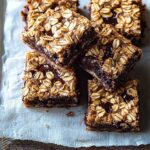
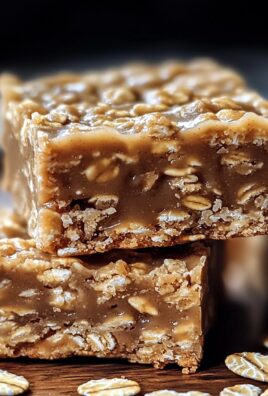
Chocolate Oatmeal Bars: Prepare to be amazed! Imagine sinking your teeth into a chewy, fudgy, and utterly irresistible treat that’s secretly packed with wholesome goodness. These aren’t your grandma’s dry, crumbly oatmeal cookies; these are decadent bars that satisfy your sweet tooth while providing a boost of energy. I’m so excited to share this recipe with you!
Oatmeal bars, in general, have a humble history, often associated with resourceful home cooks looking for ways to use simple, readily available ingredients. But the addition of chocolate elevates them to a whole new level of indulgence. Think of it as a modern twist on a classic comfort food, bridging the gap between healthy and heavenly.
What makes these Chocolate Oatmeal Bars so incredibly popular? It’s the perfect combination of textures and flavors. The hearty chewiness of the oats complements the rich, melt-in-your-mouth chocolate. They’re also incredibly convenient easy to make, portable, and perfect for a quick breakfast, afternoon snack, or even a guilt-free dessert. Plus, who can resist the allure of chocolate? Get ready to experience a delightful treat that will become a new family favorite!
Ingredients:
- 1 cup (2 sticks) unsalted butter, softened
- 1 cup granulated sugar
- 1 cup packed brown sugar
- 2 large eggs
- 1 teaspoon vanilla extract
- 1 1/2 cups all-purpose flour
- 1 teaspoon baking soda
- 1 teaspoon ground cinnamon
- 1/2 teaspoon salt
- 3 cups rolled oats (not instant)
- 1 cup semi-sweet chocolate chips
- 1/2 cup chopped walnuts or pecans (optional)
Preparing the Dough:
- Cream the Butter and Sugars: In a large bowl, or the bowl of your stand mixer, cream together the softened butter, granulated sugar, and brown sugar until light and fluffy. This usually takes about 3-5 minutes. Make sure to scrape down the sides of the bowl occasionally to ensure everything is evenly mixed. The mixture should be pale and airy.
- Incorporate the Eggs and Vanilla: Beat in the eggs one at a time, mixing well after each addition. Then, stir in the vanilla extract. The mixture might look slightly curdled at this point, but don’t worry, it will come together when you add the dry ingredients.
- Combine Dry Ingredients: In a separate medium bowl, whisk together the flour, baking soda, cinnamon, and salt. Whisking ensures that the baking soda and cinnamon are evenly distributed throughout the flour, which is crucial for proper leavening and flavor.
- Gradually Add Dry Ingredients to Wet Ingredients: Gradually add the dry ingredients to the wet ingredients, mixing on low speed until just combined. Be careful not to overmix, as this can result in tough bars. Overmixing develops the gluten in the flour, which can make the bars dense and chewy instead of soft and tender.
- Fold in Oats, Chocolate Chips, and Nuts: Gently fold in the rolled oats, chocolate chips, and chopped nuts (if using). Make sure everything is evenly distributed throughout the dough. Again, be careful not to overmix.
Baking the Bars:
- Prepare the Baking Pan: Preheat your oven to 350°F (175°C). Grease and flour a 9×13 inch baking pan. Alternatively, you can line the pan with parchment paper, leaving an overhang on the sides for easy removal. This is my preferred method, as it makes it super easy to lift the bars out of the pan after they’ve cooled.
- Press Dough into Pan: Press the dough evenly into the prepared baking pan. You can use your fingers or the back of a spoon to spread the dough. Make sure the dough is evenly distributed so the bars bake uniformly.
- Bake: Bake for 25-30 minutes, or until the edges are golden brown and a toothpick inserted into the center comes out with moist crumbs attached. The baking time may vary depending on your oven, so keep a close eye on the bars.
- Cool Completely: Let the bars cool completely in the pan before cutting into squares. This is important because the bars will continue to set as they cool. If you try to cut them while they’re still warm, they’ll be crumbly and difficult to handle.
Tips and Variations:
- Use High-Quality Chocolate: The quality of the chocolate chips will affect the overall flavor of the bars. I recommend using a good-quality semi-sweet chocolate for the best results. You can also use dark chocolate or milk chocolate, depending on your preference.
- Add Different Nuts: Feel free to experiment with different types of nuts. Walnuts and pecans are classic choices, but you can also use almonds, hazelnuts, or macadamia nuts.
- Substitute Dried Fruit: For a chewy twist, add dried cranberries, raisins, or chopped dates to the dough.
- Spice it Up: Add a pinch of nutmeg or ginger to the dough for a warmer, spicier flavor.
- Make it Gluten-Free: Substitute the all-purpose flour with a gluten-free all-purpose flour blend. Make sure the blend contains xanthan gum for binding.
- Add a Frosting: For an extra decadent treat, frost the cooled bars with chocolate frosting or cream cheese frosting.
- Storage: Store the cooled bars in an airtight container at room temperature for up to 3 days, or in the refrigerator for up to a week. You can also freeze the bars for up to 2 months.
Detailed Baking Explanation:
Let’s delve a little deeper into the baking process to ensure perfect chocolate oatmeal bars every time. The key to these bars is achieving the right balance of chewiness and tenderness. This comes down to a few critical factors:
Butter Temperature:
The butter needs to be properly softened, but not melted. If the butter is too cold, it won’t cream properly with the sugars, resulting in dense bars. If the butter is melted, the bars will be greasy and flat. The ideal consistency is when the butter is soft enough to easily press with your finger, but still holds its shape.
Sugar Ratio:
The combination of granulated sugar and brown sugar is essential for the texture and flavor of these bars. Granulated sugar provides sweetness and crispness, while brown sugar adds moisture and chewiness. The molasses in brown sugar also contributes to a richer, more complex flavor.
Mixing Technique:
As mentioned earlier, it’s crucial not to overmix the dough. Overmixing develops the gluten in the flour, which can make the bars tough. Mix the dry ingredients into the wet ingredients until just combined. A few streaks of flour are okay. The oats will absorb the remaining moisture during baking.
Oven Temperature and Baking Time:
Make sure your oven is properly preheated to 350°F (175°C). An accurate oven temperature is crucial for even baking. If your oven runs hot or cold, adjust the temperature accordingly. The baking time will vary depending on your oven and the thickness of the dough. Start checking the bars after 25 minutes. They’re done when the edges are golden brown and a toothpick inserted into the center comes out with moist crumbs attached. Avoid overbaking, as this will make the bars dry and crumbly.
Cooling Process:
Resist the urge to cut into the bars while they’re still warm. Let them cool completely in the pan before cutting. This allows the bars to set properly and prevents them from crumbling. If you’re using parchment paper, you can lift the bars out of the pan and place them on a cutting board for easier cutting.
Troubleshooting:
- Bars are too dry: You may have overbaked the bars. Reduce the baking time slightly next time. Also, make sure you’re not using too much flour.
- Bars are too greasy: You may have used melted butter instead of softened butter. Make sure the butter is properly softened, but not melted.
- Bars are too tough: You may have overmixed the dough. Mix the dry ingredients into the wet ingredients until just combined.
- Bars are too crumbly: You may have cut the bars while they were still warm. Let them cool completely in the pan before cutting.
- Bars are not baking evenly: Make sure your oven is properly preheated and that the dough is evenly distributed in the pan.
Serving Suggestions:
These chocolate oatmeal bars are delicious on their own, but they’re also great with a scoop of vanilla ice cream or a dollop of whipped cream. They’re perfect for a quick snack, a lunchbox treat, or a simple dessert. Enjoy!

Conclusion:
And there you have it! These Chocolate Oatmeal Bars are truly a must-try for anyone craving a satisfying, wholesome, and utterly delicious treat. From the chewy, oaty base to the rich, decadent chocolate topping, every bite is a symphony of textures and flavors that will leave you wanting more. I know I always do! But why are these bars so special? It’s the perfect balance of healthy and indulgent. The oats provide a hearty, fiber-rich foundation, while the chocolate adds that touch of sweetness and comfort we all crave. Plus, they’re incredibly easy to make, requiring minimal effort and readily available ingredients. Forget complicated baking projects; these bars are your go-to for a quick and impressive dessert. Beyond their simplicity and deliciousness, these bars are incredibly versatile. Serve them warm with a scoop of vanilla ice cream for an extra special treat. Or, pack them in lunchboxes for a satisfying midday snack. They’re also fantastic with a cup of coffee or tea for a cozy afternoon pick-me-up. Looking for variations? The possibilities are endless! Try adding chopped nuts, like walnuts or pecans, to the oat mixture for added crunch and flavor. A sprinkle of sea salt on top of the chocolate adds a delightful salty-sweet contrast. For a festive twist, incorporate dried cranberries or cherries. If you’re feeling adventurous, swirl in some peanut butter or Nutella into the chocolate topping before it sets. You could even add a layer of caramel between the oat base and the chocolate for an extra layer of decadence. Consider using different types of chocolate dark, milk, or even white chocolate to customize the flavor to your liking. For a vegan version, simply substitute the butter with coconut oil and ensure your chocolate is dairy-free. You can also use maple syrup or agave nectar instead of honey. These Chocolate Oatmeal Bars are more than just a recipe; they’re an invitation to get creative in the kitchen and create something truly special. They’re a blank canvas for your culinary imagination! I truly believe you’ll love these bars as much as I do. They’re perfect for satisfying your sweet tooth without feeling guilty, and they’re sure to be a hit with family and friends. So, what are you waiting for? Gather your ingredients, preheat your oven, and get ready to bake up a batch of these irresistible treats. I’m so excited for you to try this recipe! Once you do, I’d absolutely love to hear about your experience. Did you make any variations? What did you think of the flavor and texture? Share your photos and stories in the comments below. Let’s create a community of Chocolate Oatmeal Bar enthusiasts! Happy baking! I can’t wait to see what you create! And remember, baking is all about having fun, so don’t be afraid to experiment and make this recipe your own. Enjoy! Print
Chocolate Oatmeal Bars: The Ultimate Guide & Recipe
- Total Time: 45 minutes
- Yield: 24 bars 1x
Description
Chewy, delicious chocolate oatmeal bars packed with oats, chocolate chips, and optional nuts. A perfect treat!
Ingredients
- 1 cup (2 sticks) unsalted butter, softened
- 1 cup granulated sugar
- 1 cup packed brown sugar
- 2 large eggs
- 1 teaspoon vanilla extract
- 1 1/2 cups all-purpose flour
- 1 teaspoon baking soda
- 1 teaspoon ground cinnamon
- 1/2 teaspoon salt
- 3 cups rolled oats (not instant)
- 1 cup semi-sweet chocolate chips
- 1/2 cup chopped walnuts or pecans (optional)
Instructions
- Cream the Butter and Sugars: In a large bowl, or the bowl of your stand mixer, cream together the softened butter, granulated sugar, and brown sugar until light and fluffy (3-5 minutes). Scrape down the sides of the bowl occasionally.
- Incorporate the Eggs and Vanilla: Beat in the eggs one at a time, mixing well after each addition. Then, stir in the vanilla extract.
- Combine Dry Ingredients: In a separate medium bowl, whisk together the flour, baking soda, cinnamon, and salt.
- Gradually Add Dry Ingredients to Wet Ingredients: Gradually add the dry ingredients to the wet ingredients, mixing on low speed until just combined. Be careful not to overmix.
- Fold in Oats, Chocolate Chips, and Nuts: Gently fold in the rolled oats, chocolate chips, and chopped nuts (if using). Make sure everything is evenly distributed throughout the dough. Again, be careful not to overmix.
- Prepare the Baking Pan: Preheat your oven to 350°F (175°C). Grease and flour a 9×13 inch baking pan or line with parchment paper.
- Press Dough into Pan: Press the dough evenly into the prepared baking pan.
- Bake: Bake for 25-30 minutes, or until the edges are golden brown and a toothpick inserted into the center comes out with moist crumbs attached.
- Cool Completely: Let the bars cool completely in the pan before cutting into squares.
Notes
- Use high-quality chocolate chips for the best flavor.
- Experiment with different types of nuts or dried fruit.
- Add a pinch of nutmeg or ginger for a warmer flavor.
- Substitute with gluten-free flour for a gluten-free version.
- Frost the cooled bars with chocolate or cream cheese frosting for an extra treat.
- Store in an airtight container at room temperature for up to 3 days, or in the refrigerator for up to a week. Freeze for up to 2 months.
- Butter should be softened, not melted.
- Do not overmix the dough.
- Let the bars cool completely before cutting.
- Prep Time: 15 minutes
- Cook Time: 25-30 minutes


Leave a Comment