

Triple-layer chocolate mint squares are the ultimate indulgence for any chocolate lover, and if you’re anything like me, the mere mention of that decadent combination sends shivers of delight down your spine. These aren’t just any dessert; they’re a meticulously crafted masterpiece of texture and flavor that promises to elevate any occasion, from a casual get-together to a special celebration. What makes them so universally beloved? It’s the harmonious dance between rich, dark chocolate, a refreshing burst of cool mint, and a delightful textural contrast that keeps you coming back for just one more bite. This triple-layer chocolate mint squares recipe is what dreams are made of, offering a symphony of sweet and minty notes with every single forkful. Prepare to be amazed at how simple it is to create this show-stopping treat right in your own kitchen.

Triple-Layer Chocolate Mint Squares
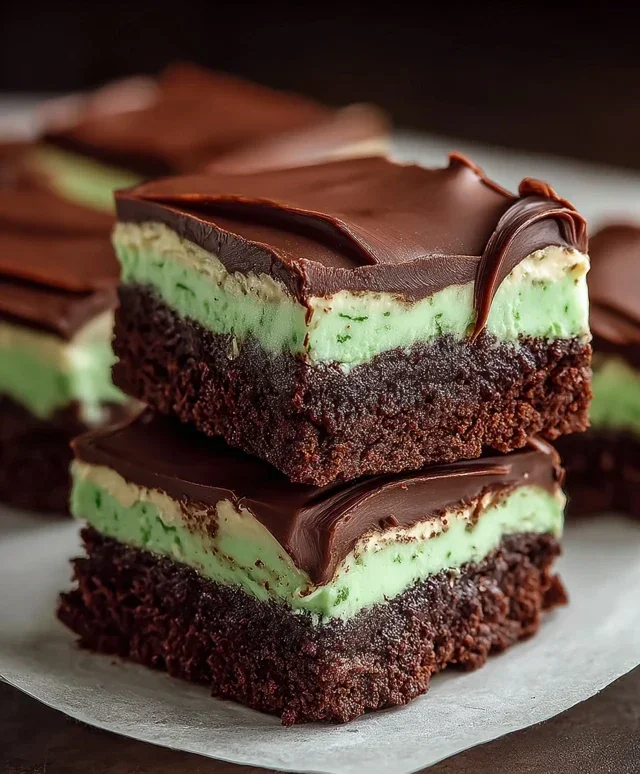
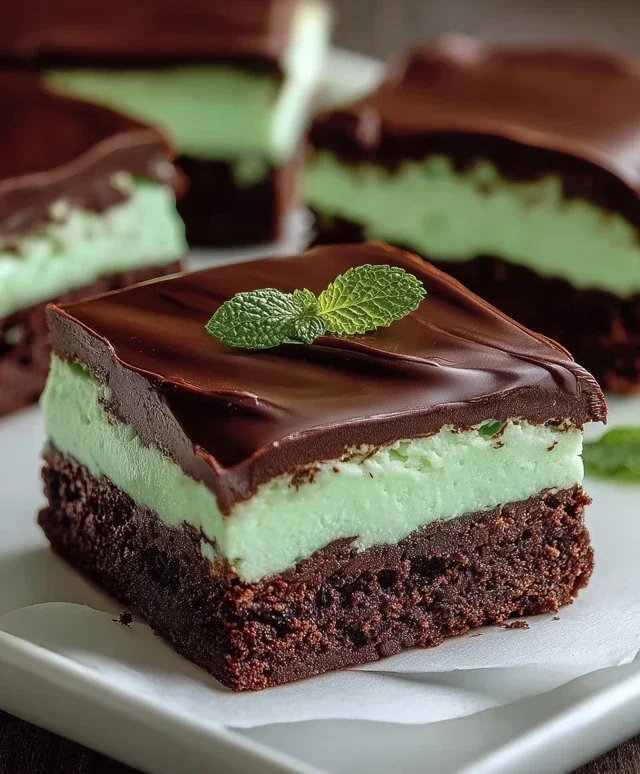
Get ready to indulge your senses with these decadent Triple-Layer Chocolate Mint Squares. This recipe delivers a symphony of textures and flavors, starting with a rich, fudgy chocolate base, followed by a creamy, mint-infused middle layer, all topped off with a smooth, luscious chocolate ganache. These squares are perfect for special occasions, holidays, or simply when you need a serious chocolate and mint fix. Trust me, once you try these, they’ll become a go-to treat.
Ingredients:
Cooking Instructions:
Layer 1: The Chocolate Base
The foundation of our delicious squares begin extracts with this rich, brownie-like base. We’ll melt the butter and semi-sweet chocolate chips together to create a smooth, glossy mixture. This is the secret to that intense chocolate flavor. In a medium saucepan over low heat, combine 1 cup of salted butter and 4 oz. of semi-sweet chocolate chips. Stir constantly until both are completely melted and smooth. Be patient here; you don’t want to scorch the chocolate. Once melted, remove from heat and let it cool slightly for about 5 minutes. While that’s cooling, in a large bowl, whisk together 2 cups of granulated sugar and 2 teaspoons of vanilla extract. Pour the slightly cooled chocolate mixture into the sugar and vanilla mixture and stir until well combined. It might look a little separated at first, but keep stirring and it will come together beautifully. Next, we’ll incorporate the dry ingredients. In a separate bowl, whisk together 1 ½ cups of all-purpose flour. Gradually add the flour to the wet ingredients, mixing until just combined. Don’t overmix; overmixing can lead to a tougher base. Finally, crack in your 4 large eggs, one at a time, mixing well after each addition. The batter will be thick and glossy. Pour this batter into a greased and floured 9×13 inch baking pan. Spread it evenly. Bake in a preheated oven at 350°F (175°C) for about 20-25 minutes, or until a toothpick inserted into the center comes out with moist crum extractbs attached. You don’t want it completely dry, as it will continue to bake slightly as it cools. Let this layer cool completely in the pan on a wire rack. This cooling step is crucial; trying to add the next layer while it’s warm will likely result in a messy situation.
Layer 2: The Minty Cream Cheese Frosting
This layer is what brings the “mint” to our chocolate mint squares and adds a delightful creamy contrast to the fudgy base. In a large bowl, using an electric mixer, beat ¾ cup of softened salted butter until light and fluffy. This is where the softened butter really comes into play, ensuring a smooth and lump-free frosting. Gradually add 3 cups of powdered sugar, about a cup at a time, mixing on low speed until it’s incorporated. Scrape down the sides of the bowl as needed to make sure everything is getting mixed in. Once the powdered sugar is incorporated, add 1 tablespoon of heavy whipping cream and 1 teaspoon of peppermint extract. Beat again until the frosting is smooth and creamy. Now for the fun part: the color! Add 10 drops of green food coloring. Start with 10 drops and add more if you desire a deeper green hue. Beat until the color is evenly distributed. The color not only makes these squares visually appealing but also signals the refreshing mint flavor within. Once your chocolate base has completely cooled, spread this minty frosting evenly over the top. Use an offset spatula for a nice, smooth finish.
Layer 3: The Rich Chocolate Ganache Topping
No chocolate treat is complete without a luxurious chocolate topping, and this ganache is pure heaven. It’s surprisingly simple to make and elevates these squares to a whole new level. In a heatproof bowl, place 3 cups of semi-sweet chocolate chips. In a small saucepan, heat ½ cup of heavy whipping cream and 2 tablespoons of butter over medium heat until the butter is melted and the cream is just begin extractning to simmer around the edges. Do not boil. Pour the hot cream mixture over the chocolate chips in the bowl. Let it sit undisturbed for about 5 minutes. This allows the heat from the cream to gently melt the chocolate. After 5 minutes, whisk the mixture gently, starting from the center and working your way outwards, until it is completely smooth and glossy. You should have a beautiful, rich ganache. Pour this ganache over the minty frosting layer and spread it evenly to cover the entire surface. Use an offset spatula or the back of a spoon to achieve a smooth, even finish.
Chilling and Cutting
Now comes the hardest part: waiting! Place the pan in the refrigerator for at least 2-3 hours, or until the ganache is set. This chilling time is essential for the layers to firm up properly, making it much easier to cut clean squares. Once the squares are chilled and set, remove the pan from the refrigerator. For the cleanest cuts, you can warm a sharp knife by running it under hot water and drying it thoroughly. Cut the slab into desired square portions. Wipe the knife clean between cuts if necessary. These squares are best served chilled, so keep them refrigerated until ready to serve. Enjoy every decadent bite of these Triple-Layer Chocolate Mint Squares!
Conclusion:
There you have it – the ultimate guide to creating these spectacular triple-layer chocolate mint squares! I’m so excited for you to try this recipe because it truly is a showstopper. The perfect harmony of rich chocolate, refreshing mint, and a satisfyingly chewy base makes these squares an absolute delight for any occasion. Whether you’re a seasoned baker or just starting out, the distinct layers offer a rewarding baking experience, culminating in a dessert that’s both visually stunning and incredibly delicious. I guarantee they’ll be a hit with friends and family!
These triple-layer chocolate mint squares are incredibly versatile. They’re fantastic on their own, but I also love serving them with a scoop of vanilla bean ice cream for an extra touch of indulgence. For a more refined dessert, a dusting of powdered sugar or a drizzle of extra chocolate ganache elevates them to a gourmet level. Don’t be afraid to get creative with variations! You could swap out the mint extract for peppermint for a stronger flavor, or even add some chopped dark chocolate chips into the brownie layer for an even more intense chocolate experience.
So please, dive into your kitchen and whip up a batch of these amazing triple-layer chocolate mint squares. I can’t wait to hear how yours turn out!
Frequently Asked Questions:
Can I make these vegan?
Yes, you absolutely can! For a vegan version, you’ll want to substitute the butter with vegan butter or coconut oil, use a flax egg or commercial egg replacer in the brownie layer, and ensure your chocolate chips are dairy-free. The creamy mint layer can be made using full-fat coconut milk or a dairy-free cream alternative.
How should I store these squares?
These triple-layer chocolate mint squares are best stored in an airtight container at room temperature for up to 3 days. If you need to store them for longer, they can be refrigerated for up to a week, though they might firm up slightly. Let them come to room temperature before serving for the best texture.
What’s the best way to cut clean squares?
For the cleanest cuts, it’s best to chill the entire pan of squares for at least 30 minutes before slicing. Use a long, sharp knife that has been dipped in hot water and wiped dry between each cut. This will help prevent the layers from sticking and tearing.
Triple-Layer Chocolate Mint Squares
Decadent triple-layer chocolate mint squares featuring a chocolate crust, a creamy mint filling, and a rich chocolate ganache topping. Perfect for special occasions or a sweet treat.
Ingredients
-
1 cup salted butter
-
4 oz. semi-sweet chocolate chips
-
2 cups granulated sugar
-
2 teaspoons vanilla extract
-
1 ½ cups all-purpose flour
-
4 large eggs
-
¾ cup salted butter, softened
-
3 cups powdered sugar
-
1 tablespoon heavy whipping cream
-
1 teaspoon peppermint extract
-
10 drops green food coloring
-
3 cups semi-sweet chocolate chips
-
2 tablespoons butter
-
½ cup heavy whipping cream
Instructions
-
Step 1
Preheat oven to 350°F (175°C). Grease and flour a 9×13 inch baking pan. -
Step 2
For the crust: Melt 1 cup salted butter and 4 oz. semi-sweet chocolate chips in a double boiler or microwave. Stir until smooth. In a large bowl, combine the melted chocolate mixture with 2 cups granulated sugar, 2 teaspoons vanilla extract, 1 ½ cups all-purpose flour, and 4 large eggs. Mix until just combined. -
Step 3
Spread the crust mixture evenly into the prepared baking pan. Bake for 15-20 minutes, or until a toothpick inserted into the center comes out clean. -
Step 4
For the mint filling: In a medium bowl, beat ¾ cup softened salted butter until creamy. Gradually add 3 cups powdered sugar, 1 tablespoon heavy whipping cream, 1 teaspoon peppermint extract, and 10 drops green food coloring. Beat until smooth and well combined. -
Step 5
Once the crust has cooled slightly, spread the mint filling evenly over the top. -
Step 6
For the ganache topping: Melt 3 cups semi-sweet chocolate chips and 2 tablespoons butter with ½ cup heavy whipping cream in a double boiler or microwave until smooth. Stir until fully combined. -
Step 7
Pour the chocolate ganache over the mint filling, spreading evenly to cover. Allow the squares to set completely in the refrigerator for at least 2 hours before cutting.
Important Information
Nutrition Facts (Per Serving)
It is important to consider this information as approximate and not to use it as definitive health advice.
Allergy Information
Please check ingredients for potential allergens and consult a health professional if in doubt.


Leave a Comment