

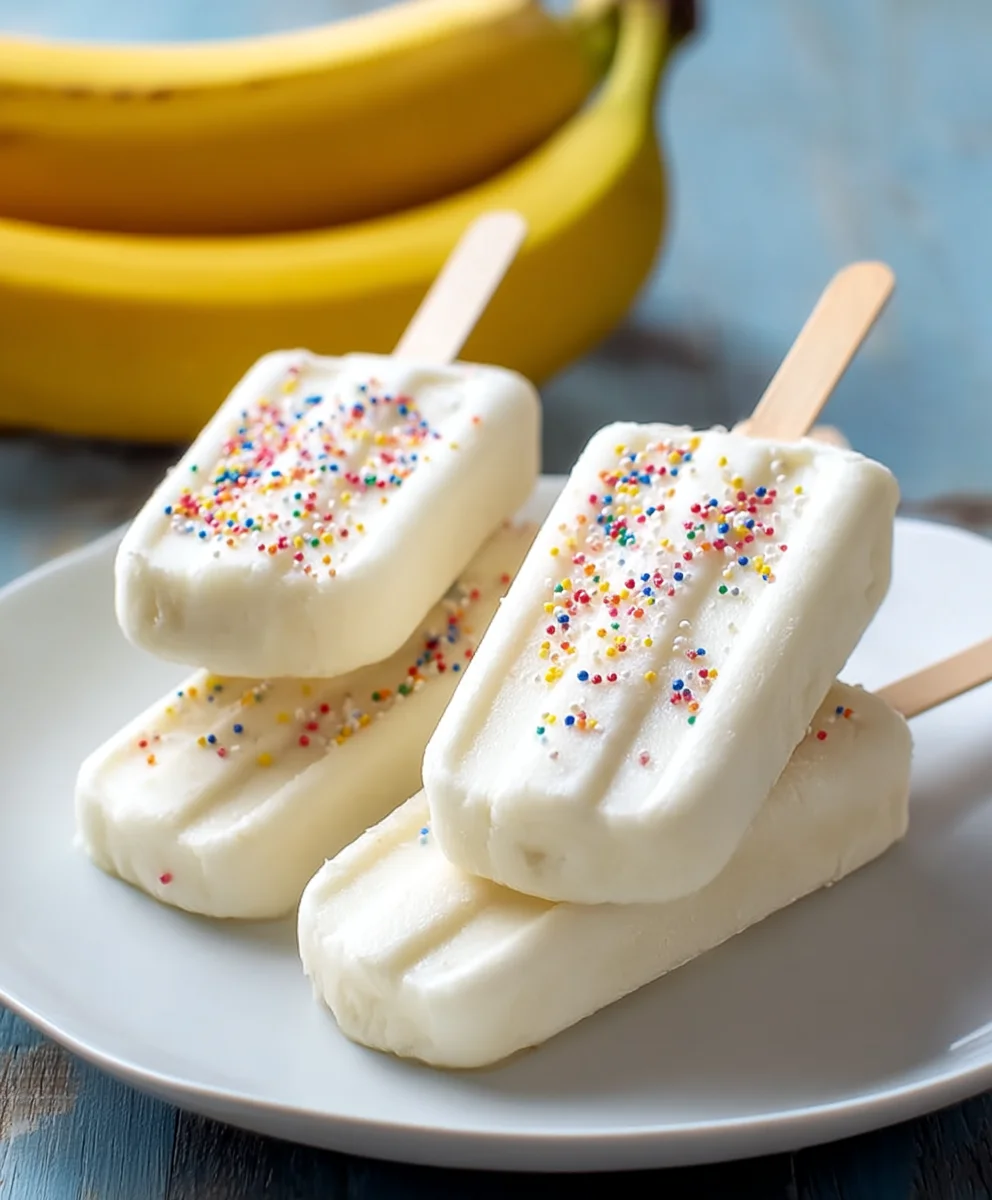
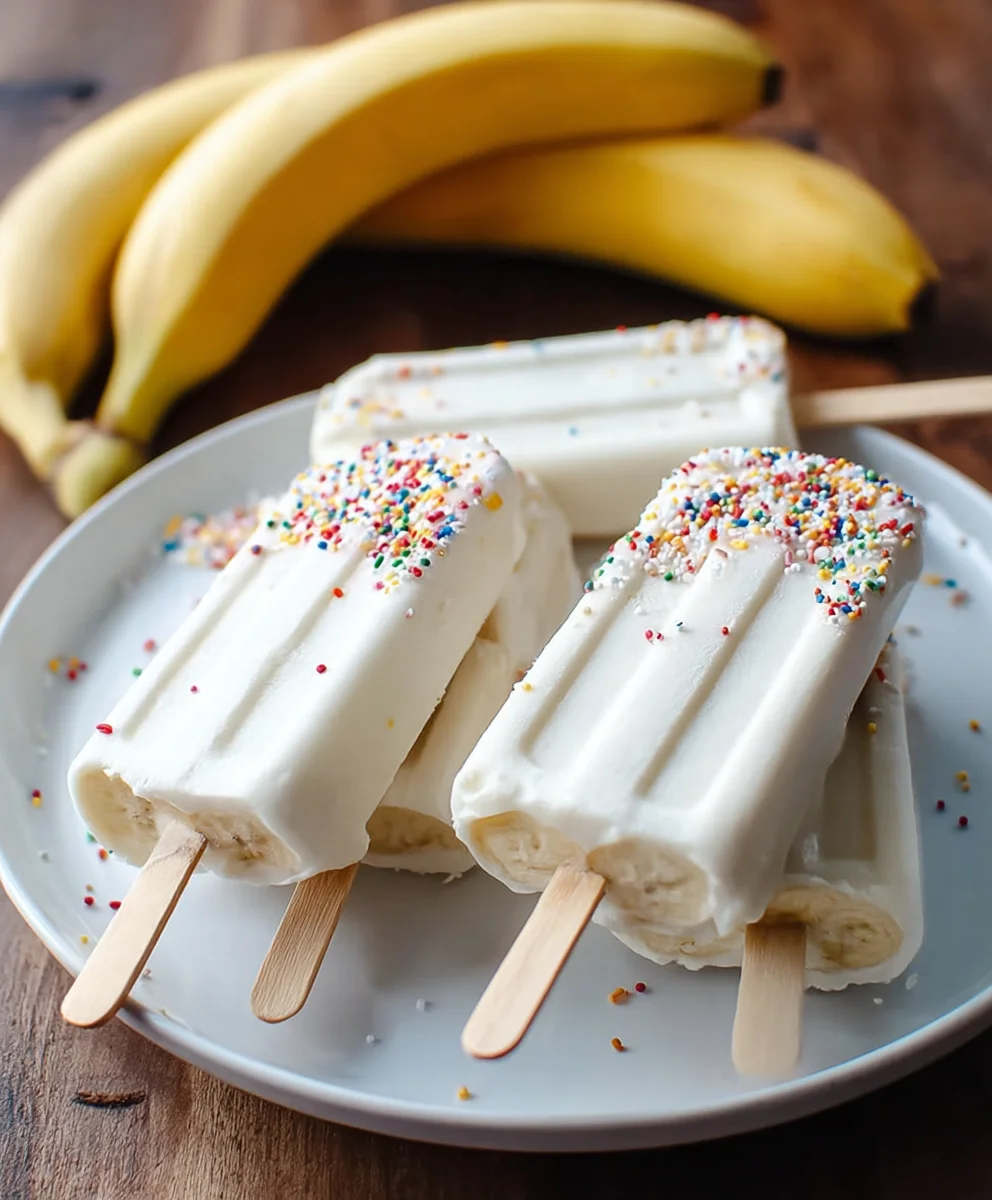
Frozen Banana Yogurt Pops are the ultimate summer treat, offering a delightful blend of creamy sweetness and refreshing chill that’s almost too good to be true. Imagin extracte biting into a perfectly frozen pop, where the natural caramel notes of ripe bananas meld seamlessly with the tangy, cool embrace of yogurt. It’s no wonder these simple yet sensational treats have captured the hearts (and taste buds) of so many. They’re incredibly easy to whip up, making them a go-to for busy parents, health-conscious snackers, or anyone craving a guilt-free indulgence. What truly sets our Frozen Banana Yogurt Pops apart is their incredible versatility. You can customize them with your favorite fruits, a sprinkle of granola, or a drizzle of honey for an extra layer of deliciousness. Forget those store-bought frozen novelties packed with artificial ingredients; these homemade Frozen Banana Yogurt Pops are pure, wholesome goodness, bursting with flavor and designed to bring a smile to your face with every lick.

Ingredients:
- 3 ripe bananas, peeled and cut in half crosswise
- 3/4 cup vanilla yogurt (you can absolutely swap this for a fruit-flavored yogurt like strawberry or blueberry for an extra burst of flavor, or even use plain Greek yogurt for a tangier profile)
- Colorful sprinkles or toppings of your choice (this is where the fun really begin extracts! Think rainbow sprinkles, mini chocolate chips, chopped nuts, shredded coconut, or even a drizzle of melted chocolate after they’re set)
- 6 popsicle sticks (standard wooden ones work perfectly, or you can opt for reusable plastic ones)
Preparing the Banana Bases
Step 1: Readying the Banana Halves
The first step in creating our delightful Frozen Banana Yogurt Pops is to prepare the banana bases. Take your three ripe bananas, which should be nicely spotted for optimal sweetness and creaminess, and peel them carefully. Once peeled, cut each banana in half crosswise. This will give you six uniform pieces, perfect for holding their yogurt coating and fitting snugly onto your popsicle sticks. Ensure the cuts are relatively straight to make the coating process easier and more even. The ripeness of the bananas is key here; overly green bananas will be hard and less sweet, while mushy bananas might be too difficult to handle. Aim for that perfect yellow with a few brown spots.
Step 2: Inserting the Popsicle Sticks
Now it’s time to give our banana halves something to hold onto. Take a popsicle stick and firmly insert it into the cut end of each banana half. Push it in about halfway, ensuring it’s stable enough to support the banana and its subsequent coating. You don’t want the stick to go all the way through, as this could make the pop unstable. The goal is to have a good portion of the stgin extract emerging from the banana, providing a comfortable handle once frozen. If your banana halves are particularly thick, you might need to wiggle the stick slightly to get it to penetrate properly.
Coating and Decorating
Step 3: Generously Coating with Yogurt
This is where our Frozen Banana Yogurt Pops start to look like their namenon-alcoholic sake! Take your vanilla yogurt (or your chosen flavor) and place it in a small bowl or a shallow dish. Dip each prepared banana half, stick-side up, into the yogurt, ensuring that the cut surfaces are completely submerged. Use a spoon to help spread the yogurt evenly over the entire banana surface if needed. You want a nice, thick coating that will freeze well. Don’t be afraid to be generous; this yogurt layer will become a creamy, delicious shell. If the yogurt is too thick to coat easily, you can whisk it lightly to loosen it up a bit. Conversely, if it’s too thin, you might want to chill it for a few minutes before starting.
Step 4: Adding the Fun Toppings
Now for the best part – decorating! While the yogurt coating is still wet, immediately roll each yogurt-covered banana half in your chosen colorful sprinkles or toppings. You can press the toppings gently into the yogurt to help them adhere. Get creative here! You can dip one half in sprinkles and the other in mini chocolate chips, or create a mosaic of different textures and colors. This step is incredibly kid-friendly and offers a fantastic opportunity for little ones to express their culinary creativity. Ensure you have your toppings ready and accessible before you start coating the bananas, as the yogurt can start to set quickly.
Freezing and Enjoying
Step 5: Freezing to Perfection
Once your banana pops are beautifully coated and adorned with sprinkles, it’s time to freeze them. Line a baking sheet or a plate with parchment paper or wax paper. This is crucial to prevent the pops from sticking to the surface as they freeze. Carefully place each decorated banana pop onto the prepared sheet, making sure they aren’t touching each other. This will allow them to freeze individually and maintain their shape. Place the baking sheet in the freezer and let the pops freeze for at least 2-3 hours, or until they are completely firm and solid. For best results, allow them to freeze for at least 4 hours. Once fully frozen, you can transfer them to a freezer-safe bag or container for longer storage, though they are best enjoyed within a few days for optimal texture.
Conclusion:
You’ve now got everything you need to create delightful Frozen Banana Yogurt Pops! This recipe is incredibly straightforward, making it a perfect activity for both seasoned bakers and kitchen newcomers alike. The beauty of these pops lies in their simplicity and their refreshing nature, offering a healthier alternative to traditional frozen treats. They are wonderfully versatile, and the base recipe provides a fantastic canvas for your culinary creativity. So go ahead, whip up a batch and enjoy a burst of flavor with every lick!
For serving suggestions, these Frozen Banana Yogurt Pops are best enjoyed straight from the freezer on a warm day. They make a fantastic after-school snack for kids or a light dessert after a meal. Consider arrangin extractg them on a platter for a colorful and inviting presentation at parties or picnics.
The real magic of Frozen Banana Yogurt Pops lies in their adaptability. Feel free to experiment with different yogurt flavors – Greek yogurt for extra creaminess, or dairy-free options for a vegan twist. You can also add a drizzle of honey or maple syrup for added sweetness, or swirl in some fruit puree like strawberry or mango for a vibrant pop of color and flavor. Chopped nuts or shredded coconut sprinkled on top before freezing can add a delightful crunch.
Don’t be afraid to get creative and make these your own! We encourage you to have fun in the kitchen and savor the delicious results of your efforts.
Frequently Asked Questions:
How long do Frozen Banana Yogurt Pops need to freeze?
For best results, your Frozen Banana Yogurt Pops should freeze for at least 4-6 hours, or until completely solid. Overnight freezing is also perfectly acceptable and ensures they are firm enough to enjoy.
Can I add other fruits to the Frozen Banana Yogurt Pops?
Absolutely! While bananas are the star, you can certainly add other fruits. Pureed berries, peaches, or mango can be blended with the yogurt and banana before freezing. Just ensure the fruit is well-mashed or pureed for a smooth texture in your pops.
How do I prevent the pops from sticking to the mold?
Lightly greasing your popsicle molds with a neutral oil before pouring the mixture can help prevent sticking. Alternatively, if you’re having trouble removing them, briefly run the outside of the mold under warm water for a few seconds, and they should slide out easily.
Easy Frozen Banana Yogurt Pops – Healthy Treat
A simple and healthy frozen treat made with ripe bananas, creamy yogurt, and fun toppings.
Ingredients
-
3 ripe bananas, peeled and cut in half crosswise
-
3/4 cup vanilla yogurt (or fruit-flavored yogurt, or plain Greek yogurt)
-
Colorful sprinkles or toppings of your choice (e.g., rainbow sprinkles, mini chocolate chips, chopped nuts, shredded coconut, melted chocolate)
-
6 popsicle sticks
-
Parchment paper or wax paper
Instructions
-
Step 1
Peel three ripe bananas and cut each one in half crosswise to create six uniform pieces. -
Step 2
Insert a popsicle stick firmly into the cut end of each banana half, pushing it in about halfway. -
Step 3
Place the vanilla yogurt (or your chosen flavor) in a small bowl. Dip each prepared banana half, stick-side up, into the yogurt, ensuring complete coverage. Use a spoon to spread evenly if needed. -
Step 4
While the yogurt is still wet, immediately roll each yogurt-covered banana half in your chosen colorful sprinkles or toppings. Press gently to help them adhere. -
Step 5
Line a baking sheet or plate with parchment paper or wax paper. Carefully place each decorated banana pop onto the prepared sheet, ensuring they are not touching. -
Step 6
Freeze the banana pops for at least 2-3 hours, or until completely firm and solid. For best results, freeze for at least 4 hours. Once frozen, they can be transferred to a freezer-safe container for storage.
Important Information
Nutrition Facts (Per Serving)
It is important to consider this information as approximate and not to use it as definitive health advice.
Allergy Information
Please check ingredients for potential allergens and consult a health professional if in doubt.

Leave a Comment