

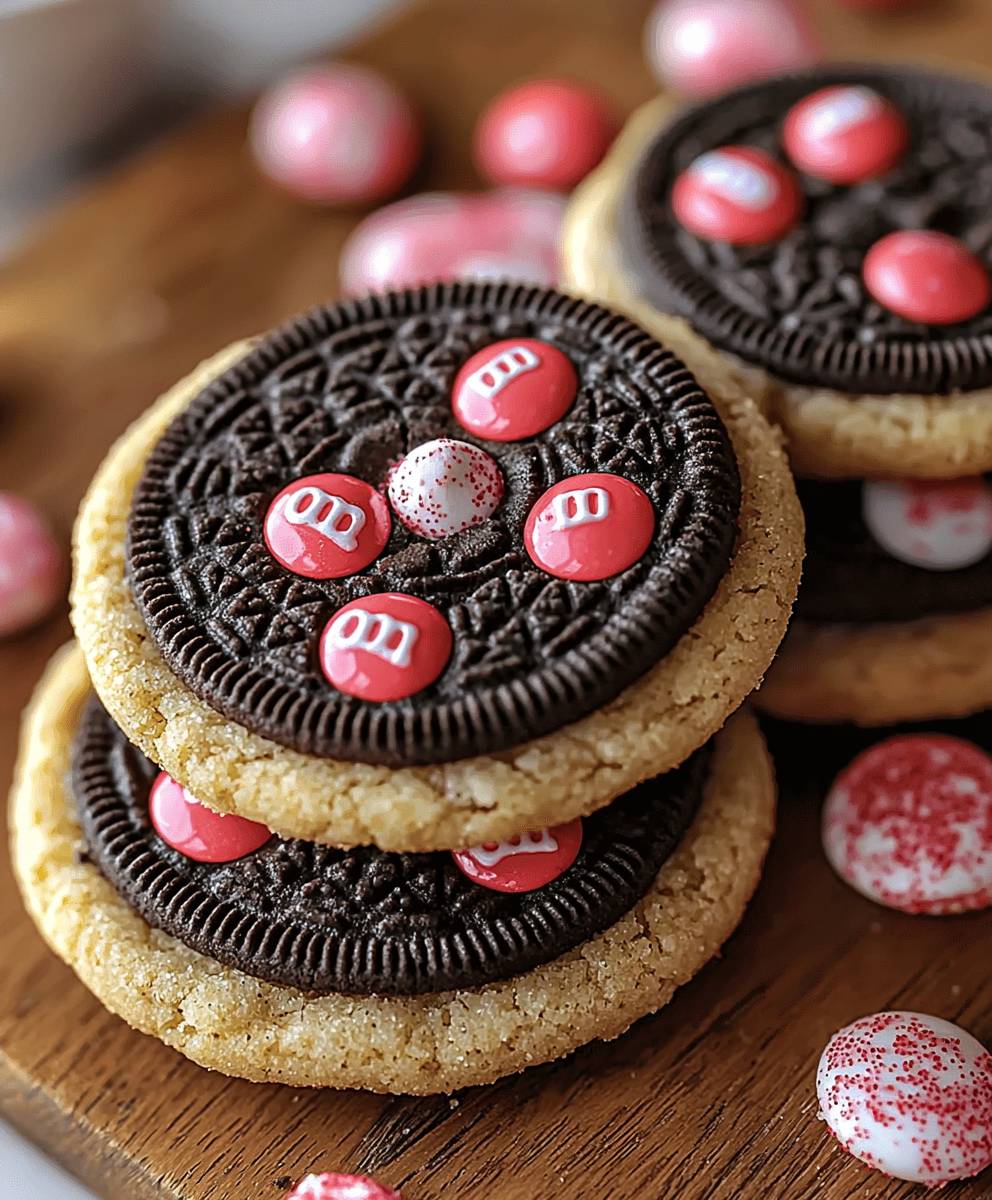
Valentines Day Oreo Cookies: Prepare to fall head-over-heels for the cutest, most delicious, and easiest Valentine’s Day treat you’ll make this year! Forget the fancy chocolates and complicated desserts; these adorable cookies are guaranteed to win hearts (and taste buds) with minimal effort. Imagine biting into a classic Oreo, now dipped in luscious, vibrant pink chocolate and adorned with sprinkles that scream “love.” It’s a simple pleasure elevated to a romantic gesture, perfect for sharing with your sweetheart, friends, family, or even just treating yourself!
While the Oreo itself is a relatively modern invention, dating back to the early 20th century, the act of giving sweet treats as a token of affection on Valentine’s Day has a much longer history. From handwritten notes accompanied by homemade candies to elaborate chocolate boxes, the tradition of expressing love through food is deeply ingrained in our culture. These Valentines Day Oreo Cookies are a playful and contemporary take on this timeless tradition.
So, why are these cookies so irresistible? Beyond their undeniable charm, they offer a delightful combination of textures and flavors. The crisp snap of the Oreo contrasts beautifully with the smooth, melting chocolate, while the sprinkles add a touch of whimsy and a satisfying crunch. Plus, let’s be honest, who can resist an Oreo? They’re nostalgic, comforting, and universally loved. And the best part? They’re incredibly easy to make, requiring only a few simple ingredients and minimal baking skills. Get ready to spread the love, one chocolate-covered Oreo at a time!

Ingredients:
- 1 package (about 14.3 ounces) chocolate sandwich cookies (like Oreos)
- 16 ounces white chocolate, finely chopped
- 4 ounces semi-sweet chocolate, finely chopped
- Red food coloring gel
- Pink food coloring gel
- Valentine’s Day sprinkles (hearts, nonpareils, etc.)
- Vegetable shortening (optional, for thinning chocolate)
- Parchment paper or silicone baking mats
Preparing the Chocolate:
- Melt the White Chocolate: Place the finely chopped white chocolate in a heat-safe bowl. I like to use a glass bowl. You can melt it in the microwave in 30-second intervals, stirring well after each interval, until completely smooth. Be careful not to overheat the chocolate, as it can seize up. Alternatively, you can melt it over a double boiler. Fill a saucepan with about an inch of water and bring it to a simmer. Place the bowl of chocolate over the simmering water, making sure the bottom of the bowl doesn’t touch the water. Stir constantly until the chocolate is melted and smooth. If the chocolate is too thick, you can add a teaspoon of vegetable shortening at a time until it reaches your desired consistency.
- Divide and Color the White Chocolate: Once the white chocolate is melted and smooth, divide it into three separate bowls. In the first bowl, add a few drops of red food coloring gel and stir until you achieve your desired shade of red. Remember, a little goes a long way! In the second bowl, add a few drops of pink food coloring gel and stir until you achieve your desired shade of pink. Leave the third bowl of white chocolate plain. If any of the chocolates start to thicken while you’re working, you can gently reheat them in the microwave for a few seconds or over the double boiler.
- Melt the Semi-Sweet Chocolate: Place the finely chopped semi-sweet chocolate in a separate heat-safe bowl. Melt it using the same method as the white chocolate, either in the microwave or over a double boiler. Stir until smooth. If needed, add a teaspoon of vegetable shortening at a time to thin it out.
Dipping the Oreos:
- Prepare Your Work Station: Line a baking sheet with parchment paper or a silicone baking mat. This will prevent the dipped Oreos from sticking. Have your melted chocolates and sprinkles ready to go.
- Dipping in White Chocolate: Take one Oreo at a time and carefully dip it into one of the bowls of melted white chocolate (red, pink, or plain). Use a fork or dipping tools to fully coat the Oreo. Gently tap the fork against the side of the bowl to remove any excess chocolate.
- Adding Sprinkles (White Chocolate): Immediately after dipping the Oreo in white chocolate, place it on the prepared baking sheet and sprinkle it with your desired Valentine’s Day sprinkles. The sprinkles need to be added while the chocolate is still wet so they will adhere properly.
- Dipping in Semi-Sweet Chocolate: Repeat the dipping process with the melted semi-sweet chocolate. Dip each Oreo, tap off the excess, and place it on the prepared baking sheet.
- Adding Sprinkles (Semi-Sweet Chocolate): Immediately after dipping the Oreo in semi-sweet chocolate, place it on the prepared baking sheet and sprinkle it with your desired Valentine’s Day sprinkles.
- Creating Drizzles (Optional): For an extra touch, you can drizzle a contrasting color of chocolate over the dipped Oreos. For example, drizzle melted semi-sweet chocolate over a red or pink dipped Oreo, or drizzle melted white chocolate over a semi-sweet chocolate dipped Oreo. To do this, transfer a small amount of melted chocolate to a piping bag or a zip-top bag with a tiny corner snipped off. Gently squeeze the bag to create thin lines of chocolate over the dipped Oreos.
Decorating Techniques:
- Marbled Effect: For a marbled effect, dip an Oreo in one color of melted white chocolate. Then, while the chocolate is still wet, drizzle a different color of melted white chocolate over the top. Use a toothpick or skewer to swirl the colors together gently.
- Heart Accents: Use a small piping bag filled with melted chocolate to pipe heart shapes onto the dipped Oreos. You can use a contrasting color of chocolate for a more dramatic effect.
- Sprinkle Patterns: Get creative with your sprinkles! Create patterns like stripes, polka dots, or even spell out words using individual sprinkles.
- Chocolate Shavings: Before the chocolate sets, you can press chocolate shavings onto the dipped Oreos for a textured look.
Setting and Storing:
- Chill to Set: Once you’ve dipped and decorated all of your Oreos, place the baking sheet in the refrigerator for about 15-20 minutes, or until the chocolate is completely set. This will help the chocolate harden and prevent it from melting easily.
- Remove from Baking Sheet: Once the chocolate is set, carefully remove the dipped Oreos from the parchment paper or silicone baking mat.
- Store Properly: Store the dipped Oreos in an airtight container at room temperature or in the refrigerator. They will stay fresh for up to a week. If storing in the refrigerator, let them come to room temperature before serving for the best flavor and texture.
Tips and Tricks:
- Use High-Quality Chocolate: The quality of the chocolate will greatly affect the taste and appearance of your dipped Oreos. I recommend using good-quality chocolate that melts smoothly and has a rich flavor.
- Don’t Overheat the Chocolate: Overheating the chocolate can cause it to seize up and become grainy. Melt the chocolate slowly and stir frequently to prevent this from happening.
- Work Quickly: The chocolate will start to set quickly, so it’s important to work quickly when dipping and decorating the Oreos. Have all of your supplies ready to go before you start.
- Thin the Chocolate if Needed: If the chocolate is too thick, you can add a teaspoon of vegetable shortening at a time until it reaches your desired consistency. This will make it easier to dip the Oreos and create a smooth, even coating.
- Get Creative with Decorations: Don’t be afraid to get creative with your decorations! Use different colors of chocolate, sprinkles, and other edible decorations to create unique and festive dipped Oreos.
- Practice Makes Perfect: If you’re new to dipping Oreos, don’t be discouraged if your first few attempts aren’t perfect. With a little practice, you’ll be able to create beautiful and delicious dipped Oreos.
- Use Dipping Tools: While a fork works, consider investing in dipping tools. They make the process much easier and cleaner. You can find them at most craft stores or online.
- Consider Double Dipping: For a thicker chocolate coating, you can double dip the Oreos. After the first dip, let the chocolate set slightly before dipping them again.
- Add Extracts: For a different flavor profile, add a few drops of extract to the melted chocolate. Peppermint extract is great for a festive holiday treat, while almond extract adds a subtle nutty flavor.
- Make it a Family Activity: Dipping Oreos is a fun activity to do with kids. Let them help with the dipping and decorating, and they’ll love creating their own unique treats.
Troubleshooting:
- Chocolate is Seizing: If your chocolate seizes up, try adding a teaspoon of vegetable shortening or a tablespoon of hot water. Stir vigorously until the chocolate becomes smooth again.
- Chocolate is Too Thick: If your chocolate is too thick, add a teaspoon of vegetable shortening at a time until it reaches your desired consistency.
- Sprinkles Aren’t Sticking: Make sure you’re adding the sprinkles while the chocolate is still wet. If the chocolate has already set, the sprinkles won’t adhere properly.
- Chocolate is Melting Too Quickly: If the chocolate is melting too quickly, try working in a cooler environment or chilling the chocolate in the refrigerator for a few minutes before dipping.
Enjoy your delicious and festive Valentine’s Day Oreo cookies! They’re perfect for sharing with loved ones or enjoying as a sweet treat for yourself.
Conclusion:
This Valentine’s Day, skip the generic chocolates and dive headfirst into a batch of these irresistible Valentine’s Day Oreo Cookies! I promise, they’re not just another pretty face; the delightful crunch of the Oreo, combined with the creamy, vibrant coating and festive sprinkles, creates a symphony of textures and flavors that will have everyone swooning. Seriously, these are so much more than just dipped cookies; they’re a mini celebration in every bite.
Why are these a must-try? Well, beyond the obvious deliciousness, they’re incredibly easy and fun to make. Even if you’re not a seasoned baker, you can whip up a batch of these in no time. Plus, they’re completely customizable! Use different colored melting chocolate to match your Valentine’s Day theme, experiment with various sprinkles (hearts, stars, edible glitter the possibilities are endless!), or even add a drizzle of white chocolate for an extra touch of elegance.
But the real magic lies in the simplicity. Sometimes, the best treats are the ones that don’t require hours in the kitchen or a laundry list of ingredients. These cookies are perfect for a last-minute Valentine’s Day party, a sweet treat for your loved ones, or even just a little something to brighten your own day.
Looking for serving suggestions? These Valentine’s Day Oreo Cookies are fantastic on their own, of course. But you can also get creative! Package them in cute little cellophane bags tied with ribbon for adorable Valentine’s Day gifts. Arrange them on a dessert platter alongside other Valentine’s Day treats like chocolate-covered strawberries or mini cupcakes. Or, for a truly decadent experience, crumble them over ice cream or use them as a topping for a Valentine’s Day milkshake.
And speaking of variations, don’t be afraid to experiment! Try using different types of Oreos Golden Oreos, Mint Oreos, or even the limited-edition flavors. You could also add a touch of flavor to the melting chocolate with extracts like peppermint, almond, or vanilla. For a more sophisticated look, use dark chocolate and top with sea salt flakes. If you’re feeling adventurous, try dipping them in a combination of white and dark chocolate for a marbled effect.
The key is to have fun and let your creativity shine! These cookies are a blank canvas for your Valentine’s Day imagination.
I truly believe that these Valentine’s Day Oreo Cookies will become a new tradition in your household. They’re simple, delicious, and guaranteed to bring a smile to everyone’s face. So, what are you waiting for? Gather your ingredients, put on some festive music, and get ready to create some Valentine’s Day magic!
I’m so excited for you to try this recipe! And more importantly, I’d love to hear about your experience. Did you make any fun variations? What were your favorite sprinkles to use? Did your loved ones enjoy them? Please, share your photos and stories in the comments below! I can’t wait to see what you create. Happy Valentine’s Day, and happy baking!
Valentines Day Oreo Cookies: A Sweet Treat for Your Loved Ones
Oreo cookies dipped in colorful melted chocolate and decorated with festive sprinkles for a fun and easy Valentine's Day treat. Perfect for all ages!
Ingredients
- 1 package (about 14.3 ounces) chocolate sandwich cookies (like Oreos)
- 16 ounces white chocolate, finely chopped
- 4 ounces semi-sweet chocolate, finely chopped
- Red food coloring gel
- Pink food coloring gel
- Valentine’s Day sprinkles (hearts, nonpareils, etc.)
- Vegetable shortening (optional, for thinning chocolate)
- Parchment paper or silicone baking mats
Instructions
- Melt the White Chocolate: Place the finely chopped white chocolate in a heat-safe bowl. Melt in the microwave in 30-second intervals, stirring well after each interval, until completely smooth. Be careful not to overheat the chocolate. Alternatively, melt over a double boiler. If the chocolate is too thick, add a teaspoon of vegetable shortening at a time until it reaches your desired consistency.
- Divide and Color the White Chocolate: Once the white chocolate is melted and smooth, divide it into three separate bowls. In the first bowl, add a few drops of red food coloring gel and stir until you achieve your desired shade of red. In the second bowl, add a few drops of pink food coloring gel and stir until you achieve your desired shade of pink. Leave the third bowl of white chocolate plain. If any of the chocolates start to thicken while you’re working, you can gently reheat them in the microwave for a few seconds or over the double boiler.
- Melt the Semi-Sweet Chocolate: Place the finely chopped semi-sweet chocolate in a separate heat-safe bowl. Melt it using the same method as the white chocolate, either in the microwave or over a double boiler. Stir until smooth. If needed, add a teaspoon of vegetable shortening at a time to thin it out.
- Prepare Your Work Station: Line a baking sheet with parchment paper or a silicone baking mat. Have your melted chocolates and sprinkles ready to go.
- Dipping in White Chocolate: Take one Oreo at a time and carefully dip it into one of the bowls of melted white chocolate (red, pink, or plain). Use a fork or dipping tools to fully coat the Oreo. Gently tap the fork against the side of the bowl to remove any excess chocolate.
- Adding Sprinkles (White Chocolate): Immediately after dipping the Oreo in white chocolate, place it on the prepared baking sheet and sprinkle it with your desired Valentine’s Day sprinkles. The sprinkles need to be added while the chocolate is still wet so they will adhere properly.
- Dipping in Semi-Sweet Chocolate: Repeat the dipping process with the melted semi-sweet chocolate. Dip each Oreo, tap off the excess, and place it on the prepared baking sheet.
- Adding Sprinkles (Semi-Sweet Chocolate): Immediately after dipping the Oreo in semi-sweet chocolate, place it on the prepared baking sheet and sprinkle it with your desired Valentine’s Day sprinkles.
- Creating Drizzles (Optional): For an extra touch, you can drizzle a contrasting color of chocolate over the dipped Oreos. For example, drizzle melted semi-sweet chocolate over a red or pink dipped Oreo, or drizzle melted white chocolate over a semi-sweet chocolate dipped Oreo. To do this, transfer a small amount of melted chocolate to a piping bag or a zip-top bag with a tiny corner snipped off. Gently squeeze the bag to create thin lines of chocolate over the dipped Oreos.
- Chill to Set: Once you’ve dipped and decorated all of your Oreos, place the baking sheet in the refrigerator for about 15-20 minutes, or until the chocolate is completely set. This will help the chocolate harden and prevent it from melting easily.
- Remove from Baking Sheet: Once the chocolate is set, carefully remove the dipped Oreos from the parchment paper or silicone baking mat.
- Store Properly: Store the dipped Oreos in an airtight container at room temperature or in the refrigerator. They will stay fresh for up to a week. If storing in the refrigerator, let them come to room temperature before serving for the best flavor and texture.
Notes
- Use high-quality chocolate for the best taste and appearance.
- Don’t overheat the chocolate, as it can seize up.
- Work quickly, as the chocolate will start to set.
- Thin the chocolate with vegetable shortening if needed.
- Get creative with decorations!
- For a marbled effect, dip an Oreo in one color of melted white chocolate. Then, while the chocolate is still wet, drizzle a different color of melted white chocolate over the top. Use a toothpick or skewer to swirl the colors together gently.
- Use a small piping bag filled with melted chocolate to pipe heart shapes onto the dipped Oreos. You can use a contrasting color of chocolate for a more dramatic effect.
- Get creative with your sprinkles! Create patterns like stripes, polka dots, or even spell out words using individual sprinkles.
- Before the chocolate sets, you can press chocolate shavings onto the dipped Oreos for a textured look.
- If your chocolate seizes up, try adding a teaspoon of vegetable shortening or a tablespoon of hot water. Stir vigorously until the chocolate becomes smooth again.
- Make sure you’re adding the sprinkles while the chocolate is still wet. If the chocolate has already set, the sprinkles won’t adhere properly.


Leave a Comment