

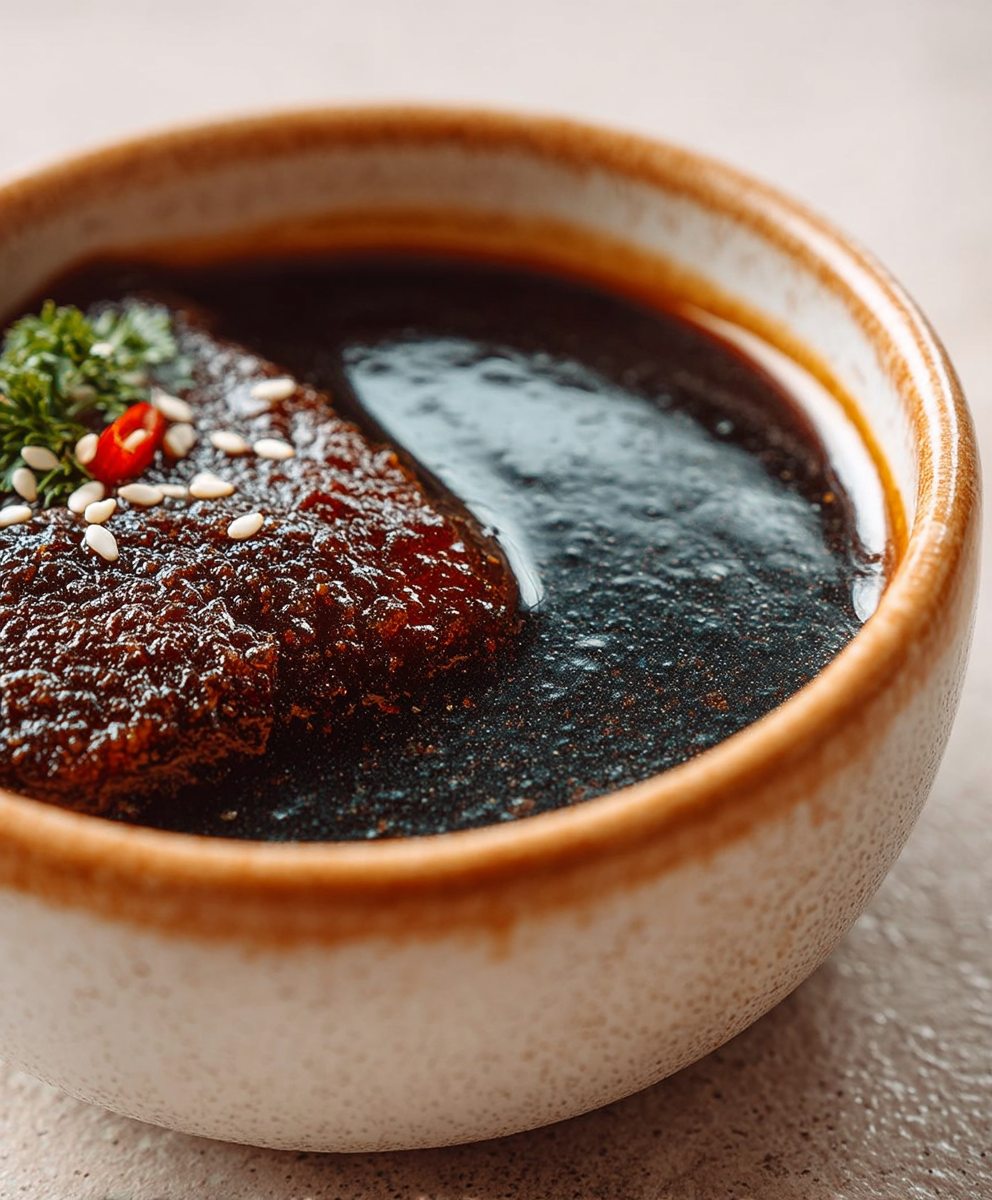
Homemade Teriyaki sauce is a culinary game-changer, transforming ordinary meals into extraordinary feasts! Forget those overly sweet, store-bought versions we’re about to embark on a journey to create a luscious, savory, and perfectly balanced teriyaki sauce right in your own kitchen.
Teriyaki, a cooking technique and sauce deeply rooted in Japanese culinary tradition, has captivated taste buds worldwide. Its origins can be traced back centuries, evolving from simple grilled meats glazed with soy sauce to the complex and nuanced flavor profiles we enjoy today. The word “teriyaki” itself is derived from “teri,” meaning luster or shine, and “yaki,” meaning to grill or broil perfectly capturing the essence of this beloved dish.
What is it about Homemade Teriyaki that makes it so irresistible? It’s the symphony of flavors the umami-rich soy sauce, the sweetness of mirin and sugar, the subtle warmth of ginger and garlic all harmonizing to create a sauce that’s both comforting and exciting. People adore teriyaki for its versatility; it’s fantastic on chicken, beef, salmon, tofu, and vegetables. Plus, making your own teriyaki sauce allows you to control the ingredients and tailor the sweetness and thickness to your exact preferences. Get ready to elevate your cooking with this simple yet sensational recipe!

Ingredients:
- 1.5 lbs boneless, skinless chicken thighs, cut into 1-inch pieces
- 1/4 cup soy sauce (low sodium preferred)
- 1/4 cup mirin (sweet rice wine)
- 2 tablespoons sake (or dry sherry)
- 2 tablespoons brown sugar, packed
- 1 tablespoon honey
- 1 tablespoon grated fresh ginger
- 2 cloves garlic, minced
- 1 teaspoon sesame oil
- 1/2 teaspoon ground black pepper
- 1 tablespoon cornstarch
- 2 tablespoons cold water
- 2 green onions, thinly sliced, for garnish
- Sesame seeds, for garnish (optional)
- Cooked rice, for serving
- Vegetables of your choice (broccoli, carrots, bell peppers), for serving (optional)
Preparing the Teriyaki Marinade:
Okay, let’s get started! The key to amazing teriyaki is a flavorful marinade. This is where all the magic happens, so pay close attention. We’re aiming for a balance of sweet, savory, and a little bit of zing.
- Combine the Wet Ingredients: In a medium bowl, whisk together the soy sauce, mirin, and sake (or dry sherry). Make sure everything is nicely combined. These liquids form the base of our teriyaki sauce, providing that classic umami flavor.
- Add the Sweeteners: Now, add the brown sugar and honey to the bowl. Whisk well until the sugar and honey are completely dissolved. This step is crucial because undissolved sugar can burn during cooking. We want a smooth, even sweetness throughout the sauce.
- Incorporate the Aromatics: Next, add the grated fresh ginger and minced garlic to the mixture. Don’t skimp on the ginger and garlic they add a wonderful depth of flavor and aroma to the teriyaki. Freshly grated ginger is always best, but if you’re in a pinch, you can use ginger paste.
- Add Sesame Oil and Pepper: Stir in the sesame oil and ground black pepper. The sesame oil adds a nutty richness, while the pepper provides a subtle kick. Just a little bit of sesame oil goes a long way, so don’t overdo it.
- Taste and Adjust: Give the marinade a taste. This is your chance to adjust the flavors to your liking. If you prefer a sweeter teriyaki, add a little more honey or brown sugar. If you want it saltier, add a touch more soy sauce. Remember, you can always add more, but you can’t take it away!
Marinating the Chicken:
Now that we have our fantastic teriyaki marinade, it’s time to let the chicken soak up all that goodness. The longer you marinate the chicken, the more flavorful it will be. I usually aim for at least 30 minutes, but longer is always better!
- Prepare the Chicken: Place the chicken pieces in a resealable plastic bag or a shallow dish. Make sure the chicken is evenly distributed so that it marinates properly.
- Pour the Marinade: Pour the teriyaki marinade over the chicken, ensuring that all the pieces are coated. If using a plastic bag, seal the bag and gently massage the marinade into the chicken. If using a dish, turn the chicken pieces to coat them evenly.
- Marinate in the Refrigerator: Place the bag or dish in the refrigerator and marinate for at least 30 minutes, or up to overnight. The longer the chicken marinates, the more flavorful it will become. If marinating for more than a few hours, I recommend flipping the bag or stirring the chicken occasionally to ensure even marination.
Cooking the Teriyaki Chicken:
Alright, the chicken has been marinating, and we’re ready to cook! There are a few different ways you can cook teriyaki chicken pan-frying, baking, or grilling. I’m going to show you how to pan-fry it, which is my preferred method for its speed and ease.
- Prepare the Cornstarch Slurry: In a small bowl, whisk together the cornstarch and cold water until smooth. This slurry will help thicken the teriyaki sauce and give it that glossy, irresistible finish. Make sure there are no lumps in the slurry.
- Heat the Pan: Heat a large skillet or wok over medium-high heat. Add a tablespoon of vegetable oil or canola oil to the pan. Make sure the pan is hot before adding the chicken.
- Cook the Chicken: Remove the chicken from the marinade, allowing any excess marinade to drip off. Be careful not to overcrowd the pan. Cook the chicken in batches if necessary, to ensure that it browns properly. Cook the chicken for 5-7 minutes per side, or until it is cooked through and no longer pink inside. The internal temperature should reach 165°F (74°C).
- Add the Remaining Marinade: Once the chicken is cooked through, pour the remaining marinade into the pan. Bring the marinade to a simmer, scraping up any browned bits from the bottom of the pan. These browned bits add a ton of flavor to the sauce.
- Thicken the Sauce: Slowly pour the cornstarch slurry into the simmering sauce, stirring constantly. Continue to simmer the sauce for 1-2 minutes, or until it has thickened to your desired consistency. The sauce should be thick enough to coat the back of a spoon.
- Coat the Chicken: Toss the cooked chicken in the thickened teriyaki sauce, ensuring that all the pieces are evenly coated. The sauce should be glossy and cling to the chicken beautifully.
Serving the Teriyaki Chicken:
We’re almost there! Now it’s time to plate up our delicious homemade teriyaki chicken and enjoy the fruits of our labor. I love serving teriyaki chicken with fluffy white rice and some steamed vegetables, but feel free to get creative and add your own personal touch.
- Prepare the Rice and Vegetables: Cook rice according to package directions. Steam or stir-fry your favorite vegetables. Broccoli, carrots, and bell peppers are all great choices.
- Plate the Dish: Spoon a generous portion of rice onto each plate. Arrange the teriyaki chicken on top of the rice. Add the steamed or stir-fried vegetables to the side.
- Garnish: Garnish the teriyaki chicken with thinly sliced green onions and sesame seeds. These garnishes add a pop of color and flavor to the dish.
- Serve Immediately: Serve the teriyaki chicken immediately and enjoy! This dish is best served hot, so don’t let it sit around for too long.
Tips and Variations:
Here are a few extra tips and variations to help you customize this teriyaki chicken recipe to your liking:
- Spice it Up: Add a pinch of red pepper flakes to the marinade for a little bit of heat.
- Add Pineapple: Add chunks of pineapple to the pan while cooking the chicken for a tropical twist.
- Use Different Protein: This recipe works well with other proteins, such as beef, pork, or tofu. Just adjust the cooking time accordingly.
- Make it Gluten-Free: Use tamari instead of soy sauce to make this recipe gluten-free.
- Meal Prep Friendly: Teriyaki chicken is great for meal prepping. Store it in an airtight container in the refrigerator for up to 4 days.
Enjoy your homemade teriyaki chicken!
Conclusion:
And there you have it! This Homemade Teriyaki recipe is more than just a sauce; it’s a flavor adventure waiting to happen in your kitchen. I truly believe this is a must-try for anyone who loves authentic Asian flavors but wants the control and satisfaction of making it themselves. Forget the store-bought stuff loaded with preservatives and questionable ingredients. With just a few simple steps and readily available ingredients, you can create a teriyaki sauce that’s bursting with umami, perfectly balanced sweetness, and a depth of flavor you won’t believe.
Why is this a must-try? Because it’s incredibly versatile! Imagine drizzling it over perfectly grilled chicken or salmon, creating a delectable teriyaki bowl with fluffy rice and your favorite veggies, or using it as a marinade for succulent pork tenderloin. The possibilities are truly endless. Plus, knowing exactly what goes into your sauce gives you peace of mind and allows you to tailor it to your specific taste preferences. Want it spicier? Add a pinch of red pepper flakes. Prefer a tangier flavor? A squeeze of fresh lemon or lime juice will do the trick.
Speaking of serving suggestions, let’s dive into a few of my favorite ways to enjoy this Homemade Teriyaki. For a quick and easy weeknight meal, try marinating chicken thighs in the sauce for at least 30 minutes (or even overnight for maximum flavor!), then baking or grilling them until cooked through. Serve with steamed broccoli and brown rice for a complete and satisfying meal. Another fantastic option is to use it as a glaze for salmon. Brush the salmon fillets with the teriyaki sauce during the last few minutes of grilling or baking for a beautiful, glossy finish and an explosion of flavor.
But don’t stop there! Get creative and experiment with different variations. Try adding a touch of ginger and garlic for an extra layer of warmth and complexity. Or, for a sweeter and more decadent sauce, incorporate a tablespoon of honey or maple syrup. If you’re feeling adventurous, consider adding a splash of sake or mirin for a more authentic Japanese flavor profile. You can even use this teriyaki sauce as a dipping sauce for homemade spring rolls or potstickers. The only limit is your imagination!
Serving Suggestions and Variations:
* Teriyaki Chicken Bowls: Marinate chicken, grill or bake, and serve over rice with steamed vegetables.
* Glazed Salmon: Brush salmon with teriyaki during the last few minutes of cooking for a glossy finish.
* Pork Tenderloin Marinade: Marinate pork tenderloin for a flavorful and tender main course.
* Vegetable Stir-Fry: Add teriyaki sauce to your favorite stir-fry for a delicious and easy meal.
* Dipping Sauce: Serve as a dipping sauce for spring rolls, potstickers, or even chicken nuggets.
* Spicy Teriyaki: Add red pepper flakes or a dash of sriracha for a spicy kick.
* Ginger Garlic Teriyaki: Incorporate grated ginger and minced garlic for added depth of flavor.
* Sweet Teriyaki: Add honey or maple syrup for a sweeter and more decadent sauce.
I’m so excited for you to try this recipe and experience the magic of homemade teriyaki for yourself. It’s a game-changer, I promise! Once you taste the difference between this homemade version and the store-bought stuff, you’ll never go back.
So, what are you waiting for? Gather your ingredients, put on your apron, and get ready to create a culinary masterpiece. And most importantly, don’t forget to share your experience with me! I’d love to hear how you enjoyed the recipe, what variations you tried, and what dishes you created. Leave a comment below, tag me on social media, or send me an email. I can’t wait to see what you come up with! Happy cooking!
Homemade Teriyaki: The Ultimate Guide to Authentic Flavor
Easy, flavorful homemade teriyaki chicken with a delicious marinade, perfect over rice and veggies.
Ingredients
- 1.5 lbs boneless, skinless chicken thighs, cut into 1-inch pieces
- 1/4 cup soy sauce (low sodium preferred)
- 1/4 cup mirin (sweet rice wine)
- 2 tablespoons sake (or dry sherry)
- 2 tablespoons brown sugar, packed
- 1 tablespoon honey
- 1 tablespoon grated fresh ginger
- 2 cloves garlic, minced
- 1 teaspoon sesame oil
- 1/2 teaspoon ground black pepper
- 1 tablespoon cornstarch
- 2 tablespoons cold water
- 2 green onions, thinly sliced, for garnish
- Sesame seeds, for garnish (optional)
- Cooked rice, for serving
- Vegetables of your choice (broccoli, carrots, bell peppers), for serving (optional)
Instructions
- Prepare the Teriyaki Marinade: In a medium bowl, whisk together the soy sauce, mirin, and sake (or dry sherry). Add the brown sugar and honey, whisking until dissolved. Incorporate the grated fresh ginger, minced garlic, sesame oil, and ground black pepper. Taste and adjust seasonings as needed.
- Marinate the Chicken: Place the chicken pieces in a resealable plastic bag or shallow dish. Pour the teriyaki marinade over the chicken, ensuring all pieces are coated. Marinate in the refrigerator for at least 30 minutes, or up to overnight, flipping or stirring occasionally.
- Prepare the Cornstarch Slurry: In a small bowl, whisk together the cornstarch and cold water until smooth.
- Cook the Chicken: Heat a large skillet or wok over medium-high heat with vegetable oil. Remove the chicken from the marinade, letting excess drip off. Cook in batches, if needed, for 5-7 minutes per side, or until cooked through (internal temperature of 165°F/74°C).
- Thicken the Sauce: Pour the remaining marinade into the pan, scraping up any browned bits. Bring to a simmer. Slowly pour in the cornstarch slurry, stirring constantly. Simmer for 1-2 minutes, or until the sauce has thickened.
- Coat the Chicken: Toss the cooked chicken in the thickened teriyaki sauce, ensuring all pieces are evenly coated.
- Serve: Prepare rice and vegetables. Spoon rice onto plates, arrange teriyaki chicken on top, and add vegetables to the side. Garnish with thinly sliced green onions and sesame seeds. Serve immediately.
Notes
- Spice it Up: Add a pinch of red pepper flakes to the marinade for a little bit of heat.
- Add Pineapple: Add chunks of pineapple to the pan while cooking the chicken for a tropical twist.
- Use Different Protein: This recipe works well with other proteins, such as beef, pork, or tofu. Just adjust the cooking time accordingly.
- Make it Gluten-Free: Use tamari instead of soy sauce to make this recipe gluten-free.
- Meal Prep Friendly: Teriyaki chicken is great for meal prepping. Store it in an airtight container in the refrigerator for up to 4 days.


Leave a Comment