

Halushki comfort food, a dish so simple yet so deeply satisfying, is about to become your new weeknight staple. Imagine tender, pillowy dumplings, lightly browned and tossed with caramelized onions and savory cabbage. The aroma alone is enough to transport you to a cozy kitchen, filled with warmth and the promise of a hearty meal.
This humble dish, originating from Central and Eastern Europe, particularly Slovakia, Poland, and Ukraine, has a rich history as peasant food. It was a way to make the most of simple, readily available ingredients like flour, potatoes, and cabbage. Over generations, families have perfected their own versions, each adding a personal touch to this classic recipe. Its a testament to the fact that the most delicious meals don’t always require fancy ingredients or complicated techniques.
What makes halushki comfort food so universally loved? It’s the perfect combination of textures and flavors. The soft, slightly chewy dumplings provide a delightful contrast to the sweet, caramelized onions and the slightly crisp cabbage. Its incredibly versatile, too! You can easily customize it with different vegetables, meats, or even a dollop of sour cream for added richness. But perhaps the biggest draw is its sheer simplicity. Its quick to prepare, budget-friendly, and guaranteed to bring a smile to everyone at the table. So, let’s dive in and discover how to make this incredibly comforting and delicious dish!

Ingredients:
- For the Noodles:
- 4 cups all-purpose flour, plus more for dusting
- 2 large eggs
- 1 teaspoon salt
- ¾ cup water, plus more if needed
- For the Cabbage and Onions:
- 1 large head of green cabbage, about 2-3 pounds
- 2 large yellow onions
- ½ cup butter (1 stick)
- 1 teaspoon salt
- ½ teaspoon black pepper
- Optional: ¼ teaspoon caraway seeds
- Optional Add-ins:
- Cooked bacon, crumbled
- Kielbasa sausage, sliced and browned
- Sour cream, for serving
- Fresh parsley, chopped, for garnish
Making the Halushki Noodles:
Okay, let’s get started with the most important part the noodles! Don’t be intimidated; it’s easier than you think. I promise!
- Combine Dry Ingredients: In a large bowl, whisk together the 4 cups of all-purpose flour and 1 teaspoon of salt. Make sure they’re well combined so the salt is evenly distributed. This helps with the flavor of the noodles.
- Add Eggs and Water: Create a well in the center of the flour mixture. Crack the 2 large eggs into the well. Pour in ¾ cup of water.
- Mix the Dough: Using a fork or your hands, gradually incorporate the flour into the eggs and water. Start from the center and work your way outwards. The dough will start to come together.
- Knead the Dough: Once the dough has mostly come together, turn it out onto a lightly floured surface. Knead the dough for about 5-7 minutes, or until it becomes smooth and elastic. If the dough is too dry, add a tablespoon of water at a time until it reaches the right consistency. It should be firm but pliable. If it’s too sticky, add a little more flour.
- Rest the Dough: Form the dough into a ball, wrap it in plastic wrap, and let it rest for at least 30 minutes at room temperature. This allows the gluten to relax, making the noodles easier to roll out and cook. Trust me, this step is worth it!
- Divide the Dough: After the dough has rested, divide it into 2-3 equal portions. This makes it easier to work with. Keep the portions you’re not working with wrapped in plastic wrap to prevent them from drying out.
- Roll Out the Dough: On a lightly floured surface, roll out one portion of the dough into a thin sheet, about 1/8 inch thick. The thinner the noodles, the faster they will cook.
- Cut the Noodles: There are a few ways to cut the noodles. You can use a sharp knife to cut the dough into small squares or rectangles, about ½ inch to ¾ inch in size. Alternatively, you can use a pizza cutter to cut the dough into strips, then cut the strips into smaller pieces. For a more rustic look, don’t worry about making them perfectly uniform.
- Dry the Noodles (Optional): If you’re not cooking the noodles immediately, you can dry them slightly. Spread them out on a lightly floured baking sheet and let them air dry for about 30 minutes. This will prevent them from sticking together when you cook them.
Preparing the Cabbage and Onions:
Now, let’s move on to the cabbage and onions. This is where the flavor really comes alive. The sweet, caramelized onions and tender cabbage are the perfect complement to the homemade noodles.
- Prepare the Cabbage: Remove the outer leaves of the cabbage if they are wilted or damaged. Cut the cabbage into quarters through the core. Remove the core from each quarter. Slice the cabbage thinly. You can use a knife or a mandoline slicer for this. I prefer to slice it thinly so it cooks evenly and becomes nice and tender.
- Prepare the Onions: Peel the 2 large yellow onions and cut them in half. Slice each half thinly.
- Sauté the Onions: In a large, heavy-bottomed skillet or Dutch oven, melt the ½ cup of butter over medium heat. Add the sliced onions and cook, stirring occasionally, until they are soft and golden brown, about 15-20 minutes. This step is crucial for developing the sweet, caramelized flavor. Don’t rush it!
- Add the Cabbage: Add the sliced cabbage to the skillet with the onions. Season with 1 teaspoon of salt, ½ teaspoon of black pepper, and ¼ teaspoon of caraway seeds (if using).
- Cook the Cabbage: Cook the cabbage, stirring occasionally, until it is tender and slightly wilted, about 20-25 minutes. You may need to add a tablespoon or two of water to the skillet if the cabbage starts to stick. The cabbage should be soft and slightly sweet.
Cooking the Noodles and Assembling the Halushki:
Alright, we’re in the home stretch! Now it’s time to cook the noodles and bring everything together. Get ready for some serious comfort food!
- Cook the Noodles: Bring a large pot of salted water to a rolling boil. Add the halushki noodles to the boiling water. Cook for 3-5 minutes, or until the noodles are tender and float to the surface. Fresh noodles cook very quickly, so keep a close eye on them.
- Drain the Noodles: Drain the cooked noodles in a colander. Don’t rinse them! You want to keep some of the starchy water to help the sauce cling to the noodles.
- Combine Noodles and Cabbage: Add the drained noodles to the skillet with the cabbage and onions. Toss everything together to combine. Make sure the noodles are well coated with the cabbage and onion mixture.
- Cook Together: Cook the halushki for another 5-10 minutes, stirring occasionally, to allow the flavors to meld together. This also helps to heat the noodles through.
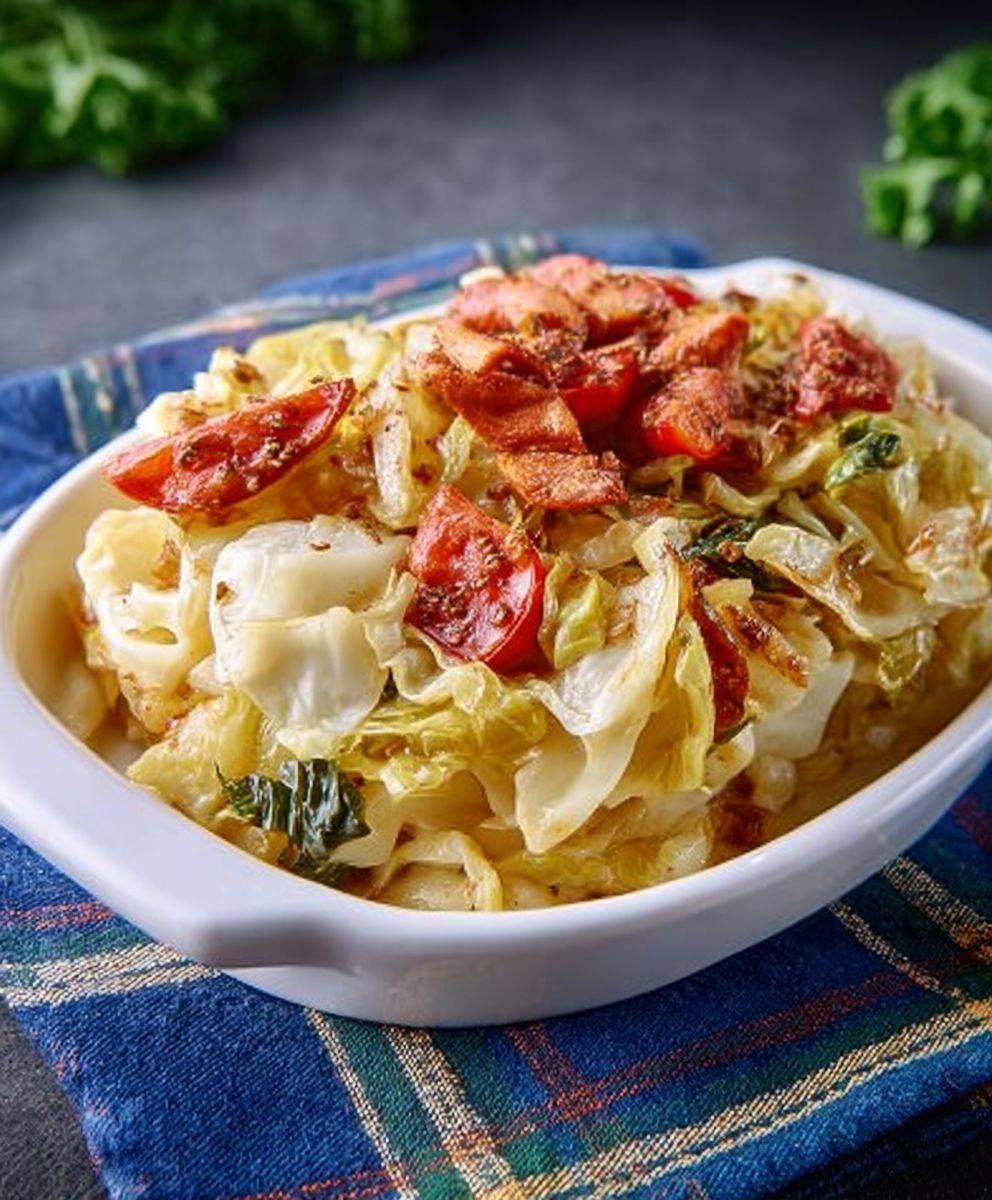
- Serve: Serve the halushki hot. You can top it with crumbled cooked bacon, sliced and browned kielbasa sausage, a dollop of sour cream, and fresh chopped parsley, if desired.
Tips and Variations:
- Make it Vegetarian: To make this dish vegetarian, simply omit the bacon and kielbasa sausage. The halushki is delicious on its own with just the cabbage and onions.
- Add Some Heat: For a little kick, add a pinch of red pepper flakes to the cabbage and onion mixture.
- Use Different Vegetables: You can also add other vegetables to the halushki, such as carrots, mushrooms, or bell peppers.
- Make it Ahead: You can make the halushki noodles ahead of time and store them in the refrigerator for up to 2 days. You can also cook the cabbage and onions ahead of time and store them in the refrigerator for up to 3 days. When you’re ready to serve, simply cook the noodles and combine everything together.
- Freezing: Halushki freezes well. Allow it to cool completely, then transfer it to an airtight container and freeze for up to 3 months. Thaw overnight in the refrigerator before reheating.
Enjoy!
I hope you enjoy this classic halushki recipe as much as I do! It’s a simple, comforting dish that’s perfect for a cozy night in. Don’t be afraid to experiment with different variations and make it your own. Happy cooking!
Conclusion:
And there you have it! This Halushki recipe isn’t just a meal; it’s a warm hug on a plate, a taste of tradition, and a guaranteed crowd-pleaser. I truly believe this is a must-try recipe for anyone seeking authentic comfort food. The simple ingredients belie the incredible depth of flavor, and the satisfyingly chewy noodles combined with the caramelized cabbage and onions create a symphony of textures and tastes that will leave you wanting more.
But why is this particular Halushki recipe so special? It’s all about the balance. We’ve taken the classic elements and refined them, ensuring that the cabbage is perfectly sweet and tender, the noodles are cooked to al dente perfection, and the overall dish is seasoned just right. It’s the kind of meal that evokes memories of family gatherings and cozy evenings, and it’s guaranteed to become a staple in your own kitchen.
Beyond its inherent deliciousness, this recipe is also incredibly versatile. Feel free to experiment with different variations to suit your own preferences. For a heartier meal, consider adding some kielbasa sausage or bacon to the pan while you’re caramelizing the onions and cabbage. The smoky flavor will complement the sweetness beautifully. If you’re looking for a vegetarian option, you can add some mushrooms or other vegetables to the mix. Bell peppers, zucchini, or even spinach would all be delicious additions.
For serving suggestions, I personally love to top my Halushki with a dollop of sour cream or plain Greek yogurt. The tanginess of the dairy cuts through the richness of the dish and adds a refreshing element. A sprinkle of fresh parsley or chives also adds a pop of color and flavor. And of course, a side of crusty bread is always a welcome addition for soaking up all that delicious sauce.
Don’t be intimidated by the simplicity of the ingredients list. This recipe is surprisingly easy to make, even for beginner cooks. The key is to take your time and allow the cabbage and onions to caramelize properly. This is where the magic happens, and it’s what gives the dish its signature flavor. Trust me, the extra time is well worth it.
I’m so confident that you’ll love this Halushki recipe that I urge you to try it out for yourself. Gather your ingredients, put on some music, and get ready to create a truly memorable meal. And once you’ve made it, I would absolutely love to hear about your experience! Share your photos and comments on social media using the hashtag #MyHalushkiAdventure. Let me know what variations you tried, what toppings you added, and what your family thought. I’m always looking for new ideas and inspiration, and I can’t wait to see what you come up with.
So go ahead, give this recipe a try. I promise you won’t be disappointed. It’s the perfect comfort food for any occasion, and it’s a guaranteed way to bring a smile to your face. Happy cooking! And remember, the best meals are always made with love. I hope you enjoy this Halushki comfort food as much as I do!
Halushki Comfort Food: A Delicious and Easy Recipe
Homemade noodles tossed with sweet caramelized cabbage and onions. A comforting and hearty dish perfect for any occasion.
Ingredients
- 4 cups all-purpose flour, plus more for dusting
- 2 large eggs
- 1 teaspoon salt
- ¾ cup water, plus more if needed
- 1 large head of green cabbage, about 2-3 pounds
- 2 large yellow onions
- ½ cup butter (1 stick)
- 1 teaspoon salt
- ½ teaspoon black pepper
- Optional: ¼ teaspoon caraway seeds
- Cooked bacon, crumbled
- Kielbasa sausage, sliced and browned
- Sour cream, for serving
- Fresh parsley, chopped, for garnish
Instructions
- Make the Noodles:
- In a large bowl, whisk together flour and salt.
- Create a well in the center, add eggs and water.
- Gradually incorporate flour into the wet ingredients.
- Knead on a floured surface for 5-7 minutes until smooth and elastic. Add water or flour as needed to adjust consistency.
- Form into a ball, wrap in plastic wrap, and rest for at least 30 minutes.
- Divide dough into 2-3 portions.
- Roll out each portion into a thin sheet (1/8 inch thick).
- Cut into ½-¾ inch squares or rectangles.
- Optional: Dry the noodles on a floured baking sheet for 30 minutes.
- Prepare Cabbage and Onions:
- Remove outer leaves of cabbage, quarter, and remove the core. Slice thinly.
- Peel and thinly slice onions.
- In a large skillet or Dutch oven, melt butter over medium heat.
- Add onions and cook, stirring occasionally, until soft and golden brown (15-20 minutes).
- Add cabbage, salt, pepper, and caraway seeds (if using).
- Cook, stirring occasionally, until cabbage is tender and slightly wilted (20-25 minutes). Add water if needed to prevent sticking.
- Cook Noodles and Assemble:
- Bring a large pot of salted water to a boil.
- Add noodles and cook for 3-5 minutes, or until tender and floating.
- Drain noodles (do not rinse).
- Add noodles to the skillet with cabbage and onions. Toss to combine.
- Cook for another 5-10 minutes, stirring occasionally, to meld flavors.
- Serve: Serve hot, topped with crumbled bacon, kielbasa, sour cream, and parsley, if desired.
Notes
- Make it Vegetarian: Omit bacon and kielbasa.
- Add Heat: Add a pinch of red pepper flakes.
- Use Different Vegetables: Add carrots, mushrooms, or bell peppers.
- Make Ahead: Noodles can be made 2 days in advance. Cabbage and onions can be made 3 days in advance.
- Freezing: Cool completely, transfer to an airtight container, and freeze for up to 3 months. Thaw overnight in the refrigerator before reheating.


Leave a Comment