

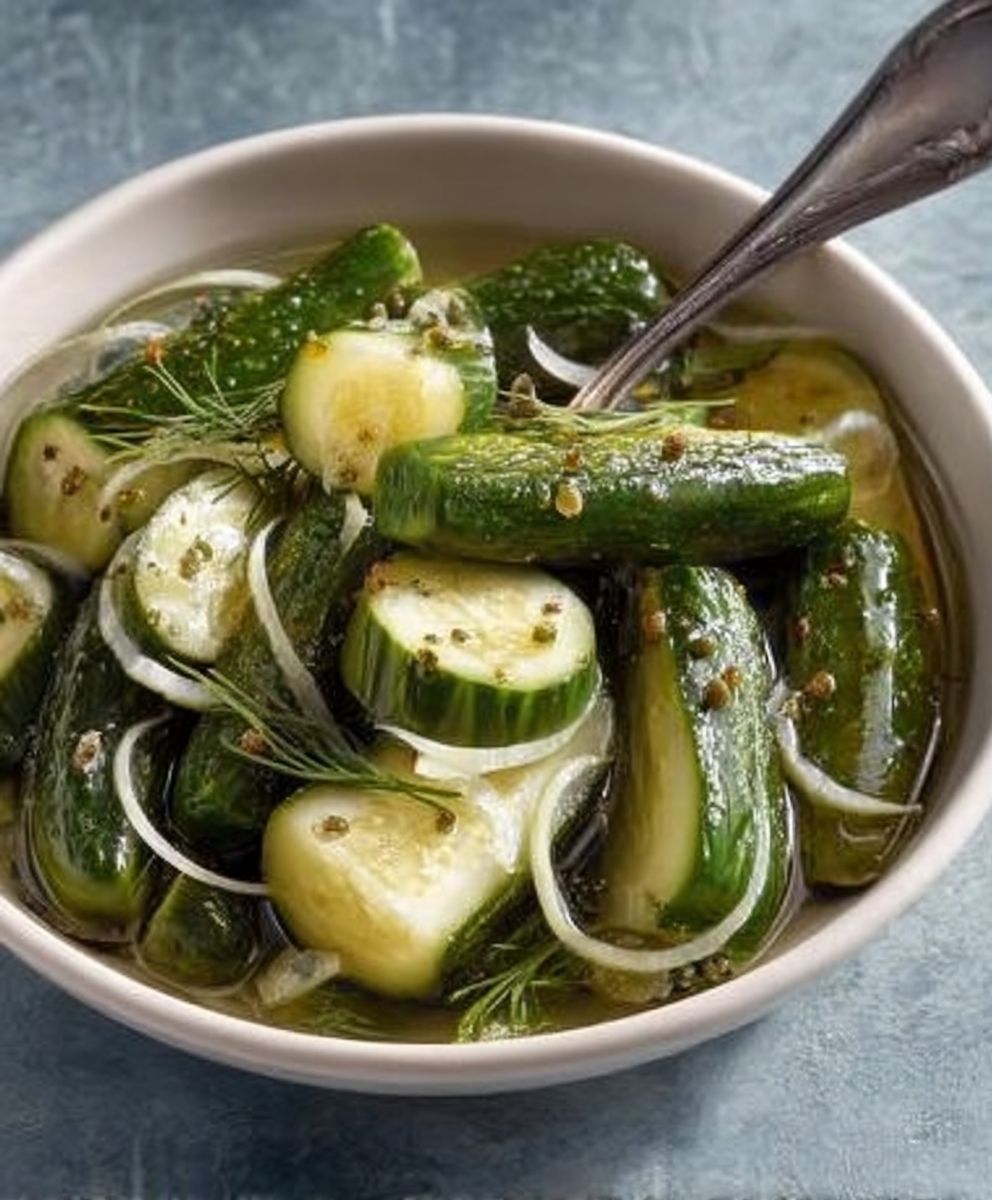
Dill Pickles, those crunchy, tangy spears of pure delight, are more than just a side dish; they’re a culinary experience! Have you ever bitten into a perfectly crisp dill pickle and felt an instant jolt of satisfaction? That’s the magic we’re about to unlock together. Forget those limp, store-bought pickles we’re diving headfirst into the world of homemade goodness.
Pickling, as a preservation method, dates back millennia, with evidence suggesting its use in ancient Mesopotamia. While the exact origins of dill pickles are harder to pinpoint, their popularity exploded with European immigrants who brought their pickling traditions to America. These traditions, combined with the readily available dill and cucumbers, gave rise to the dill pickle we know and love today.
But what makes dill pickles so irresistible? It’s the perfect balance of sour, salty, and savory, with a satisfying crunch that keeps you coming back for more. They’re incredibly versatile, adding a zesty kick to sandwiches, burgers, or even enjoyed straight from the jar as a refreshing snack. Plus, making your own dill pickles is surprisingly easy and allows you to customize the flavor to your exact liking. Get ready to embark on a pickling adventure that will transform your cucumbers into tangy treasures!

Ingredients:
- 10-12 pickling cucumbers, about 4-5 inches long
- 8 cups water, divided
- 1/2 cup kosher salt, divided
- 4 cups white vinegar (5% acidity)
- 2 tablespoons sugar
- 4 cloves garlic, peeled and smashed
- 2 tablespoons dill seeds
- 2 tablespoons yellow mustard seeds
- 1 teaspoon black peppercorns
- 1/2 teaspoon red pepper flakes (optional, for heat)
- Fresh dill sprigs (at least 4 large sprigs)
- Grape leaves (optional, 2-3 leaves per jar, help keep pickles crisp)
Preparing the Cucumbers:
- Wash the cucumbers thoroughly. This is a crucial step! You want to remove any dirt or debris that might be clinging to them. I like to use a vegetable brush under running water to make sure they’re squeaky clean.
- Trim the blossom end of each cucumber. This is important because the blossom end contains enzymes that can cause the pickles to soften during fermentation. Just slice off a thin piece, about 1/4 inch, from the end that was attached to the vine.
- Soak the cucumbers in an ice bath. In a large bowl, combine 4 cups of water and 1/4 cup of kosher salt. Add the cucumbers to the brine and weigh them down with a plate or bowl to keep them submerged. Let them soak for at least 4 hours, or preferably overnight, in the refrigerator. This helps to draw out excess moisture and ensures a crispier pickle.
Preparing the Brine:
- Combine the vinegar, water, sugar, and remaining salt in a large saucepan. In the saucepan, add the 4 cups of white vinegar, the remaining 4 cups of water, 2 tablespoons of sugar, and the remaining 1/4 cup of kosher salt.
- Bring the brine to a boil. Place the saucepan over medium-high heat and bring the mixture to a rolling boil, stirring occasionally to dissolve the salt and sugar completely. Once boiling, reduce the heat and let it simmer for about 5 minutes. This helps to meld the flavors together.
- Remove the brine from the heat and let it cool slightly. You don’t want to pour boiling hot brine over the cucumbers, as it can make them mushy. Let it cool for about 10-15 minutes while you prepare the jars.
Preparing the Jars:
- Sterilize the jars and lids. This is essential for preventing spoilage. There are several ways to sterilize jars:
- Boiling: Place the jars and lids in a large pot of boiling water for 10 minutes. Remove them carefully with tongs and place them on a clean towel to dry.
- Dishwasher: Run the jars and lids through a hot cycle in the dishwasher. Keep them in the dishwasher until you’re ready to use them.
- Oven: Preheat the oven to 250°F (120°C). Place the clean jars on a baking sheet and heat them for 20 minutes. Boil the lids in a separate saucepan for 10 minutes.
I usually opt for the boiling method, just to be extra safe.
- Prepare the spices for each jar. For each jar, add 1 clove of smashed garlic, 1/2 tablespoon of dill seeds, 1/2 tablespoon of yellow mustard seeds, 1/4 teaspoon of black peppercorns, and a pinch of red pepper flakes (if using).
- Add a fresh dill sprig and grape leaves (if using) to each jar. Place a large sprig of fresh dill and 2-3 grape leaves (if using) into each jar. The grape leaves contain tannins that help keep the pickles crisp.
Packing the Jars:
- Remove the cucumbers from the ice bath and drain them well. Pat them dry with paper towels to remove any excess moisture.
- Pack the cucumbers tightly into the jars. Arrange the cucumbers vertically in the jars, packing them as tightly as possible without crushing them. You want to leave about 1/2 inch of headspace at the top of the jar.
- Pour the warm brine over the cucumbers. Carefully pour the warm brine over the cucumbers, leaving about 1/2 inch of headspace at the top of the jar. Use a clean utensil (like a chopstick or a plastic knife) to gently release any trapped air bubbles.
- Wipe the rims of the jars clean. Use a clean, damp cloth to wipe the rims of the jars to remove any spills or drips. This ensures a good seal.
- Place the lids on the jars and screw on the bands. Place the sterilized lids on the jars and screw on the bands until they are fingertip tight. This means tightening them until you feel resistance, but not forcing them.
Processing the Pickles (Water Bath Canning):
- Prepare the water bath canner. Fill a large pot with enough water to cover the jars by at least 1 inch. Place a rack in the bottom of the pot to prevent the jars from sitting directly on the heat. Bring the water to a boil.
- Carefully lower the jars into the boiling water. Use a jar lifter to carefully lower the jars into the boiling water. Make sure the jars are not touching each other or the sides of the pot.
- Process the jars for the correct amount of time. Once the water returns to a boil, process the jars for 10 minutes for pint jars (16 oz) and 15 minutes for quart jars (32 oz). Adjust processing time for altitude:
- 1,001 – 3,000 feet: Add 5 minutes
- 3,001 – 6,000 feet: Add 10 minutes
- 6,001 – 8,000 feet: Add 15 minutes
- 8,001 – 10,000 feet: Add 20 minutes
Important: Processing time is crucial for ensuring the pickles are safe to eat.
- Turn off the heat and let the jars sit in the water for 5 minutes. This helps to prevent siphoning (when liquid is drawn out of the jars).
- Carefully remove the jars from the water bath canner. Use a jar lifter to carefully remove the jars from the water bath canner and place them on a clean towel-lined surface, leaving at least 1 inch of space between the jars.
- Let the jars cool completely. As the jars cool, you should hear a “pop” sound as the lids seal. This usually takes about 12-24 hours.
- Check the seals. After the jars have cooled completely, check the seals by pressing down on the center of each lid. If the lid doesn’t flex or move, it’s properly sealed. If the lid flexes, it’s not sealed and the jar should be refrigerated and eaten within a few weeks.
- Store the sealed jars in a cool, dark place. Properly sealed and processed dill pickles can be stored for up to a year.
No Canning Option (Refrigerator Pickles):
If you’re not comfortable with canning, you can make refrigerator pickles. They won’t last as long as canned pickles, but they’re still delicious and easy to make.
- Follow steps 1-4 under “Preparing the Cucumbers” and “Preparing the Brine” above.
- Follow steps 2-3 under “Preparing the Jars” above.
- Follow steps 1-3 under “Packing the Jars” above.
- Let the jars cool completely, then refrigerate for at least 24 hours before eating. Refrigerator pickles will last for about 2-3 weeks in the refrigerator.
Tips for the Best Dill Pickles:
- Use fresh, firm cucumbers. The quality of your cucumbers will directly impact the quality of your pickles. Look for cucumbers that are firm, unblemished, and free from soft spots.
- Don’t overcook the brine. Overcooking the brine can make it too concentrated and affect the flavor of the pickles.
- Pack the jars tightly. Packing the jars tightly helps to prevent the cucumbers from floating and ensures that they are fully submerged in the brine.
- Be patient! The pickles will taste better if you let them sit for at least a week before eating them. This allows the flavors to meld together and the cucumbers to fully absorb the brine.
- Experiment with different spices. Feel free to add other spices to your
Conclusion:
So, there you have it! My tried-and-true recipe for the most wonderfully crisp and flavorful dill pickles you’ll ever taste. I truly believe this is a must-try recipe for anyone who loves that tangy, garlicky, and utterly satisfying crunch. Forget the store-bought stuff; once you experience the vibrant freshness of homemade pickles, you’ll never go back. The satisfaction of pulling a jar of these beauties from your pantry, knowing you created them from scratch, is simply unmatched.
But why is this recipe a must-try, you ask? It’s all about the balance. The perfect blend of dill, garlic, and spices creates a flavor explosion that dances on your tongue. The brine, carefully crafted with just the right amount of salt and vinegar, ensures a crispness that’s simply irresistible. And the best part? It’s surprisingly easy! Even if you’ve never canned anything before, this recipe is incredibly straightforward and beginner-friendly. I’ve broken down each step to make the process as smooth as possible, so you can confidently create a batch of pickles that will impress your friends and family.
Now, let’s talk serving suggestions! These dill pickles are, of course, fantastic straight from the jar as a refreshing snack. But don’t stop there! Chop them up and add them to your favorite potato salad or tuna salad for a burst of tangy flavor. They’re also incredible on sandwiches, burgers, and even as a surprising addition to a cheese board. Imagine a juicy burger topped with a few slices of these homemade pickles pure heaven! And for a truly unique experience, try adding them to a Bloody Mary for an extra kick.
Looking for variations? Absolutely! Feel free to experiment with different spices to create your own signature pickle flavor. Add a pinch of red pepper flakes for a spicy kick, or a few mustard seeds for a more complex flavor profile. You can also try using different types of vinegar, such as apple cider vinegar or white wine vinegar, to subtly alter the taste. For a sweeter pickle, add a touch more sugar to the brine. And if you’re feeling adventurous, try pickling other vegetables alongside the cucumbers, such as carrots, green beans, or even okra. The possibilities are endless!
Serving Suggestions and Variations:
- Spicy Dill Pickles: Add red pepper flakes or a sliced jalapeño to the jar.
- Sweet Dill Pickles: Increase the sugar in the brine by a tablespoon or two.
- Garlic Lover’s Pickles: Double the amount of garlic cloves.
- Bread and Butter Pickles (Dill Version): Add a teaspoon of turmeric and a bit more sugar for a sweeter, more colorful pickle.
- Pickled Green Beans: Use the same brine recipe with trimmed green beans instead of cucumbers.
I’m so excited for you to try this recipe and experience the joy of homemade dill pickles. I truly believe you’ll love them as much as I do. So, gather your ingredients, grab your jars, and get pickling! And most importantly, don’t forget to share your experience with me! I’d love to hear how your pickles turned out, what variations you tried, and what your favorite ways are to enjoy them. Leave a comment below, tag me in your photos on social media, or send me an email. I can’t wait to see your pickle creations!
Happy pickling, and enjoy!
Dill Pickles: The Ultimate Guide to Making, Storing, and Enjoying Them
Crisp, tangy dill pickles, perfect for canning or enjoying fresh. Simple brine and classic spices create a satisfying treat.
Ingredients
- 10-12 pickling cucumbers, about 4-5 inches long
- 8 cups water, divided
- 1/2 cup kosher salt, divided
- 4 cups white vinegar (5% acidity)
- 2 tablespoons sugar
- 4 cloves garlic, peeled and smashed
- 2 tablespoons dill seeds
- 2 tablespoons yellow mustard seeds
- 1 teaspoon black peppercorns
- 1/2 teaspoon red pepper flakes (optional, for heat)
- Fresh dill sprigs (at least 4 large sprigs)
- Grape leaves (optional, 2-3 leaves per jar, help keep pickles crisp)
Instructions
- Wash the cucumbers thoroughly.
- Trim the blossom end of each cucumber (about 1/4 inch).
- Soak the cucumbers in an ice bath: Combine 4 cups of water and 1/4 cup of kosher salt in a large bowl. Add the cucumbers, weigh them down, and refrigerate for at least 4 hours, or preferably overnight.
- Combine the vinegar, water, sugar, and remaining salt in a large saucepan.
- Bring the brine to a boil, stirring occasionally to dissolve the salt and sugar completely. Reduce heat and simmer for about 5 minutes.
- Remove the brine from the heat and let it cool slightly (10-15 minutes).
- Sterilize the jars and lids using your preferred method (boiling, dishwasher, or oven).
- For each jar, add 1 clove of smashed garlic, 1/2 tablespoon of dill seeds, 1/2 tablespoon of yellow mustard seeds, 1/4 teaspoon of black peppercorns, and a pinch of red pepper flakes (if using).
- Add a fresh dill sprig and 2-3 grape leaves (if using) to each jar.
- Remove the cucumbers from the ice bath and drain them well. Pat them dry with paper towels.
- Pack the cucumbers tightly into the jars, leaving about 1/2 inch of headspace at the top of the jar.
- Pour the warm brine over the cucumbers, leaving about 1/2 inch of headspace at the top of the jar. Use a clean utensil to gently release any trapped air bubbles.
- Wipe the rims of the jars clean.
- Place the lids on the jars and screw on the bands until they are fingertip tight.
- Fill a large pot with enough water to cover the jars by at least 1 inch. Place a rack in the bottom of the pot. Bring the water to a boil.
- Carefully lower the jars into the boiling water using a jar lifter.
- Once the water returns to a boil, process the jars for 10 minutes for pint jars (16 oz) and 15 minutes for quart jars (32 oz). Adjust processing time for altitude:
- 1,001 – 3,000 feet: Add 5 minutes
- 3,001 – 6,000 feet: Add 10 minutes
- 6,001 – 8,000 feet: Add 15 minutes
- 8,001 – 10,000 feet: Add 20 minutes
- Turn off the heat and let the jars sit in the water for 5 minutes.
- Carefully remove the jars from the water bath canner and place them on a clean towel-lined surface, leaving at least 1 inch of space between the jars.
- Let the jars cool completely (12-24 hours).
- Check the seals by pressing down on the center of each lid. If the lid doesn’t flex or move, it’s properly sealed.
- Store the sealed jars in a cool, dark place for up to a year.
- Follow steps 1-4 under “Preparing the Cucumbers” and “Preparing the Brine” above.
- Follow steps 2-3 under “Preparing the Jars” above.
- Follow steps 1-3 under “Packing the Jars” above.
- Let the jars cool completely, then refrigerate for at least 24 hours before eating. Refrigerator pickles will last for about 2-3 weeks in the refrigerator.
Notes
- Use fresh, firm cucumbers for the best results.
- Don’t overcook the brine.
- Pack the jars tightly to prevent cucumbers from floating.
- Be patient! Pickles taste better after sitting for at least a week.
- Experiment with different spices to customize your pickles.
- Sterilizing the jars is essential for preventing spoilage in canned pickles.
- Processing time is crucial for ensuring the pickles are safe to eat.
- If a jar doesn’t seal properly, refrigerate it and eat the pickles within a few weeks.

Leave a Comment