

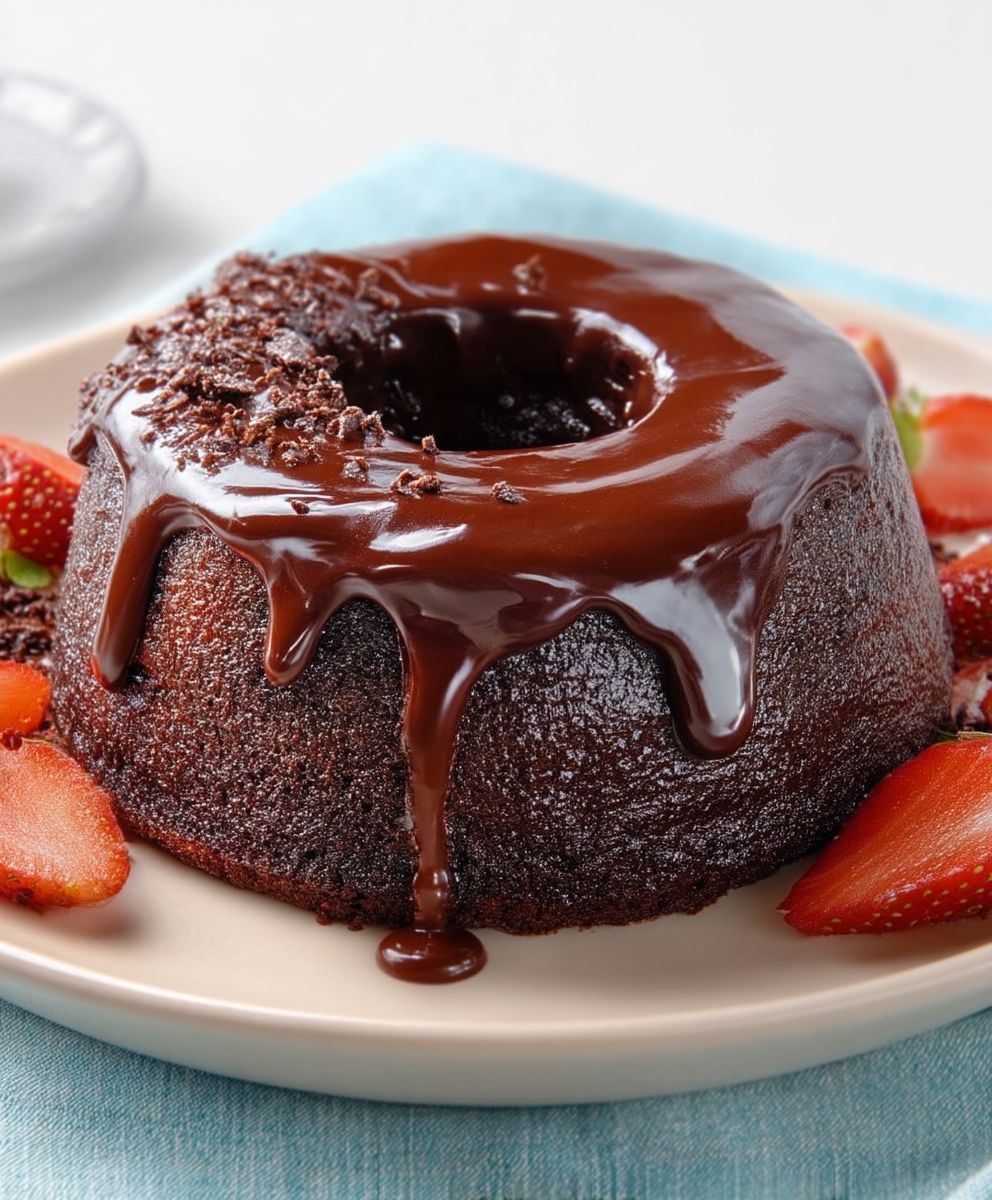
Chocolate glaze, that shimmering, decadent coating, has the power to transform an ordinary dessert into an extraordinary indulgence. Have you ever wondered how to achieve that perfect, glossy finish that elevates cakes, cookies, and pastries to a professional level? I’m here to let you in on the secret!
While the exact origins of chocolate glaze are difficult to pinpoint, the use of chocolate in glazes and sauces dates back centuries. Chocolate, revered by ancient Mesoamerican cultures, gradually made its way to Europe, where it was embraced and refined. Over time, innovative pastry chefs began experimenting with different techniques, eventually leading to the creation of the smooth, luscious chocolate glaze we know and love today.
What makes chocolate glaze so irresistible? It’s a combination of factors! The rich, intense chocolate flavor, the smooth, velvety texture, and the beautiful, glossy appearance all contribute to its appeal. Plus, it’s incredibly versatile and relatively simple to make, making it a favorite among both home bakers and professional pastry chefs. Whether you’re looking to add a touch of elegance to a simple cake or create a show-stopping dessert, chocolate glaze is the perfect finishing touch. Get ready to learn how to make the perfect chocolate glaze that will impress everyone!

Ingredients:
- 1 cup (2 sticks) unsalted butter, softened
- 3 cups powdered sugar, sifted
- 1 cup unsweetened cocoa powder, sifted
- ½ cup milk (whole milk recommended for richness)
- 1 teaspoon vanilla extract
- ¼ teaspoon salt
- 2 tablespoons light corn syrup (for shine and smoothness)
Preparing the Chocolate Glaze:
- Cream the Butter: In a large mixing bowl, or the bowl of your stand mixer fitted with the paddle attachment, cream the softened butter until it is light and fluffy. This usually takes about 3-5 minutes on medium speed. Make sure your butter is truly softened, but not melted. If it’s too cold, it will be difficult to cream, and if it’s melted, the glaze will be too thin. Scrape down the sides of the bowl occasionally to ensure all the butter is incorporated.
- Add the Powdered Sugar: Gradually add the sifted powdered sugar, one cup at a time, to the creamed butter. Mix on low speed to prevent a cloud of powdered sugar from erupting. After each addition, scrape down the sides of the bowl to ensure everything is well combined. Sifting the powdered sugar is crucial for a smooth, lump-free glaze. If you skip this step, you might end up with a grainy texture.
- Incorporate the Cocoa Powder: Sift the unsweetened cocoa powder and add it to the mixture. Again, mix on low speed to avoid a cocoa powder explosion. Sifting the cocoa powder, just like the powdered sugar, helps to prevent lumps and ensures a smooth, even color and flavor in the glaze. Mix until the cocoa powder is fully incorporated and the mixture is starting to look like a thick paste.
- Add the Milk: Gradually add the milk, starting with about ¼ cup. Mix on low speed until the milk is incorporated. Add the remaining milk as needed to reach your desired consistency. The amount of milk you need may vary slightly depending on the humidity and the exact consistency of your butter. You want the glaze to be smooth and pourable, but not too thin.
- Add the Vanilla Extract and Salt: Stir in the vanilla extract and salt. The vanilla extract enhances the chocolate flavor, and the salt balances the sweetness. Mix until well combined.
- Add the Light Corn Syrup: Add the light corn syrup and mix until fully incorporated. The corn syrup adds a beautiful shine to the glaze and helps to keep it smooth and prevents it from crusting over too quickly.
- Adjust the Consistency: If the glaze is too thick, add a little more milk, one tablespoon at a time, until you reach the desired consistency. If the glaze is too thin, add a little more sifted powdered sugar, one tablespoon at a time, until it thickens up. Remember to mix well after each addition and check the consistency before adding more.
- Mix Until Smooth: Continue to mix the glaze on medium speed for another 2-3 minutes, until it is very smooth and glossy. This step is important for achieving a professional-looking glaze.
Tips for Perfect Chocolate Glaze:
- Use High-Quality Ingredients: The quality of your ingredients will directly impact the flavor and texture of your glaze. Use good quality butter, cocoa powder, and vanilla extract for the best results.
- Sift, Sift, Sift: I cannot stress this enough! Sifting the powdered sugar and cocoa powder is essential for a smooth, lump-free glaze. Don’t skip this step!
- Room Temperature Butter: Make sure your butter is softened to room temperature before you start. This will ensure that it creams properly and creates a light and fluffy glaze.
- Gradual Additions: Add the powdered sugar and milk gradually to prevent a mess and ensure that everything is well combined.
- Adjust to Your Liking: Taste the glaze and adjust the sweetness or chocolate intensity to your liking. You can add more cocoa powder for a richer chocolate flavor or more powdered sugar for a sweeter glaze.
- Preventing a Crust: If you’re not using the glaze immediately, cover the bowl tightly with plastic wrap, pressing the plastic wrap directly onto the surface of the glaze to prevent a crust from forming.
- Reheating: If the glaze becomes too thick after sitting, you can gently reheat it in the microwave for a few seconds at a time, stirring in between, until it reaches the desired consistency. Be careful not to overheat it, as this can cause it to separate.
Using the Chocolate Glaze:
This chocolate glaze is incredibly versatile and can be used on a variety of desserts, including:
- Cakes: This glaze is perfect for covering cakes, both layer cakes and sheet cakes. It creates a smooth, glossy finish that looks beautiful and tastes delicious.
- Cupcakes: Drizzle or dip cupcakes in this glaze for a simple yet elegant topping. You can also add sprinkles or other decorations for a festive touch.
- Brownies: Elevate your brownies with a generous layer of this chocolate glaze. It adds a rich, decadent flavor that complements the fudgy texture of the brownies.
- Donuts: Dip homemade or store-bought donuts in this glaze for a classic treat.
- Cookies: Drizzle this glaze over cookies for a touch of chocolatey goodness. It works especially well with shortbread cookies or sugar cookies.
- Pound Cake: A simple pound cake is transformed with a generous coating of this glaze.
Troubleshooting:
- Glaze is too thick: Add milk, one tablespoon at a time, until you reach the desired consistency.
- Glaze is too thin: Add sifted powdered sugar, one tablespoon at a time, until it thickens up.
- Glaze is lumpy: Make sure you sifted the powdered sugar and cocoa powder. If it’s still lumpy, try mixing it on low speed for a longer period of time. You can also try gently warming the glaze in the microwave for a few seconds to help smooth it out.
- Glaze is grainy: This is usually caused by not sifting the powdered sugar. Unfortunately, there’s not much you can do to fix a grainy glaze. The best way to avoid this is to always sift your powdered sugar.
- Glaze is dull: Make sure you added the light corn syrup. The corn syrup is what gives the glaze its shine.
Variations:
- Mocha Glaze: Add 1-2 teaspoons of instant espresso powder to the glaze for a mocha flavor.
- Peppermint Glaze: Add ¼ teaspoon of peppermint extract to the glaze for a festive peppermint flavor.
- Salted Chocolate Glaze: Sprinkle a pinch of sea salt over the glaze after it’s been applied to your dessert for a salty-sweet flavor.
- Dark Chocolate Glaze: Use dark cocoa powder instead of unsweetened cocoa powder for a richer, more intense chocolate flavor. You may need to adjust the amount of powdered sugar to balance the bitterness.
- White Chocolate Glaze: While this recipe is for chocolate glaze, you can adapt it for white chocolate. Substitute the cocoa powder with melted white chocolate (about 6 ounces). Be careful not to overheat the white chocolate when melting it.
Storage:
Store leftover chocolate glaze in an airtight container in the refrigerator for up to 5 days. Before using, bring it to room temperature and stir well to restore its smooth consistency. You may need to add a little milk to thin it out if it has thickened up too much.
Enjoy your delicious homemade chocolate glaze!
Conclusion:
This isn’t just another chocolate glaze recipe; it’s your new secret weapon for elevating everything from simple cakes to decadent desserts. I truly believe that once you experience the rich, glossy perfection of this chocolate glaze, you’ll never settle for store-bought again. The depth of flavor, the smooth texture, and the effortless application make it an absolute must-try for any home baker, regardless of skill level.
Think about it: a simple vanilla cake instantly transforms into a sophisticated treat with a generous pour of this glaze. Brownies become intensely fudgy and irresistible. Even a humble batch of cookies gets a serious upgrade. It’s the kind of finishing touch that makes people say, “Wow, you made this?” And the best part? It’s so incredibly easy to make!
But the possibilities don’t stop there! Feel free to get creative and experiment with variations. For a mocha twist, add a teaspoon of instant espresso powder to the glaze while it’s still warm. A pinch of sea salt will enhance the chocolate’s sweetness and add a delightful salty-sweet contrast. If you’re feeling adventurous, try infusing the cream with orange zest or a cinnamon stick for a subtle, aromatic flavor.
Serving suggestions are endless. Drizzle it over ice cream for an extra-indulgent sundae. Use it as a dipping sauce for fresh fruit. Or, for a truly decadent experience, pour it over a warm chocolate lava cake. You can even use it to create stunning chocolate-covered strawberries simply dip the berries in the warm glaze and let them set on parchment paper.
I’ve personally used this chocolate glaze on countless desserts, and it never fails to impress. It’s become my go-to recipe for adding that final touch of elegance and flavor. I’m confident that it will become one of your favorites too.
So, what are you waiting for? Gather your ingredients, follow the simple steps, and prepare to be amazed. I promise you, this recipe is worth every single minute of effort. It’s a game-changer!
I’m so excited for you to try this recipe and experience the magic of homemade chocolate glaze for yourself. Once you do, I’d absolutely love to hear about your experience! Did you try any variations? What did you glaze? Share your photos and stories in the comments below! Let’s build a community of glaze enthusiasts and inspire each other with our delicious creations. Don’t be shy your feedback is invaluable, and I can’t wait to see what you come up with. Happy glazing!
Chocolate Glaze: The Ultimate Guide to Perfecting Your Dessert
Rich, smooth, and glossy chocolate glaze for cakes, cupcakes, brownies, and more! Simple ingredients, easy to customize.
Ingredients
- 1 cup (2 sticks) unsalted butter, softened
- 3 cups powdered sugar, sifted
- 1 cup unsweetened cocoa powder, sifted
- ½ cup milk (whole milk recommended for richness)
- 1 teaspoon vanilla extract
- ¼ teaspoon salt
- 2 tablespoons light corn syrup (for shine and smoothness)
Instructions
- Cream the Butter: In a large mixing bowl, or the bowl of your stand mixer fitted with the paddle attachment, cream the softened butter until it is light and fluffy (3-5 minutes on medium speed). Scrape down the sides of the bowl occasionally.
- Add the Powdered Sugar: Gradually add the sifted powdered sugar, one cup at a time, to the creamed butter. Mix on low speed. Scrape down the sides of the bowl after each addition.
- Incorporate the Cocoa Powder: Sift the unsweetened cocoa powder and add it to the mixture. Mix on low speed until fully incorporated.
- Add the Milk: Gradually add the milk, starting with about ¼ cup. Mix on low speed until incorporated. Add the remaining milk as needed to reach your desired consistency.
- Add the Vanilla Extract and Salt: Stir in the vanilla extract and salt. Mix until well combined.
- Add the Light Corn Syrup: Add the light corn syrup and mix until fully incorporated.
- Adjust the Consistency: If the glaze is too thick, add a little more milk, one tablespoon at a time. If the glaze is too thin, add a little more sifted powdered sugar, one tablespoon at a time. Mix well after each addition.
- Mix Until Smooth: Continue to mix the glaze on medium speed for another 2-3 minutes, until it is very smooth and glossy.
Notes
- Use high-quality ingredients for the best flavor.
- Sifting the powdered sugar and cocoa powder is essential for a smooth glaze.
- Make sure your butter is softened to room temperature.
- Add the powdered sugar and milk gradually.
- Taste and adjust the sweetness or chocolate intensity to your liking.
- If not using immediately, cover the bowl tightly with plastic wrap, pressing the plastic wrap directly onto the surface of the glaze to prevent a crust from forming.
- If the glaze becomes too thick after sitting, you can gently reheat it in the microwave for a few seconds at a time, stirring in between, until it reaches the desired consistency. Be careful not to overheat it, as this can cause it to separate.

Leave a Comment