Chicken chimichangas, those deep-fried delights bursting with savory filling, are calling your name! Imagine sinking your teeth into a crispy, golden-brown tortilla, giving way to a warm, flavorful mixture of tender chicken, melted cheese, and zesty spices. Is your mouth watering yet? Mine is!
While the exact origins of the chimichanga are debated with competing claims from restaurants in Arizona there’s no denying its Southwestern American and Mexican-American roots. Some say it was a happy accident, a burrito that took an unexpected plunge into a fryer. Others claim it was a deliberate creation, a way to elevate the humble burrito to new heights of deliciousness. Regardless of its true beginning, the chimichanga has become a beloved staple.
People adore chicken chimichangas for so many reasons. The combination of textures is simply irresistible: the satisfying crunch of the fried tortilla against the soft, flavorful filling is a culinary masterpiece. Plus, they’re incredibly versatile! You can customize the filling to your heart’s content, adding your favorite beans, rice, vegetables, and sauces. And let’s be honest, anything deep-fried is just inherently delicious, right? Whether you’re looking for a quick and easy weeknight dinner or a crowd-pleasing appetizer, these are always a hit. So, let’s get cooking and create some unforgettable chicken chimichangas!
Ingredients:
- 1 pound boneless, skinless chicken breasts
- 1 tablespoon olive oil
- 1 medium onion, chopped
- 1 green bell pepper, chopped
- 1 red bell pepper, chopped
- 1 (15 ounce) can black beans, rinsed and drained
- 1 (15 ounce) can corn, drained
- 1 (10 ounce) can diced tomatoes and green chilies (like Rotel), undrained
- 1 packet taco seasoning
- 1/2 cup chicken broth
- 1 cup shredded cheddar cheese
- 1 cup shredded Monterey Jack cheese
- 8 large flour tortillas
- Vegetable oil, for frying
- Optional toppings: sour cream, guacamole, salsa, chopped cilantro
Preparing the Chicken Filling
Alright, let’s get started with the heart of our chimichangas the flavorful chicken filling! This is where we build all those delicious layers of taste that will make your taste buds sing.
- Cook the Chicken: First, we need to cook our chicken. You can do this in a few ways. My favorite is to simply poach the chicken breasts in simmering water until they’re cooked through. This usually takes about 15-20 minutes. Another option is to bake them in the oven at 375°F (190°C) for about 20-25 minutes, or until the internal temperature reaches 165°F (74°C). You can even grill them if you’re feeling adventurous! Once the chicken is cooked, let it cool slightly, then shred it with two forks.
- Sauté the Vegetables: While the chicken is cooking (or after, depending on your method), heat the olive oil in a large skillet over medium heat. Add the chopped onion and bell peppers (both green and red the more color, the better!) and sauté until they’re softened and slightly caramelized. This usually takes about 5-7 minutes. Don’t rush this step; letting the vegetables soften and sweeten really enhances the flavor of the filling.
- Combine the Ingredients: Now, add the shredded chicken, black beans, corn, and diced tomatoes and green chilies (Rotel) to the skillet with the sautéed vegetables. Stir everything together well to combine.
- Season and Simmer: Sprinkle the taco seasoning over the mixture and stir again to ensure everything is evenly coated. Pour in the chicken broth and bring the mixture to a simmer. Reduce the heat to low, cover the skillet, and let it simmer for about 10-15 minutes, stirring occasionally. This allows all the flavors to meld together beautifully and the sauce to thicken slightly. The aroma at this point should be absolutely irresistible!
- Add Cheese (Optional, but Highly Recommended!): Remove the skillet from the heat and stir in about 1/2 cup of the cheddar cheese and 1/2 cup of the Monterey Jack cheese. This will add a creamy, cheesy element to the filling that’s just divine. You can skip this step if you prefer, but I highly recommend it!
Assembling the Chimichangas
Now comes the fun part assembling our chimichangas! This is where we transform our delicious filling into those crispy, golden-brown pockets of goodness.
- Warm the Tortillas: This is a crucial step! Warm the tortillas slightly to make them more pliable and prevent them from tearing when you fold them. You can warm them in a dry skillet over medium heat for a few seconds per side, or wrap them in a damp paper towel and microwave them for about 15-20 seconds.
- Fill the Tortillas: Lay a warm tortilla on a flat surface. Spoon about 1/2 to 3/4 cup of the chicken filling into the center of the tortilla. Don’t overfill them, or they’ll be difficult to fold and may burst during frying.
- Fold the Chimichangas: Fold in the sides of the tortilla over the filling, then tightly roll the tortilla up from the bottom, like you’re making a burrito. Make sure the seam is facing down to help keep the chimichanga closed during frying.
- Repeat: Repeat steps 2 and 3 with the remaining tortillas and filling.
Frying the Chimichangas
Time to get that crispy, golden-brown exterior we all crave! Frying is the traditional method for making chimichangas, and it’s what gives them that signature crunch.
- Heat the Oil: Pour about 1/2 inch of vegetable oil into a large, heavy-bottomed skillet or Dutch oven. Heat the oil over medium-high heat until it reaches a temperature of 350°F (175°C). You can use a deep-fry thermometer to monitor the temperature. If you don’t have a thermometer, you can test the oil by dropping a small piece of tortilla into it. If it sizzles and turns golden brown in about 30 seconds, the oil is ready.
- Fry the Chimichangas: Carefully place the chimichangas, seam-side down, into the hot oil. Don’t overcrowd the skillet; fry them in batches of 2-3 at a time. Fry for about 2-3 minutes per side, or until they’re golden brown and crispy.
- Drain the Excess Oil: Remove the chimichangas from the skillet with a slotted spoon and place them on a wire rack lined with paper towels to drain the excess oil. This will help them stay crispy.
Baking the Chimichangas (Alternative Method)
If you prefer a healthier option or want to avoid the mess of frying, you can bake the chimichangas instead. They won’t be quite as crispy as the fried version, but they’ll still be delicious!
- Preheat the Oven: Preheat your oven to 400°F (200°C).
- Prepare the Baking Sheet: Lightly grease a baking sheet with cooking spray.
- Place the Chimichangas: Place the assembled chimichangas, seam-side down, on the prepared baking sheet.
- Brush with Oil (Optional): For a crispier texture, you can brush the chimichangas with a little bit of olive oil or melted butter.
- Bake: Bake for about 15-20 minutes, or until the chimichangas are golden brown and heated through.
Serving and Topping
The final step serving and topping our glorious chimichangas! This is where you can really customize them to your liking.
- Plate the Chimichangas: Place the cooked chimichangas on plates.
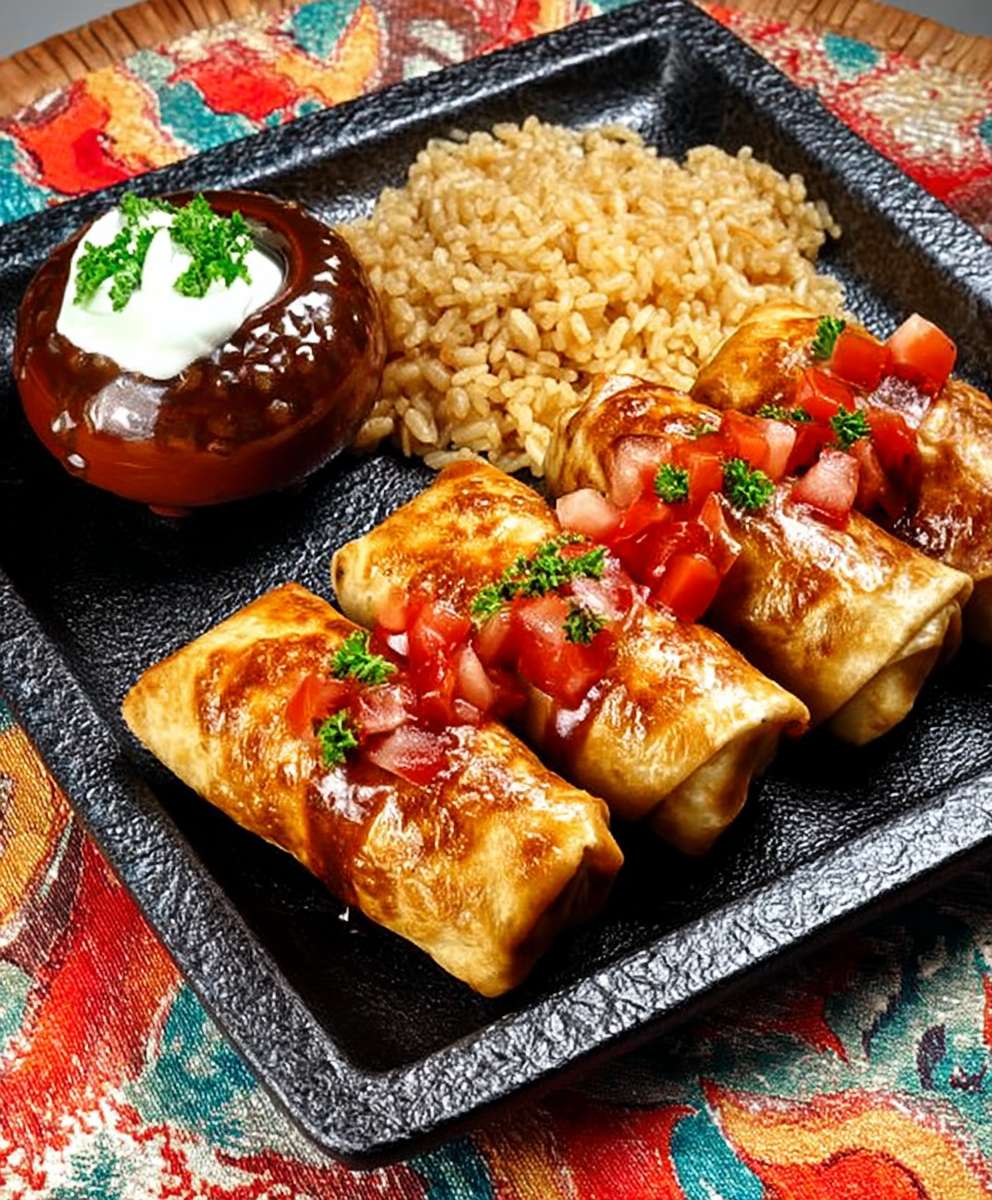
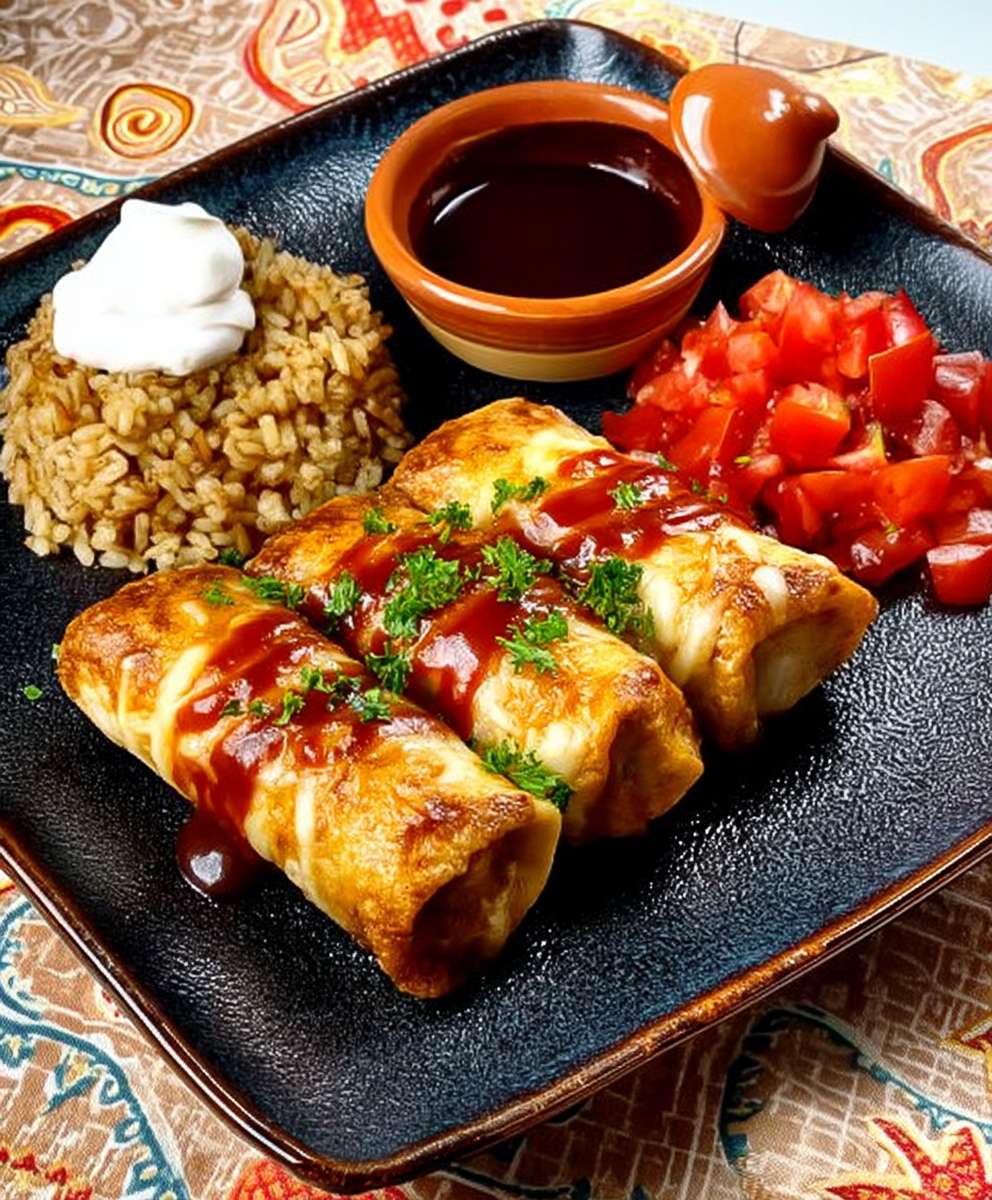
- Add Toppings: Top with your favorite toppings! Some popular choices include sour cream, guacamole, salsa, chopped cilantro, shredded lettuce, and diced tomatoes. You can also drizzle them with some queso or hot sauce for an extra kick.
- Serve Immediately: Serve the chimichangas immediately while they’re hot and crispy. They’re best enjoyed fresh!
Tips and Variations
Spice it Up:
Add a pinch of cayenne pepper or a dash of hot sauce to the chicken filling for a spicier kick.
Cheese Lovers:
Experiment with different types of cheese! Pepper jack, queso fresco, or even a sprinkle of cotija cheese would be delicious.
Vegetarian Option:
Substitute the chicken with crumbled tofu or extra black beans and corn for a vegetarian version.
Make Ahead:
You can assemble the chimichangas ahead of time and store them in the refrigerator for up to 24 hours. Just be sure to fry or bake them right before serving.
Freezing:
Cooked chimichangas can be frozen for later. Let them cool completely, then wrap them individually in plastic wrap and place them in a freezer bag. To reheat, bake them in a preheated oven at 350°F (175°C) until heated through.
Conclusion:
This isn’t just another recipe; it’s your ticket to a fiesta of flavor! These Chicken Chimichangas are a guaranteed crowd-pleaser, offering a delightful combination of crispy, golden-brown tortillas and a savory, satisfying filling. The ease of preparation, coupled with the incredible taste, makes this a must-try for any home cook, regardless of your skill level. Trust me, once you take that first bite, you’ll understand why I’m so excited to share this recipe with you.
But what truly sets these chimichangas apart is their versatility. While the recipe provides a fantastic foundation, feel free to get creative and customize them to your liking. Craving a little extra heat? Add a pinch of cayenne pepper or a dash of your favorite hot sauce to the chicken mixture. Want to incorporate more veggies? Bell peppers, onions, and corn are all excellent additions. And don’t even get me started on the cheese possibilities! Monterey Jack, cheddar, or even a blend of Mexican cheeses will melt beautifully and add a rich, creamy element.
Beyond the filling, consider the endless serving options. For a classic presentation, serve your Chicken Chimichangas with a generous dollop of sour cream, a scoop of guacamole, and a vibrant pico de gallo. A side of Mexican rice and refried beans completes the meal, creating a truly authentic and satisfying experience. Alternatively, you can slice the chimichangas into smaller pieces and serve them as appetizers at your next party. They’re always a hit!
Looking for even more variations? Try baking the chimichangas instead of frying them for a healthier option. Simply brush them with a little oil and bake at 375°F (190°C) until golden brown and crispy. You can also experiment with different dipping sauces. A creamy cilantro-lime sauce, a spicy chipotle mayo, or even a simple cheese sauce would all be delicious accompaniments.
I truly believe that this recipe for Chicken Chimichangas will become a staple in your kitchen. It’s quick, easy, and incredibly delicious. Plus, it’s a fantastic way to use up leftover cooked chicken. So, what are you waiting for? Gather your ingredients, preheat your oven (or frying pan!), and get ready to create some culinary magic.
I’m so confident that you’ll love these chimichangas that I can’t wait to hear about your experience. Did you try any variations? What were your favorite toppings? Did you make them for a special occasion? Please, share your thoughts and photos in the comments below. Your feedback is invaluable, and I’m always eager to learn from your culinary adventures. Happy cooking, and enjoy your delicious homemade Chicken Chimichangas! I hope this recipe brings as much joy to your table as it has to mine. Don’t forget to rate the recipe and share it with your friends and family! Let’s spread the chimichanga love!
Chicken Chimichangas: The Ultimate Recipe & Guide
Crispy, golden-brown chicken chimichangas filled with a flavorful mix of chicken, beans, corn, peppers, and cheese. Perfect for a fun and satisfying meal!
Ingredients
- 1 pound boneless, skinless chicken breasts
- 1 tablespoon olive oil
- 1 medium onion, chopped
- 1 green bell pepper, chopped
- 1 red bell pepper, chopped
- 1 (15 ounce) can black beans, rinsed and drained
- 1 (15 ounce) can corn, drained
- 1 (10 ounce) can diced tomatoes and green chilies (like Rotel), undrained
- 1 packet taco seasoning
- 1/2 cup chicken broth
- 1 cup shredded cheddar cheese
- 1 cup shredded Monterey Jack cheese
- 8 large flour tortillas
- Vegetable oil, for frying
- Optional toppings: sour cream, guacamole, salsa, chopped cilantro
Instructions
- Cook the Chicken: Poach, bake, or grill chicken breasts until cooked through. Shred with two forks.
- Sauté the Vegetables: Heat olive oil in a skillet over medium heat. Add chopped onion and bell peppers and sauté until softened (5-7 minutes).
- Combine the Ingredients: Add shredded chicken, black beans, corn, and diced tomatoes and green chilies (Rotel) to the skillet. Stir to combine.
- Season and Simmer: Sprinkle taco seasoning over the mixture and stir. Pour in chicken broth, bring to a simmer, reduce heat, cover, and simmer for 10-15 minutes, stirring occasionally.
- Add Cheese (Optional): Remove from heat and stir in 1/2 cup cheddar and 1/2 cup Monterey Jack cheese.
- Warm the Tortillas: Warm tortillas slightly to make them pliable.
- Fill the Tortillas: Lay a warm tortilla on a flat surface. Spoon about 1/2 to 3/4 cup of the chicken filling into the center of the tortilla.
- Fold the Chimichangas: Fold in the sides of the tortilla over the filling, then tightly roll the tortilla up from the bottom, like you’re making a burrito. Make sure the seam is facing down to help keep the chimichanga closed during frying.
- Repeat: Repeat steps 2 and 3 with the remaining tortillas and filling.
- Heat the Oil: Pour about 1/2 inch of vegetable oil into a large, heavy-bottomed skillet or Dutch oven. Heat the oil over medium-high heat until it reaches a temperature of 350°F (175°C).
- Fry the Chimichangas: Carefully place the chimichangas, seam-side down, into the hot oil. Don’t overcrowd the skillet; fry them in batches of 2-3 at a time. Fry for about 2-3 minutes per side, or until they’re golden brown and crispy.
- Drain the Excess Oil: Remove the chimichangas from the skillet with a slotted spoon and place them on a wire rack lined with paper towels to drain the excess oil.
- Preheat the Oven: Preheat your oven to 400°F (200°C).
- Prepare the Baking Sheet: Lightly grease a baking sheet with cooking spray.
- Place the Chimichangas: Place the assembled chimichangas, seam-side down, on the prepared baking sheet.
- Brush with Oil (Optional): For a crispier texture, you can brush the chimichangas with a little bit of olive oil or melted butter.
- Bake: Bake for about 15-20 minutes, or until the chimichangas are golden brown and heated through.
- Plate the Chimichangas: Place the cooked chimichangas on plates.
- Add Toppings: Top with your favorite toppings! Some popular choices include sour cream, guacamole, salsa, chopped cilantro, shredded lettuce, and diced tomatoes. You can also drizzle them with some queso or hot sauce for an extra kick.
- Serve Immediately: Serve the chimichangas immediately while they’re hot and crispy.
Notes
- Spice it Up: Add cayenne pepper or hot sauce to the filling for a spicier kick.
- Cheese Lovers: Experiment with different cheeses like pepper jack or queso fresco.
- Vegetarian Option: Substitute chicken with crumbled tofu or extra beans and corn.
- Make Ahead: Assemble chimichangas ahead of time and refrigerate for up to 24 hours.
- Freezing: Cooked chimichangas can be frozen. Cool completely, wrap individually, and freeze. Reheat in a preheated oven at 350°F (175°C) until heated through.


Leave a Comment