Description
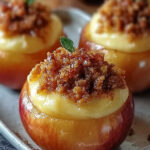
Enjoy the perfect blend of tart apples and creamy cheesecake in these Cheesecake Stuffed Baked Apples. Baked until tender and topped with caramel sauce, they make a comforting dessert that’s delightful when served warm, especially with a scoop of vanilla ice cream.
Ingredients
Scale
- 4 medium-sized apples (Granny Smith or Honeycrisp)
- 1 cup cream cheese, softened
- 1/2 cup granulated sugar
- 1/2 teaspoon vanilla extract
- 1/2 teaspoon ground cinnamon
- 1/4 teaspoon salt
- 1/2 cup sour cream
- 1/4 cup all-purpose flour
- 1/4 cup chopped walnuts or pecans (optional)
- 1/4 cup raisins or dried cranberries (optional)
- 2 tablespoons unsalted butter, melted
- 1 tablespoon brown sugar
- 1/2 teaspoon ground nutmeg
- 1/4 cup caramel sauce (for drizzling, optional)
Instructions
- Preheat your oven to 350°F (175°C).
- Wash the apples thoroughly under running water to remove any dirt or wax.
- Using a sharp knife or an apple corer, carefully remove the core from each apple, making sure to leave the bottom intact to hold the filling.
- Using a small paring knife, gently carve out a bit of the flesh from the inside of each apple to create more space for the cheesecake filling. Be careful not to puncture the skin.
- In a small bowl, mix the melted butter, brown sugar, and ground cinnamon. Brush this mixture over the outside of each apple to enhance their flavor and help them caramelize while baking.
- In a large mixing bowl, combine the softened cream cheese and granulated sugar. Using an electric mixer, beat on medium speed until the mixture is smooth and creamy, about 2-3 minutes.
- Add the vanilla extract, ground cinnamon, and salt to the cream cheese mixture. Mix until well combined.
- Incorporate the sour cream into the mixture, blending until smooth.
- Gradually add the all-purpose flour, mixing until just combined. Be careful not to overmix.
- If using, fold in the chopped walnuts or pecans and raisins or dried cranberries for added texture and flavor.
- Using a spoon or a piping bag, carefully fill each apple with the cheesecake filling. Pack it in gently but firmly, ensuring that the filling is heaped slightly above the rim of the apple.
- Place the stuffed apples upright in a baking dish. If they are wobbly, you can slice a small amount off the bottom of each apple to create a flat surface.
- Once all the apples are stuffed and placed in the baking dish, pour about 1/2 cup of water into the bottom of the dish. This will create steam while baking, helping to keep the apples moist.
- Cover the baking dish with aluminum foil to prevent the tops from browning too quickly.
- Bake in the preheated oven for 25 minutes covered, then remove the foil and bake for an additional 15-20 minutes, or until the apples are tender and the cheesecake filling is set and slightly golden on top.
- Check for doneness by inserting a toothpick into the apple; it should slide in easily when the apples are done.
- Once the apples are baked, remove them from the oven and let them cool for about 10 minutes before serving.
- For an extra touch, drizzle caramel sauce over the top of each stuffed apple just before serving.
- Serve warm, either on their own or with a scoop of vanilla ice cream for a delightful dessert experience.
- Enjoy your delicious cheesecake stuffed baked apples as a comforting dessert that combines the flavors of cheesecake and baked apples in every bite!
Notes
- Feel free to customize the filling by adding your favorite nuts or dried fruits.
- These stuffed apples can be stored in the refrigerator for up to 3 days. Reheat in the oven or microwave before serving.
- Prep Time: 20 minutes
- Cook Time: 40-45 minutes
