

Baked French Fries: Crispy on the outside, fluffy on the inside, and without the guilt of deep-frying? Yes, please! Forget soggy, sad attempts at oven-baked fries we’re about to unlock the secrets to achieving truly crave-worthy baked French fries that rival your favorite restaurant version.
The humble French fry, a seemingly simple side dish, boasts a surprisingly rich history. While its exact origins are debated between France and Belgium, one thing is certain: the French fry has become a global phenomenon. From street vendors to Michelin-starred restaurants, this potato preparation has captured hearts (and stomachs) worldwide. But let’s be honest, the traditional deep-fried method isn’t always the healthiest option. That’s where our baked version comes in!
What makes French fries so irresistible? It’s the perfect combination of textures the satisfying crunch followed by the soft, potatoey interior. People adore them for their versatility; they’re the ideal accompaniment to burgers, sandwiches, or even enjoyed as a snack on their own. And while convenience is key in today’s busy world, we often sacrifice flavor for speed. But with this recipe, you don’t have to choose! These baked French fries are surprisingly easy to make, requiring minimal effort for maximum flavor payoff. Get ready to experience the joy of homemade fries, guilt-free!

Ingredients:
- 4 large russet potatoes, peeled and cut into ½-inch thick fries
- 2 tablespoons olive oil
- 1 teaspoon garlic powder
- 1 teaspoon onion powder
- 1 teaspoon smoked paprika
- ½ teaspoon dried oregano
- ½ teaspoon dried thyme
- ½ teaspoon salt, or to taste
- ¼ teaspoon black pepper, or to taste
- Optional: Fresh parsley, chopped, for garnish
Preparing the Potatoes:
Okay, let’s get started! The key to crispy baked fries is all in the preparation. We need to make sure we remove excess starch from the potatoes. Trust me, this step is crucial!
- Rinse the cut fries: Place the cut fries in a large bowl and cover them with cold water. Gently rub the fries together to release the starch. Drain the water and repeat this process at least three times, or until the water runs clear. This usually takes about 5-7 minutes of rinsing. Don’t skip this!
- Soak the fries (optional, but highly recommended): After rinsing, fill the bowl with fresh cold water and let the fries soak for at least 30 minutes, or even up to 2 hours in the refrigerator. Soaking helps draw out even more starch, resulting in crispier fries. I usually aim for an hour if I have the time.
- Dry the fries thoroughly: This is another super important step! After soaking, drain the fries well. Spread them out in a single layer on a clean kitchen towel or several layers of paper towels. Pat them completely dry. You want to remove as much moisture as possible. The drier they are, the crispier they’ll get in the oven. I sometimes even use a second towel to make sure they’re really dry.
Seasoning the Fries:
Now for the fun part adding all that delicious flavor! I love this spice blend, but feel free to experiment with your own favorite seasonings.
- Preheat the oven: Preheat your oven to 400°F (200°C). Make sure your oven is fully preheated before you put the fries in.
- Prepare the baking sheet: Line a large baking sheet with parchment paper. This will prevent the fries from sticking and make cleanup a breeze. I prefer parchment paper over aluminum foil for this recipe.
- Toss with oil and spices: In a large bowl, toss the dried fries with olive oil, garlic powder, onion powder, smoked paprika, dried oregano, dried thyme, salt, and pepper. Make sure the fries are evenly coated with the oil and spices. I like to use my hands to really get in there and make sure everything is well distributed.
Baking the Fries:
The baking process is where the magic happens. We want to achieve that perfect balance of crispy on the outside and fluffy on the inside.
- Arrange the fries on the baking sheet: Spread the seasoned fries in a single layer on the prepared baking sheet. Make sure the fries are not overcrowded, as this will cause them to steam instead of bake and crisp up. If necessary, use two baking sheets.
- Bake the fries: Bake for 20 minutes.
- Flip the fries: After 20 minutes, carefully flip the fries with a spatula. This ensures even browning on both sides.
- Continue baking: Continue baking for another 15-20 minutes, or until the fries are golden brown and crispy. Keep an eye on them, as baking times may vary depending on your oven. I usually check them every 5 minutes after the initial flip to make sure they don’t burn.
- Check for doneness: To test for doneness, pierce a fry with a fork. It should be tender on the inside and crispy on the outside. If they’re not quite crispy enough, you can bake them for a few more minutes.
Serving and Enjoying:
Finally, the moment we’ve all been waiting for! Time to enjoy those delicious, homemade baked fries.
- Remove from oven: Once the fries are golden brown and crispy, remove them from the oven.
- Season to taste: If desired, sprinkle with a little extra salt and pepper to taste.
- Garnish (optional): Garnish with fresh chopped parsley for a pop of color and freshness.
- Serve immediately: Serve the baked fries immediately while they are hot and crispy. They are best enjoyed fresh out of the oven.
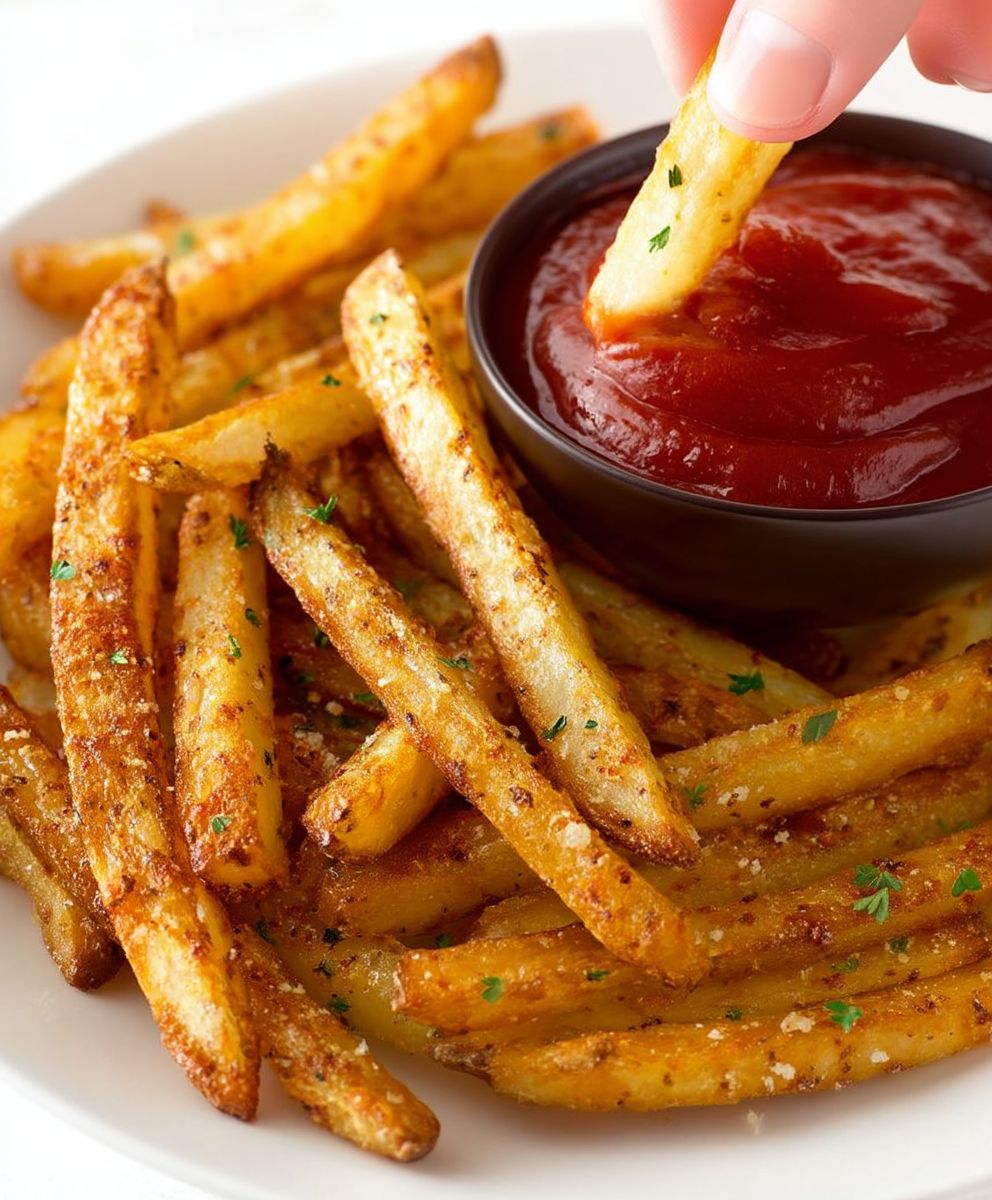
- Dipping sauces: Serve with your favorite dipping sauces, such as ketchup, mayonnaise, ranch dressing, or aioli. I personally love them with a spicy sriracha mayo!
Tips for Extra Crispy Fries:
- High Heat: Don’t be afraid to use a high oven temperature. 400°F (200°C) is ideal for achieving that crispy exterior.
- Don’t Overcrowd: As mentioned before, overcrowding the baking sheet will lead to steamed, not crispy, fries. Use two baking sheets if necessary.
- Elevated Baking Sheet: Consider using a wire rack placed on top of your baking sheet. This allows for better air circulation around the fries, promoting even crisping.
- Starch Removal is Key: I can’t stress this enough! The more starch you remove, the crispier your fries will be.
- Dry, Dry, Dry: Make sure those fries are bone dry before you toss them with oil and spices.
- Spice it Up: Feel free to experiment with different spice combinations. Cajun seasoning, chili powder, or even a sprinkle of parmesan cheese can add a unique flavor.
- Don’t be Afraid to Bake Longer: If your fries aren’t crispy enough after the initial baking time, don’t hesitate to bake them for a few more minutes. Just keep a close eye on them to prevent burning.
Variations:
- Sweet Potato Fries: Substitute russet potatoes with sweet potatoes for a sweeter and more nutritious option. The baking time may need to be adjusted slightly.
- Spicy Fries: Add a pinch of cayenne pepper or chili flakes to the spice mixture for a spicy kick.
- Garlic Parmesan Fries: After baking, toss the fries with grated parmesan cheese and minced garlic for a savory and cheesy treat.
- Rosemary Garlic Fries: Add fresh rosemary sprigs to the baking sheet along with the fries for an aromatic and flavorful twist.
- Lemon Pepper Fries: Use lemon pepper seasoning instead of the other spices for a zesty and refreshing flavor.
Troubleshooting:
- Fries are not crispy: Make sure you rinsed and soaked the fries properly to remove excess starch. Also, ensure that the fries are completely dry before baking and that the baking sheet is not overcrowded.
- Fries are burning: Reduce the oven temperature slightly and keep a closer eye on the fries during the last few minutes of baking.
- Fries are sticking to the baking sheet: Make sure you are using parchment paper or a non-stick baking sheet.
- Fries are soggy: This is usually caused by overcrowding the baking sheet or not drying the fries thoroughly enough.
I hope you enjoy these baked fries as much as I do! They’re a healthier and just as delicious alternative to traditional fried fries. Happy cooking!
Conclusion:
So there you have it! These Baked French Fries are truly a game-changer. Forget soggy, greasy fries we’re talking crispy, golden perfection, all without the guilt of deep-frying. I know, I know, it sounds too good to be true, but trust me, one bite and you’ll be hooked. The combination of the perfectly seasoned potatoes and the high-heat baking method creates an irresistible texture that rivals any restaurant fry.
But why are these a must-try? Well, beyond the obvious health benefits, they’re incredibly versatile and customizable. They’re also surprisingly easy to make! No fancy equipment or complicated techniques required. Just a few simple ingredients and a little bit of patience, and you’ll be enjoying a batch of these delectable fries in no time. Plus, think of all the money you’ll save by making your own fries at home! No more expensive takeout orders when you’re craving that salty, crispy goodness.
And the possibilities don’t stop there! These fries are fantastic on their own, dipped in your favorite ketchup, aioli, or even a spicy sriracha mayo. But why not get creative? Try serving them alongside a juicy burger, a grilled chicken sandwich, or even as a side dish to a hearty steak. They’re also a great addition to a loaded fries platter, topped with cheese, bacon, and all your favorite fixings.
Looking for some variations? Experiment with different seasonings! Garlic powder, onion powder, paprika, chili powder, or even a sprinkle of parmesan cheese can add a unique twist to your fries. You could also try using different types of potatoes, such as sweet potatoes or Yukon gold potatoes, for a different flavor and texture. For a truly decadent treat, try drizzling them with truffle oil after baking. The possibilities are endless!
Im confident that once you try this recipe, youll add it to your regular rotation. It’s a crowd-pleaser, a healthy alternative to traditional fries, and a fun way to get creative in the kitchen. Baked French Fries are a simple pleasure that everyone can enjoy.
So, what are you waiting for? Grab your potatoes, preheat your oven, and get ready to experience the best baked fries you’ve ever had. I’m so excited for you to try this recipe and discover just how delicious and easy it is to make your own crispy, golden fries at home.
And most importantly, I want to hear about your experience! Did you try any variations? What were your favorite dipping sauces? Did you make them for a special occasion? Share your photos and stories in the comments below. I can’t wait to see what you create! Happy cooking! Let me know if you have any questions, and I’ll do my best to help. Enjoy your homemade, healthy, and utterly delicious baked fries!
Baked French Fries: The Crispiest, Healthier Recipe You'll Ever Make
Crispy, flavorful baked fries made with russet potatoes and savory spices. A healthier, delicious alternative to fried fries!
Ingredients
- 4 large russet potatoes, peeled and cut into ½-inch thick fries
- 2 tablespoons olive oil
- 1 teaspoon garlic powder
- 1 teaspoon onion powder
- 1 teaspoon smoked paprika
- ½ teaspoon dried oregano
- ½ teaspoon dried thyme
- ½ teaspoon salt, or to taste
- ¼ teaspoon black pepper, or to taste
- Optional: Fresh parsley, chopped, for garnish
Instructions
- Rinse the cut fries: Place the cut fries in a large bowl and cover them with cold water. Gently rub the fries together to release the starch. Drain the water and repeat this process at least three times, or until the water runs clear.
- Soak the fries (optional, but highly recommended): After rinsing, fill the bowl with fresh cold water and let the fries soak for at least 30 minutes, or even up to 2 hours in the refrigerator.
- Dry the fries thoroughly: After soaking, drain the fries well. Spread them out in a single layer on a clean kitchen towel or several layers of paper towels. Pat them completely dry.
- Preheat the oven: Preheat your oven to 400°F (200°C).
- Prepare the baking sheet: Line a large baking sheet with parchment paper.
- Toss with oil and spices: In a large bowl, toss the dried fries with olive oil, garlic powder, onion powder, smoked paprika, dried oregano, dried thyme, salt, and pepper. Make sure the fries are evenly coated with the oil and spices.
- Arrange the fries on the baking sheet: Spread the seasoned fries in a single layer on the prepared baking sheet. Make sure the fries are not overcrowded. If necessary, use two baking sheets.
- Bake the fries: Bake for 20 minutes.
- Flip the fries: After 20 minutes, carefully flip the fries with a spatula.
- Continue baking: Continue baking for another 15-20 minutes, or until the fries are golden brown and crispy.
- Check for doneness: To test for doneness, pierce a fry with a fork. It should be tender on the inside and crispy on the outside. If they’re not quite crispy enough, you can bake them for a few more minutes.
- Remove from oven: Once the fries are golden brown and crispy, remove them from the oven.
- Season to taste: If desired, sprinkle with a little extra salt and pepper to taste.
- Garnish (optional): Garnish with fresh chopped parsley for a pop of color and freshness.
- Serve immediately: Serve the baked fries immediately while they are hot and crispy.
- Dipping sauces: Serve with your favorite dipping sauces, such as ketchup, mayonnaise, ranch dressing, or aioli.
Notes
- For extra crispy fries, ensure thorough starch removal by rinsing and soaking the potatoes.
- Dry the fries completely before tossing with oil and spices.
- Don’t overcrowd the baking sheet; use two if necessary.
- Consider using a wire rack on top of the baking sheet for better air circulation.
- Adjust baking time as needed based on your oven.
- Experiment with different spice combinations to customize the flavor.


Leave a Comment