

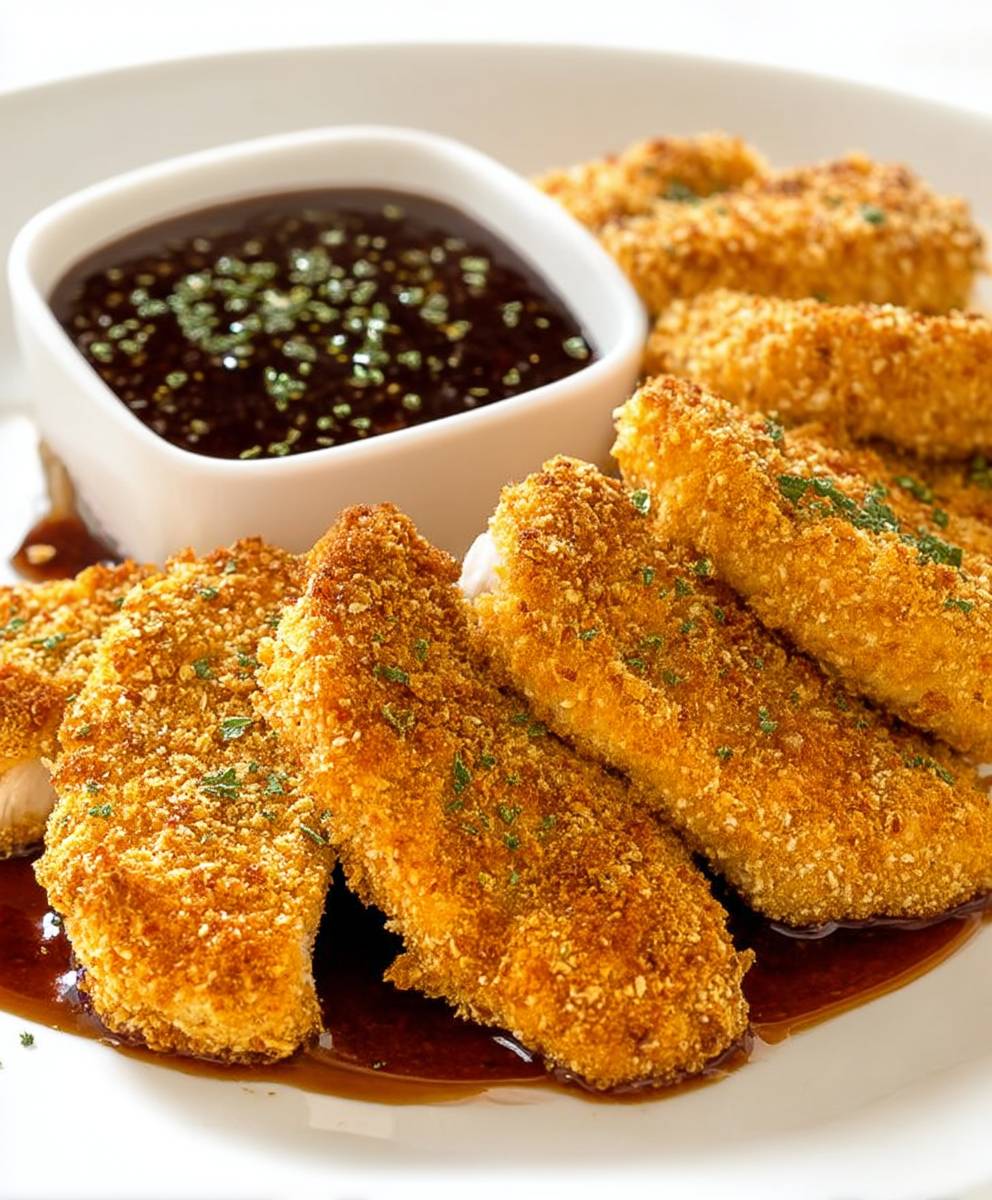
Baked Chicken Tenders: Forget everything you thought you knew about this classic comfort food! Are you ready to experience chicken tenders that are crispy, juicy, and unbelievably delicious, all without a single drop of oil? I’m about to share my secret to achieving perfectly baked chicken tenders that will rival your favorite restaurant version, but are healthier and easier to make at home.
Chicken tenders, in their various forms, have been a staple on American menus for decades, evolving from simple fried fare to a canvas for culinary creativity. While the deep-fried version is undeniably tempting, it often leaves you feeling guilty and sluggish. That’s where this baked version shines!
People adore chicken tenders for their satisfying crunch, tender interior, and versatility. They’re perfect for kids and adults alike, and can be enjoyed as a snack, appetizer, or main course. My baked version retains all the qualities you love the crispy coating, the juicy chicken but eliminates the excess fat and calories. Plus, cleanup is a breeze! Get ready to enjoy the best baked chicken tenders you’ve ever tasted!

Ingredients:
- 2 lbs boneless, skinless chicken breasts, cut into 1-inch thick strips
- 1 cup all-purpose flour
- 1 teaspoon salt
- 1/2 teaspoon black pepper
- 1 teaspoon garlic powder
- 1 teaspoon onion powder
- 1/2 teaspoon paprika
- 1/2 teaspoon dried thyme
- 2 large eggs
- 1/4 cup milk
- 2 cups panko breadcrumbs
- 1/2 cup grated Parmesan cheese
- 1/4 cup olive oil
- Cooking spray
Preparing the Chicken and Breading Station
- Prepare the Chicken: First things first, let’s get our chicken ready. Take your boneless, skinless chicken breasts and cut them into strips that are about 1-inch thick. This size is perfect for even cooking and a satisfying bite. Make sure they are all roughly the same size so they cook at the same rate.
- Set up the Flour Mixture: In a shallow dish, whisk together the all-purpose flour, salt, black pepper, garlic powder, onion powder, paprika, and dried thyme. This seasoned flour mixture will be the first layer of our breading, helping the egg wash adhere properly and adding a ton of flavor. Make sure all the spices are evenly distributed throughout the flour.
- Prepare the Egg Wash: In another shallow dish, whisk together the eggs and milk until they are well combined. The egg wash acts as a glue, allowing the panko breadcrumbs to stick to the chicken. Ensure there are no streaks of egg white remaining; a homogenous mixture is key.
- Create the Panko Mixture: In a third shallow dish, combine the panko breadcrumbs and grated Parmesan cheese. The panko breadcrumbs provide a fantastic crispy texture, while the Parmesan cheese adds a savory, cheesy flavor that complements the chicken beautifully. Mix them thoroughly to ensure even distribution.
Breading the Chicken Tenders
- Dredge in Flour: Take each chicken strip and dredge it in the flour mixture, making sure to coat it completely. Shake off any excess flour; we want a thin, even coating, not a thick layer. This step is crucial for the egg wash to adhere properly.
- Dip in Egg Wash: Next, dip the floured chicken strip into the egg wash, ensuring it’s fully coated. Let any excess egg wash drip off before moving on to the next step. This helps prevent the breadcrumbs from becoming soggy.
- Coat with Panko: Finally, dredge the chicken strip in the panko breadcrumb mixture, pressing gently to ensure the breadcrumbs adhere well. Make sure the entire surface of the chicken is covered with breadcrumbs. A generous coating is what gives us that amazing crispy texture.
- Repeat: Repeat the breading process for all the remaining chicken strips. It might get a little messy, but trust me, it’s worth it!
Baking the Chicken Tenders
- Prepare the Baking Sheet: Preheat your oven to 400°F (200°C). Line a baking sheet with parchment paper for easy cleanup. Then, lightly spray the parchment paper with cooking spray. This will prevent the chicken tenders from sticking and help them crisp up nicely on the bottom.
- Arrange the Chicken: Arrange the breaded chicken tenders on the prepared baking sheet in a single layer, making sure they are not touching. Overcrowding the baking sheet will cause the chicken to steam instead of bake, resulting in less crispy tenders.
- Drizzle with Olive Oil: Drizzle the chicken tenders with olive oil. This will help them brown and crisp up beautifully in the oven. You can use a pastry brush to ensure even distribution of the oil.
- Bake: Bake for 20-25 minutes, or until the chicken is cooked through and the breadcrumbs are golden brown and crispy. The internal temperature of the chicken should reach 165°F (74°C). Use a meat thermometer to check for doneness.
- Optional Broiling: For extra crispy tenders, you can broil them for the last 1-2 minutes, keeping a close eye on them to prevent burning. The broiling will give them a nice golden-brown color and an extra crunch.
- Rest: Remove the baking sheet from the oven and let the chicken tenders rest for a few minutes before serving. This allows the juices to redistribute, resulting in more tender and flavorful chicken.
Serving Suggestions
These baked chicken tenders are incredibly versatile and can be served with a variety of dipping sauces. Here are a few of my favorites:
- Honey Mustard
- BBQ Sauce
- Ranch Dressing
- Ketchup
- Sweet Chili Sauce
You can also serve them as part of a larger meal with sides like:
- French Fries
- Mashed Potatoes
- Coleslaw
- Corn on the Cob
- Salad
These baked chicken tenders are also great for making chicken sandwiches, wraps, or salads. The possibilities are endless!
Tips for Perfect Baked Chicken Tenders
- Don’t Overcrowd the Baking Sheet: As mentioned earlier, overcrowding the baking sheet will cause the chicken to steam instead of bake, resulting in less crispy tenders. Bake in batches if necessary.
- Use Fresh Panko Breadcrumbs: Fresh panko breadcrumbs will give you the best crispy texture. If your panko breadcrumbs are stale, they won’t crisp up as well.
- Don’t Skip the Olive Oil: The olive oil is essential for browning and crisping up the chicken tenders. Don’t skip this step!
- Check for Doneness: Use a meat thermometer to ensure the chicken is cooked through. The internal temperature should reach 165°F (74°C).
- Let Rest Before Serving: Letting the chicken tenders rest for a few minutes before serving allows the juices to redistribute, resulting in more tender and flavorful chicken.
Variations
Want to mix things up a bit? Here are a few variations you can try:
- Spicy Chicken Tenders: Add a pinch of cayenne pepper or a dash of hot sauce to the flour mixture for a spicy kick.
- Italian Chicken Tenders: Add Italian seasoning to the flour mixture and use Italian-style breadcrumbs instead of panko.
- Lemon Pepper Chicken Tenders: Add lemon zest and lemon pepper seasoning to the flour mixture.
- Gluten-Free Chicken Tenders: Use gluten-free flour and gluten-free breadcrumbs.
Make-Ahead Instructions
You can prepare the chicken tenders ahead of time and bake them later. Here’s how:
- Bread the Chicken: Follow the breading instructions as outlined above.
- Arrange on Baking Sheet: Arrange the breaded chicken tenders on a baking sheet lined with parchment paper.
- Freeze: Freeze the baking sheet with the chicken tenders for at least 2 hours, or until the chicken is frozen solid.
- Transfer to Freezer Bag: Transfer the frozen chicken tenders to a freezer bag or airtight container.
- Store: Store in the freezer for up to 3 months.
- Bake: When ready to bake, preheat your oven to 400°F (200°C). Arrange the frozen chicken tenders on a baking sheet lined with parchment paper and bake for 25-30 minutes, or until cooked through and golden brown.
Storage Instructions
Leftover baked chicken tenders can be stored in an airtight container in the refrigerator for up to 3-4 days. Reheat them in the oven or microwave until heated through.
Nutritional Information (Approximate)
Per serving (4 chicken tenders):
- Calories: 350
- Protein: 35g
- Fat: 15g
- Carbohydrates: 20g
- Fiber: 1g
- Sugar: 2g
Note: Nutritional information is approximate and may vary depending on the specific ingredients used.
Conclusion:
So there you have it! These Baked Chicken Tenders are truly a game-changer. Forget greasy, unhealthy fast food this recipe delivers all the crispy, juicy goodness you crave, but with a fraction of the guilt and a whole lot more flavor. I genuinely believe this will become a staple in your kitchen, just like it has in mine.
Why is this recipe a must-try? Well, let’s recap. First, it’s incredibly easy. We’re talking minimal prep time and simple ingredients that you probably already have in your pantry. Second, it’s healthy-ish! Baking instead of frying significantly reduces the fat content, making it a much better option for a quick and satisfying meal. Third, and perhaps most importantly, they taste amazing! The combination of the crispy coating and the tender, juicy chicken is simply irresistible. My family devours these every single time I make them.
But the best part about this recipe is its versatility. These Baked Chicken Tenders are fantastic on their own, dipped in your favorite sauce. Think classic ketchup, tangy BBQ sauce, creamy ranch, or even a spicy sriracha mayo for a little kick. But don’t stop there! Get creative with your serving suggestions.
Consider slicing them up and adding them to a fresh salad for a protein-packed lunch. They’re also perfect for wrapping in tortillas with some lettuce, tomato, and cheese for a quick and easy chicken wrap. And if you’re feeling adventurous, try using them as a topping for homemade pizzas or even as a filling for delicious chicken parmesan sandwiches.
Looking for variations? Absolutely! Feel free to experiment with different seasonings in the breadcrumb mixture. Add a pinch of cayenne pepper for a little heat, some garlic powder for extra flavor, or even some Italian seasoning for a more Mediterranean twist. You can also try using different types of breadcrumbs, such as panko breadcrumbs for an extra crispy texture.
Another fun variation is to use different types of dipping sauces. Instead of the usual suspects, try a honey mustard sauce, a sweet chili sauce, or even a homemade avocado crema. The possibilities are endless!
I truly believe that these Baked Chicken Tenders will become a family favorite. They’re perfect for busy weeknights, quick lunches, or even as a party appetizer. They’re also a great way to get kids involved in the kitchen, as they’re easy to make and fun to eat.
So, what are you waiting for? Grab your ingredients, preheat your oven, and get ready to experience the best baked chicken tenders you’ve ever had. I’m confident that you’ll love them as much as I do.
And now for the most important part: I want to hear from you! Once you’ve tried this recipe, please come back and share your experience in the comments below. Let me know what you thought, what variations you tried, and what dipping sauces you used. I’m always looking for new ideas and inspiration, and I love hearing from my readers.
Don’t forget to snap a picture of your delicious Baked Chicken Tenders and share it on social media using your favorite hashtag. I can’t wait to see your creations! Happy cooking!
Baked Chicken Tenders: The Crispiest, Healthier Recipe You'll Ever Make
Crispy, oven-baked chicken tenders that are healthier than fried, but just as delicious! Perfect for a quick weeknight meal, kid-friendly lunches, or a party appetizer.
Ingredients
- 2 lbs boneless, skinless chicken breasts, cut into 1-inch thick strips
- 1 cup all-purpose flour
- 1 teaspoon salt
- 1/2 teaspoon black pepper
- 1 teaspoon garlic powder
- 1 teaspoon onion powder
- 1/2 teaspoon paprika
- 1/2 teaspoon dried thyme
- 2 large eggs
- 1/4 cup milk
- 2 cups panko breadcrumbs
- 1/2 cup grated Parmesan cheese
- 1/4 cup olive oil
- Cooking spray
Instructions
- Prepare the Chicken: Cut chicken breasts into 1-inch thick strips.
- Set up Flour Mixture: In a shallow dish, whisk together flour, salt, pepper, garlic powder, onion powder, paprika, and thyme.
- Prepare Egg Wash: In another shallow dish, whisk together eggs and milk.
- Create Panko Mixture: In a third shallow dish, combine panko breadcrumbs and Parmesan cheese.
- Dredge in Flour: Dredge each chicken strip in the flour mixture, shaking off excess.
- Dip in Egg Wash: Dip the floured chicken strip into the egg wash, letting excess drip off.
- Coat with Panko: Dredge the chicken strip in the panko breadcrumb mixture, pressing gently to adhere.
- Repeat: Repeat the breading process for all remaining chicken strips.
- Prepare Baking Sheet: Preheat oven to 400°F (200°C). Line a baking sheet with parchment paper and spray with cooking spray.
- Arrange the Chicken: Arrange breaded chicken tenders on the prepared baking sheet in a single layer, not touching.
- Drizzle with Olive Oil: Drizzle the chicken tenders with olive oil.
- Bake: Bake for 20-25 minutes, or until chicken is cooked through (internal temperature of 165°F/74°C) and breadcrumbs are golden brown and crispy.
- Optional Broiling: For extra crispy tenders, broil for the last 1-2 minutes, watching carefully.
- Rest: Let the chicken tenders rest for a few minutes before serving.
Notes
- Don’t overcrowd the baking sheet for optimal crispiness.
- Use fresh panko breadcrumbs for the best texture.
- Don’t skip the olive oil, it’s essential for browning.
- Use a meat thermometer to ensure the chicken is cooked through.
- Let the chicken rest before serving for juicier tenders.
- Serve with your favorite dipping sauces like honey mustard, BBQ sauce, ranch, ketchup, or sweet chili sauce.
- Great served with sides like french fries, mashed potatoes, coleslaw, corn on the cob, or salad.
- Can be used in chicken sandwiches, wraps, or salads.
- Make-Ahead Instructions: Bread the chicken, freeze on a baking sheet, then transfer to a freezer bag. Bake from frozen for 25-30 minutes at 400°F (200°C).
- Storage Instructions: Store leftovers in an airtight container in the refrigerator for up to 3-4 days. Reheat in the oven or microwave.


Leave a Comment