

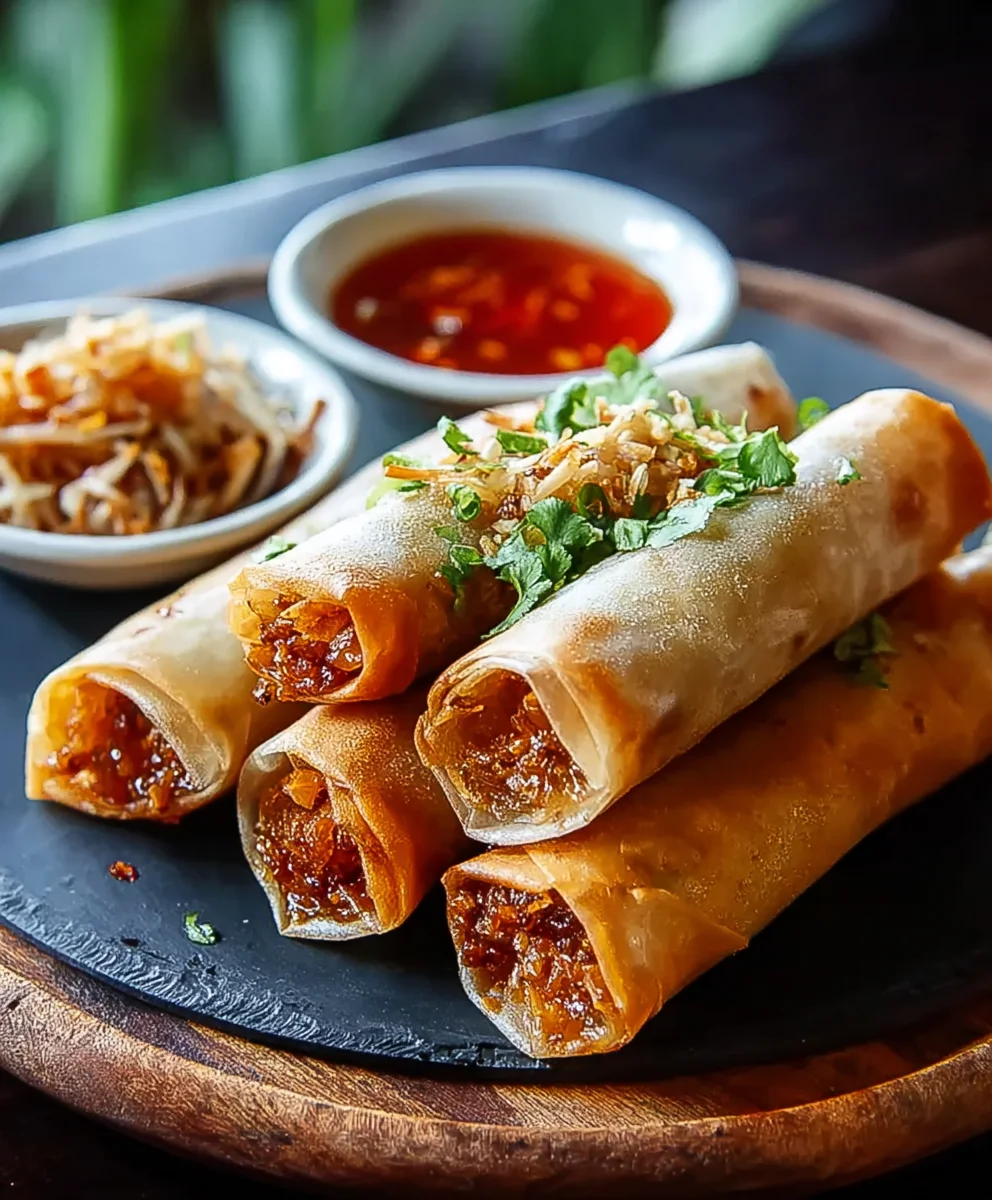
Filipino Lumpia represents more than just a dish; it’s a vibrant culinary hug, a taste of home for many, and an irresistible appetizer for those discovering its magic. Imagin extracte delicate, crispy wrappers giving way to a savory, flavorful filling, a delightful contrast that keeps you reaching for just one more. What is it about Filipino lumpia that captures hearts and palates worldwide? It’s the perfect harmony of textures and tastes – the satisfying crunch of the fried wrapper, the tender, seasoned filling, and that subtle hint of sweetness or spice that dances on your tongue. Whether it’s the classic beef and vegetable rendition or a vegetarian delight, each bite of authentic Filipino lumpia tells a story of tradition, family gatherings, and pure, unadulterated deliciousness. Get ready to embark on a flavor journey as we uncover the secrets to making this beloved classic in your own kitchen.

Ingredients:
- 1 package (25) lumpia wrappers
- 2 lbs ground beef
- 5 cloves garlic, minced
- 1 inch gin extractger, minced
- 3 tbsp soy sauce
- 1/2 tsp chicken bouillon powder (optional)
- 2 eggs, beaten
- 1/2 tsp black pepper
- 6 oz cabbage, thinly sliced
- Vegetable oil for frying
Preparing the Filling
The heart of any great Filipino Lumpia is a flavorful and well-balanced filling. We’ll start by building a robust base of aromatics. In a large bowl, combine the 2 lbs of ground beef with the minced garlic andgin extractnced ginger. These ingredients are crucial for adding depth and a subtle warmth to the lumpia. Don’t be shy withgin extracte garlic and ginger; they are key flavor drivers in Filipino cuisine. Next, add the 3 tablespoons of soy sauce. Soy sauce provides a salty, umami foundation that will coat each piece of ground beef. If you’re looking for an extra layer of savory goodness, you can also stir in the 1/2 teaspoon of chicken bouillon powder at this stage. While it’s optional, it truly enhances the overall flavor profile, giving it that characteristic homemade taste. Finally, season the mixture with 1/2 teaspoon of black pepper. Black pepper adds a gentle bite and complements the other seasonings perfectly. Once all the seasonings are added, use your hands to thoroughly mix everything together. You wangin extracto ensure the garlic, ginger, soy sauce, and pepper are evenly distributed throughout the ground beef. This ensures every bite of your Filipino Lumpia will be bursting with flavor.
Incorporating the Binder and Vegetables
Now that our seasoned meat mixture is ready, it’s time to introduce the elements that will help bind the filling together and add a lovely textural contrast. We’ll start with the binder. Gently pour in the 2 beaten eggs over the meat mixture. The eggs will act as a natural adhesive, helping to hold all the ingredients together as the lumpia cooks, preventing them from falling apart. Be sure to incorporate the eggs thoroughly, mixing them in until the meat mixture has a slightly sticky consistency. This step is vital for easy handling when assembling the lumpia rolls. Following the eggs, it’s time to add our vegetable component: the 6 ounces of thinly sliced cabbage. The cabbage adds a delightful crunch and a touch of freshness that cuts through the richness of the meat. It’s important to slice the cabbage very thinly, almost like shreds, so it cooks evenly and doesn’t create bulky lumps within the wrapper. Distribute the shredded cabbage evenly over the meat mixture. Now, with clean hands, gently fold and mix the cabbage into the meat. Be careful not to overmix at this stage; you want to distribute the cabbage without bruising it too much, preserving its crispness. The goal is for the cabbage to be integrated with the meat and seasonings, creating a cohesive filling that is ready to be rolled.
Assembling the Filipino Lumpia
This is where the magic truly happens – turning our delicious filling into pgin extractect Filipino Lumpia rolls. Begin by laying one lumpia wrapper flat on a clean, dry surface. If your wrappers are frozen, make sure they are thawed completely but still pliable. You’ll notice the wrappers are typically diamond-shaped. Place a tablespoon or two of your prepared filling near the bottom corner of the wrapper (the corner closest to you). Don’t overfill the wrapper, as this can make rolling difficult and lead to bursting during frying. Aim for a neat, compact amount of filling gin extractt will allow for a good roll. Now, begin the rolling process. Fold the bottom corner of the wrapper snugly over the filling. Then, fold in the left and right sides of the wrapper towards the center, creating neat little “envelopes” around the filling. This is similar to how you might wrap a spring roll. Finally, tightly roll the entire lumpia upwards, away from you, until the seam is on the bottom. You can moisten the final edge of the wrapper with a tiny bit of water or a dab of the beaten egg wash to help seal it securely. This ensures your lumpia stays closed during frying and your filling remains perfectly contained. Repeat this process with the remaining wrappers and filling, creating a batch of uniformly shaped lumpia. As you finish each one, place it seam-side down on a plate or tray to prevent it from unrolling.
Frying Your Lumpia to Golden Perfection
Now it’s time to bring your Filipino Lumpia to life with a beautiful golden-brown crispiness. You’ll need a pot or a deep skillet for frying. Pour enough vegetable oil into the pot to come about 1 to 2 inches up the sides. Heat the oil over medium-high heat. You can test if the oil is ready by dropping a tiny piece of lumpia wrapper into it. If it sizzles and floats to the surface immediately, your oil is at the correct temperature, typically around 350°F (175°C). Carefully place a few lumpia into the hot oil, being careful not to overcrowd the pot. Overcrowding will lower the oil temperature and result in soggy lumpia, which is the opposite of what we want. Fry the lumpia for about 3-5 minutes per side, or until they are golden brown and crispy. Keep a close eye on them as they can brown quickly. Use tongs or a slotted spoon to gently turn the lumpia, ensuring they cook evenly on all sides. The goal is a uniformly golden exterior that indicates the filling is heated through and the wrapper is wonderfully crisp. Once they achieve that perfect golden hue, carefully remove the lumpia from the oil using your tongs or slotted spoon. Place them on a wire rack set over a baking sheet or on a plate lined with paper towels. This allows any excess oil to drain away, keeping your lumpia wonderfully crisp and preventing them from becoming greasy.
Achieving Ultimate Crispiness and Serving
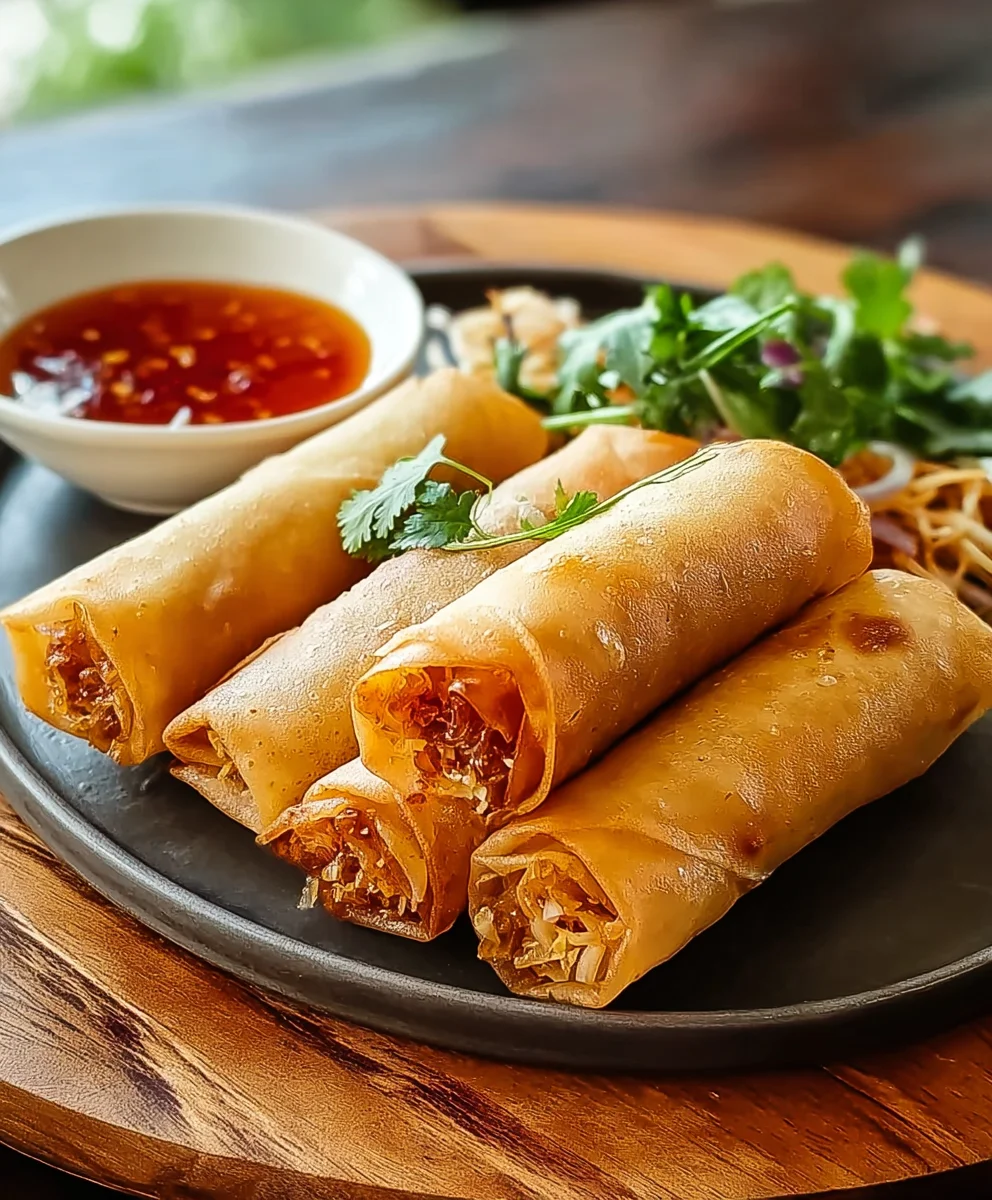
The frying stage is crucial for achieving that iconic crispy texture that makes Filipino Lumpia so irresistible. As the lumpia fry, the moisture from the filling will create steam inside the wrapper, contributing to its puffiness and eventual crispness. It’s important to maintain a consistent oil temperature throughout the frying process. If the oil gets too hot, the wrappers will brown too quickly before the filling is cooked. If it’s too cool, the lumpia will absorb too much oil and become greasy. Adjust your heat as needed. Once all the lumpia have been fried and drained, allow them to rest for a minute or two before serving. This brief resting period allows the internal temperature to even out and the exterior to maintain its crispness. Filipino Lumpia are best enjoyed hot and fresh. They are incredibly versatile and can be served as an appetizer, a snack, or even part of a larger meal. Traditionally, they are served with a dipping sauce. Popular choices include sweet chili sauce, a vinegar-based dipping sauce with garlic and onions, or even just a simple ketchup. The contrast between the savory, crispy lumpia and a tangy or sweet dipping sauce is absolutely divine. Enjoy the fruits of your labor – these homemade Filipino Lumpia are sure to be a hit!
Conclusion:
I hope you enjoyed diving into the delicious world of Filipino Lumpia! We’ve explored how to create these crispy, savory rolls, a true staple of Filipino cuisine. The magic lies in the perfect balance of fresh ingredients, seasoned ground meat, and that satisfying crunch from the wrapper. Making Filipino Lumpia at home is a rewarding experience, and the aroma that fills your kitchen as they fry is simply irresistible.
Serve your freshly made Filipino Lumpia hot and crispy, as they are best enjoyed immediately. They make an excellent appetizer, a delightful snack, or even a side dish to your favorite Filipino meals like adobo or pancit. Don’t hesitate to get creative with your dipping sauces! A sweet chili sauce, a tangy vinegar-based dip, or even a simple soy sauce and calamansi mixture all complement the savory filling beautifully.
As for variations, feel free to experiment! You can substitute the ground beef with ground chicken or even finely chopped firm tofu for a vegetarian option. Some people love to add finely diced jicama or water chestnuts for extra texture. The possibilities are endless, and the joy of making Filipino Lumpia is in making them your own. So go ahead, gather your ingredients, and embrace the fun of rolling and frying! I encourage you to share your creations with friends and family – it’s a dish meant for sharing and creating memories.
Frequently Asked Questions about Filipino Lumpia:
Can I make Filipino Lumpia ahead of time?
Yes, you can assemble the Filipino Lumpia ahead of time and store them, uncooked, in the refrigerator for up to a day. Place them on a baking sheet lined with parchment paper, ensuring they don’t touch, and cover them tightly with plastic wrap. When you’re ready to cook, fry them directly from the refrigerator. However, for the absolute best crispiness, frying them fresh is always recommended.
What is the best way to get my Filipino Lumpia wrappers crispy?
Ensuring your oil is at the correct temperature (around 350-375°F or 175-190°C) is key for achieving crispy Filipino Lumpia. Don’t overcrowd the pan, as this can lower the oil temperature and lead to soggy rolls. Fry them in batches, and drain them well on a wire rack set over a baking sheet after frying to allow air circulation. This prevents them from steaming and losing their crispiness.
Easy Beef Lumpia-Filipino Spring Rolls Recipe
A simple and delicious recipe for classic Filipino Beef Lumpia, also known as Filipino Spring Rolls. Perfect for appetizers or snacks.
Ingredients
-
1 package (25) lumpia wrappers
-
2 lbs ground beef
-
5 cloves garlic, minced
-
1 inch ginger, minced
-
3 tbsp soy sauce
-
1/2 tsp chicken bouillon powder (optional)
-
2 eggs, beaten
-
1/2 tsp black pepper
-
6 oz cabbage, thinly sliced
-
Vegetable oil for frying
Instructions
-
Step 1
Prepare the filling: In a large bowl, combine ground beef, minced garlic, minced ginger, soy sauce, optional chicken bouillon powder, and black pepper. Mix thoroughly until all ingredients are evenly distributed. -
Step 2
Incorporate binder and vegetables: Add the beaten eggs to the meat mixture and mix until slightly sticky. Then, add the thinly sliced cabbage and gently mix until integrated. -
Step 3
Assemble the lumpia: Lay a lumpia wrapper flat. Place 1-2 tablespoons of filling near the bottom corner. Fold the bottom corner over the filling, then fold in the sides, and tightly roll upwards. Moisten the final edge with water or egg wash to seal. -
Step 4
Fry the lumpia: Heat 1-2 inches of vegetable oil in a pot or deep skillet over medium-high heat to about 350°F (175°C). Carefully add lumpia in batches, ensuring not to overcrowd the pot. -
Step 5
Fry for 3-5 minutes per side, or until golden brown and crispy. Turn occasionally for even cooking. Remove with tongs and drain on a wire rack or paper towels. -
Step 6
Serve: Allow lumpia to rest for a minute or two. Serve hot and fresh with your favorite dipping sauce such as sweet chili sauce or a vinegar-based sauce.
Important Information
Nutrition Facts (Per Serving)
It is important to consider this information as approximate and not to use it as definitive health advice.
Allergy Information
Please check ingredients for potential allergens and consult a health professional if in doubt.


Leave a Comment