

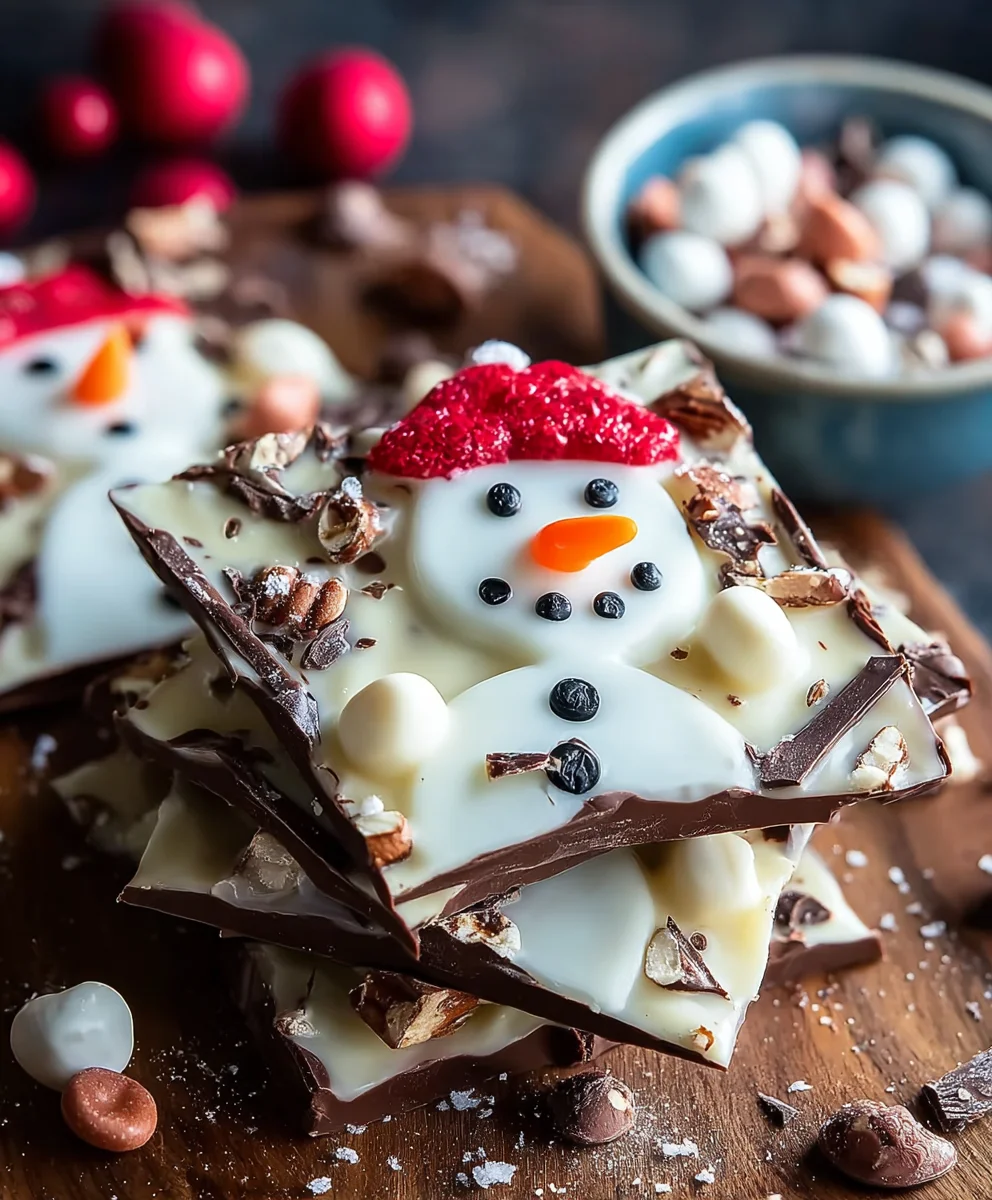
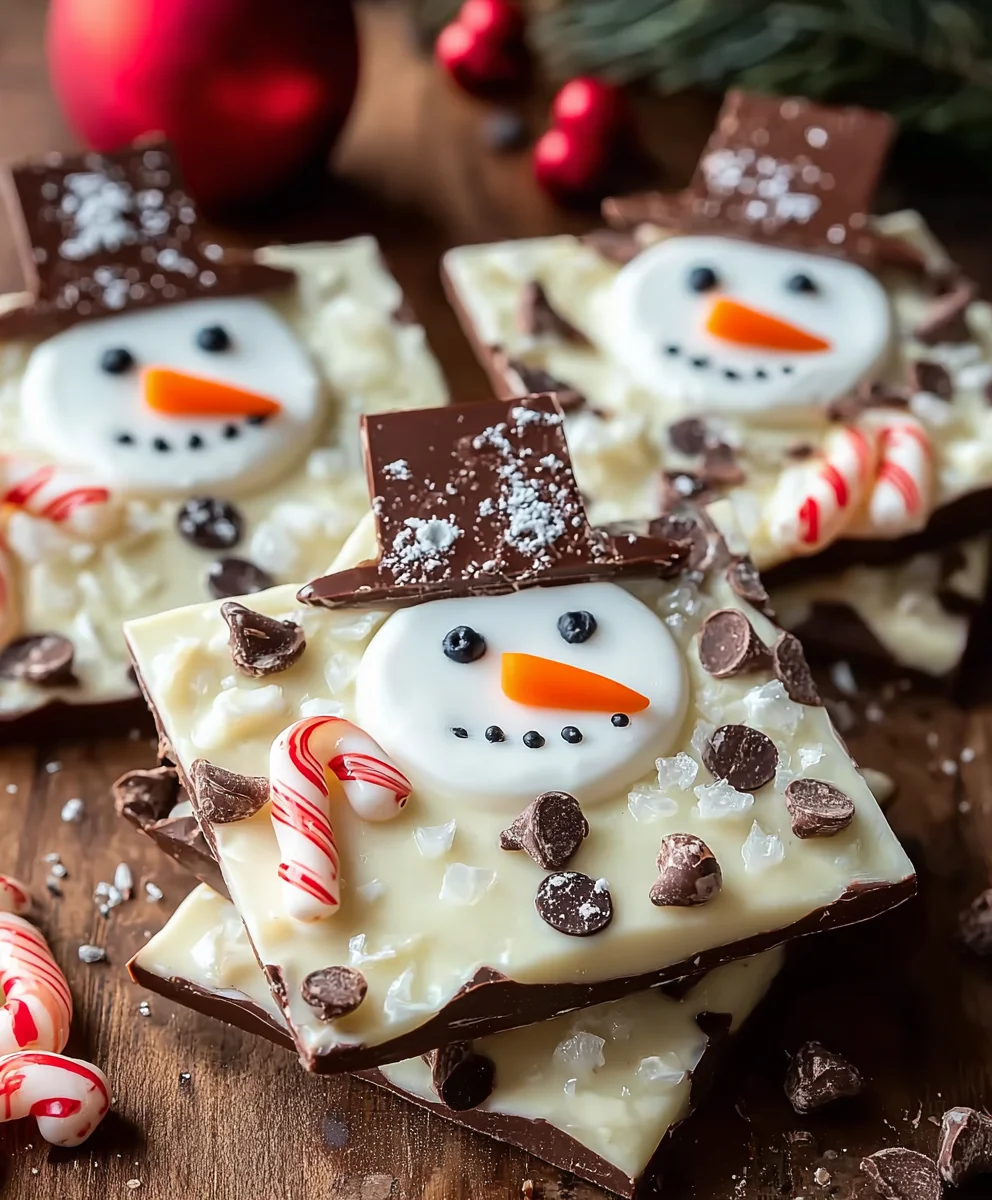
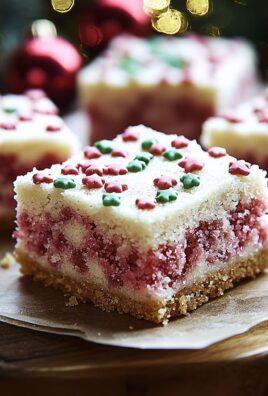
Melted Snowman Bark is more than just a festive treat; it’s a whimsical journey to a winter wonderland right in your kitchen. Imagin extracte the delight on everyone’s faces, young and old, as they discover these charming, edible snowmen delightfully “melting” into a sweet, creamy base. This isn’t your average candy; it’s a conversation starter, a centerpiece, and a burst of pure holiday joy. What makes Melted Snowman Bark so universally adored? It’s the perfect marriage of simple ingredients transformed into something truly magical. The crisp sweetness of white chocolate, coupled with the playful, edible decorations that bring our frosty friends to life, creates a texture and flavor profile that’s utterly irresistible. Each bite is a delightful crunch followed by smooth, melt-in-your-mouth goodness, evoking nostalgic memories of snowball fights and cozy evenings by the fire.
Why We Love This Recipe
This Melted Snowman Bark captures the very essence of holiday fun. It’s incredibly easy to make, making it a perfect activity for family baking sessions. Plus, the visual appeal is unparalleled! The adorable design ensures that no matter your skill level, you’ll produce a show-stopping creation that’s almost too cute to eat. Almost! The satisfaction of seeing those little snowmen gracefully surrender to the chocolate is part of the charm. It’s the kind of treat that spreads cheer and sweetens every holiday gathering.
What Makes It Special
What truly sets Melted Snowman Bark apart is its storytelling potential. Each piece is a miniature winter scene, spargin extractg imagination and conversation. The contrast between the smooth, rich white chocolate and the slightly chewy elements of the decorations is a delightful textural experience. It’s a simple concept elevated to an art form, proving that the most memorable treats are often born from the simplest ideas. This recipe is designed for pure enjoyment, offering a delicious and visually stunning way to celebrate the season.

Ingredients:
- 1 pound almond bark or white melting chocolate
- 12 golden Oreo cookies
- 6 red and green gumdrops, halved
- 1 Twizzler pull and peel
- 36 red and green mini M&Ms
- Black cookie icing
- Orange cookie icing
Preparing Your Workspace and Melting the Chocolate
The first step to creating our delightful Melted Snowman Bark is to prepare your baking surface and melt the white chocolate. Line a large baking sheet, approximately 13×18 inches, with parchment paper. This will prevent the bark from sticking and make it incredibly easy to remove once it’s set. Now, let’s get our white chocolate ready. You can use either almond bark or white melting chocolate for this recipe; both will yield a wonderful, smooth base. Carefully break the almond bark or melting chocolate into pieces and place them in a microwave-safe bowl. Microwave in 30-second intervals, stirring thoroughly after each interval. Continue this process until the chocolate is completely smooth and melted. Be patient; overcooking can cause the chocolate to seize and become unusable. Alternatively, you can melt the chocolate using a double boiler. Fill the bottom pot of your double boiler with about an inch of water and bring it to a gentle simmer. Place the almond bark or melting chocolate in the top bowl, ensuring the bottom of the bowl does not touch the water. Stir continuously until the chocolate is smooth. Once melted, remove the bowl from the heat and let it cool slightly for a minute or two before proceeding. This ensures it’s not too hot to handle and incorporate other elements.
Creating the Snowman Bodies
With our chocolate base ready, it’s time to bring our snowmen to life! Spread the melted white chocolate evenly across the parchment-lined baking sheet. Aim for a thickness of about 1/4 inch. This will give you a good base for building your snowmen and ensure the bark has a satisfying snap when broken. While the chocolate is still wet, begin extract placing your Golden Oreo cookies onto the surface. You’ll want to use about half of the Oreos to form the base of your snowmen, placing them in approximate rows. Then, take the remaining Golden Oreos and break them in half. These halves will serve as the heads for your snowmen, so place them on top of the whole cookies. Gently press down on the Oreos so they are slightly embedded in the melted chocolate, ensuring they won’t shift as the bark sets. Don’t worry about perfect placement; a slightly haphazard arrangement can add to the charming, melted aesthetic.
Designing the Snowman Features
Now for the fun part: giving our snowmen their distinctive features! This is where your creativity can truly shine. Take your black cookie icing and a piping bag with a fine tip, or a small ziploc bag with a tiny corner snipped off, and draw two small black dots on each Oreo “head” to create the eyes. Next, use the black cookie icing to draw a simple mouth line or a few dots for the mouth. For the nose, we’ll use the orange cookie icing. Again, using a fine tip, pipe a small, slightly elongated triangle onto the center of each snowman’s face. This is a classic snowman nose, and the orange color provides a perfect contrast against the white chocolate. You want the icing to be visible and to create a clear delineation for the nose.
Adding the Snowman Accessories
To complete the look of our Melted Snowman Bark and give them that festive flair, we’ll add their accessories. Take your halved gumdrops and use them as cheerful hats for your snowmen. Press them gently onto the top of the Oreo “heads.” You can alternate between red and green gumdrops for a festive color combination. For the scarf detail, we’ll use the Twizzler pull and peel. Carefully pull apart the red strands of the Twizzler. You’ll want to separate one or two strands for each snowman. Gently lay a strand of the red Twizzler horizontally across the “neck” area of each snowman to resemble a scarf. Don’t overthink the placement; a slightly droopy scarf can add to the melted snowman charm. Finally, scatter the mini M&Ms across the bark. These can represent scattered buttons on a snowman’s belly or just add extra pops of festive color and texture to your bark. Distribute them randomly across the entire surface for a balanced look.
Setting and Breaking the Bark
Once all your snowmen are designed and decorated, it’s time for the bark to set. Carefully transfer the baking sheet to the refrigerator and let it chill for at least 1 hour, or until the chocolate is completely firm to the touch. This chilling period is crucial for achieving clean breaks when you’re ready to serve. After the bark has set, remove the baking sheet from the refrigerator. Gently lift the parchment paper with the bark off the baking sheet. You can then break the bark into irregular pieces by hand. For sharper edges, you can use a sharp knife to score the bark before breaking, or simply tap it firmly with the handle of a knife. If you prefer more uniform pieces, you can use a pizza cutter while the bark is still slightly pliable but set. Store the Melted Snowman Bark in an airtight container at room temperature, or in the refrigerator if the weather is warm. Enjoy sharing these adorable and delicious treats with friends and family!
Conclusion:
We hope you’ve enjoyed learning how to make this delightful Melted Snowman Bark! This easy-to-follow recipe yields a wonderfully sweet and festive treat that’s perfect for the holiday season. The combination of creamy white chocolate, crunchy pretzels, and playful candy decorations creates a truly memorable dessert that will charm both kids and adults alike.
This Melted Snowman Bark is incredibly versatile. Serve it as a fun party favor, a sweet addition to a holiday dessert platter, or even as a thoughtful homemade gift. For serving suggestions, consider breaking it into irregular shards for a rustic look, or using festive cookie cutters to create specific shapes.
Don’t be afraid to get creative with variations! You could swap the pretzels for crushed grabeef ham crackers or gin extractgerbread cookies for a different flavor profile. Feel free to experiment with different types of sprinkles or add a drizzle of dark chocolate for a contrasting visual and taste. Most importantly, have fun with the decorating – let your inner artist shine! We encourage you to gather your loved ones and make this Melted Snowman Bark together for a truly joyous baking experience.
Frequently Asked Questions:
Can Melted Snowman Bark be made ahead of time?
Absolutely! Melted Snowman Bark can be made several days in advance and stored in an airtight container at room temperature. Ensure it’s fully set befogin extractpackaging to prevent pieces from sticking together.
How should I store leftover Melted Snowman Bark?
Store any leftover Melted Snowman Bark in an airtight container at room temperature. Avoid refrigerating it, as this can cause the chocolate to bloom and develop a dull appearance. It will stay fresh for up to a week.
Are there any nut-free options for Melted Snowman Bark?
Yes, if you need a nut-free version, simply ensure all your chocolate, sprinkles, and candy decorations are certified nut-free. You can replace the pretzels with a nut-free crispy rice cereal or crushed gluten-free cookies for added crunch.
Melted Snowman Bark-Easy Festive Treat
A fun and easy festive treat perfect for the holidays, featuring melted white chocolate topped with Golden Oreos, gumdrops, Twizzlers, and M&Ms to create adorable melted snowmen.
Ingredients
-
1 pound almond bark or white melting chocolate
-
12 golden Oreo cookies
-
6 red and green gumdrops, halved
-
1 Twizzler pull and peel
-
36 red and green mini M&Ms
-
Black cookie icing
-
Orange cookie icing
Instructions
-
Step 1
Line a 13×18 inch baking sheet with parchment paper. Melt almond bark or white melting chocolate in 30-second intervals in the microwave, stirring after each, until smooth. Alternatively, melt using a double boiler. -
Step 2
Spread the melted chocolate evenly onto the parchment paper, about 1/4 inch thick. Place whole Golden Oreo cookies onto the chocolate to form snowman bases. Break remaining Golden Oreos in half and place them on top of the whole cookies for snowman heads. Gently press to embed. -
Step 3
Using black cookie icing, pipe two dots for eyes and a mouth line or dots on each Oreo head. Use orange cookie icing to pipe a triangular nose onto the center of each snowman’s face. -
Step 4
Press halved gumdrops onto the top of the Oreo heads for hats. Separate strands from the Twizzler pull and peel and lay one or two strands horizontally across the ‘neck’ area of each snowman to resemble scarves. -
Step 5
Scatter mini M&Ms across the bark to represent buttons or add festive color. -
Step 6
Refrigerate the bark for at least 1 hour, or until completely firm. Break the bark into irregular pieces by hand or score with a knife before breaking. Store in an airtight container.
Important Information
Nutrition Facts (Per Serving)
It is important to consider this information as approximate and not to use it as definitive health advice.
Allergy Information
Please check ingredients for potential allergens and consult a health professional if in doubt.
Leave a Comment