

Baked Zucchini Balls – the very name conjures images of wholesome goodness, and I promise you, they deliver far beyond expectations. Forget everything you thought you knew about humble zucchini; this recipe transforms it into an absolute star. Imagine sinking your teeth into a perfectly golden, crispy exterior, giving way to a tender, savory, and wonderfully herbaceous interior. These delightful morsels are a testament to how simple ingredients, when treated with care, can create something truly extraordinary. While traditional vegetable fritters, common across Mediterranean cultures, often involve frying, our baked rendition offers all the flavor with a significantly lighter touch, making it a healthier, modern twist on a beloved classic.
Why These Baked Zucchini Balls Will Become Your New Favorite
I find immense joy in sharing dishes that are not only delicious but also wonderfully versatile and packed with fresh flavor. People absolutely adore these Baked Zucchini Balls for their incredible texture – that satisfying crunch followed by a soft, flavorful core – and their guilt-free nature. They are fantastic as a sophisticated appetizer, a delightful side dish, or even a light, satisfying lunch. Get ready to discover your new favorite way to enjoy this abundant summer vegetable; this recipe is sure to become a cherished addition to your culinary repertoire.

Ingredients:
- 3 medium zucchini (about 1.5 – 2 pounds / 700-900g total): I always look for firm, bright green zucchini without any soft spots. These form the delightful base of our “Baked Zucchini Balls.”
- 1/2 cup finely chopped yellow onion: This adds a foundational sweetness and savory depth. Finely chopped ensures it integrates seamlessly into the mixture.
- 2 cloves garlic, minced: Garlic is a must for almost any savory dish in my kitchen! It brings a wonderful aromatic warmth.
- 1 large egg, lightly beaten: Our essential binding agent, helping to hold our “Baked Zucchini Balls” together beautifully.
- 1/2 cup plain breadcrumbs (Panko breadcrumbs recommended for extra crispiness): I adore Panko for its light, airy texture, which contributes to a lovely exterior crust without making the interior heavy. It also helps absorb any residual moisture.
- 1/2 cup grated Parmesan cheese: The salty, nutty flavor of Parmesan is a fantastic complement to the mild zucchini. Freshly grated is always best!
- 1/4 cup fresh parsley, finely chopped: Fresh herbs are key here! Parsley adds a vibrant, fresh counterpoint to the richness of the cheese and the earthiness of the zucchini.
- 1 tablespoon fresh dill, finely chopped (optional, but highly recommended): Dill brings a bright, slightly citrusy note that truly elevates the flavor profile of these “Baked Zucchini Balls.”
- 1 teaspoon dried oregano: A classic herb that provides a warm, earthy aroma and taste.
- 1/2 teaspoon salt: Essential for seasoning and bringing out all the flavors. Remember, cheese can be salty, so we’ll adjust later if needed.
- 1/4 teaspoon black pepper: A touch of freshly ground pepper adds a gentle kick.
- 2 tablespoons olive oil (plus more for greasing the baking sheet): Used for sautéing our aromatics and for a light brush over the “Baked Zucchini Balls” before baking to encourage a golden crust.
- Optional dipping sauce: Marinara sauce, a simple Greek yogurt dill dip, or even a garlic aioli would be absolutely divine with these!
Preparing Your Zucchini
- Wash and Trim the Zucchini: First things first, give your zucchini a good wash under cool running water. Then, trim off both ends – the stem and the blossom end. We want only the good stuff for our delicious “Baked Zucchini Balls.”
- Grate the Zucchini: Now for the main event! Using a box grater with the large holes, or the grating attachment of your food processor, grate all three zucchini. I usually find that a food processor makes quick work of this, but a box grater works perfectly well and is quite therapeutic! Aim for consistent, medium-sized shreds.
-
The Absolutely Crucial Step: Squeeze Out Excess Water! This is arguably the most important step for achieving perfect, firm “Baked Zucchini Balls” that aren’t soggy. Zucchini is incredibly high in water content, and if you don’t remove a significant amount of it, your mixture will be too wet, leading to mushy balls instead of beautifully crisp ones.
To do this, place the grated zucchini in a clean kitchen towel, cheesecloth, or even a strong paper towel. Gather the ends of the towel and twist it tightly, squeezing with all your might over a sink or a bowl. You’ll be amazed at how much liquid comes out! Keep squeezing until you can’t get any more liquid out. The zucchini should feel quite dry and compact. I often do this in two batches to ensure maximum water extraction. Don’t rush this step – your future self, enjoying perfectly textured “Baked Zucchini Balls,” will thank you!
Once squeezed, transfer the dry, grated zucchini to a large mixing bowl, breaking it apart gently so it’s not a dense lump.
Crafting the Flavorful Mixture
-
Sauté the Aromatics: In a small skillet or frying pan, heat 1 tablespoon of olive oil over medium heat. Add the finely chopped yellow onion and cook, stirring occasionally, until it softens and becomes translucent, about 5-7 minutes. This step is key because cooking the onion first mellows its raw sharpness and brings out its natural sweetness, adding a richer, more complex flavor to our “Baked Zucchini Balls.”
Once the onion is soft, add the minced garlic and cook for just another minute until fragrant. Be careful not to burn the garlic, as burnt garlic can taste bitter. Immediately remove the pan from the heat to stop the cooking process.
- Combine All Ingredients: Add the sautéed onion and garlic mixture directly into the large bowl with the squeezed zucchini. Now, let’s bring in the rest of our flavor powerhouses! Add the lightly beaten egg, plain breadcrumbs (or Panko for that extra crisp), grated Parmesan cheese, finely chopped fresh parsley, finely chopped fresh dill (if using), dried oregano, salt, and black pepper.
-
Mix Thoroughly (But Gently!): Using your hands (which I find is the best tool for this job, ensuring everything is well combined without overmixing), a sturdy spoon, or a spatula, mix all the ingredients together until everything is evenly distributed. You want to make sure the breadcrumbs and egg are coating all the zucchini, acting as binders.
The mixture should be well-combined and feel somewhat cohesive, not overly wet or crumbly. If it feels too wet, you can add another tablespoon or two of breadcrumbs, one at a time, until it reaches a manageable consistency that you can form into balls. Conversely, if it feels too dry and isn’t holding together, you might need to add just a tiny bit more egg or a splash of water, but this is rare if you’ve squeezed your zucchini well.
Give it a taste test! Carefully take a tiny pinch of the mixture and taste it. This is your chance to adjust the seasoning – maybe a little more salt, pepper, or a pinch of extra herbs to suit your palate. Remember, the flavors will concentrate slightly during baking.
- Let the Mixture Rest (Optional, but Recommended): For even better flavor integration and slightly improved binding, you can cover the bowl and refrigerate the mixture for about 15-30 minutes. This gives the breadcrumbs a chance to fully absorb any remaining moisture and for the flavors to meld. If you’re in a rush, you can skip this, but I often find it’s worth the wait for truly exceptional “Baked Zucchini Balls.”
Forming and Baking Your Baked Zucchini Balls
- Preheat Your Oven: While the mixture is resting (or as you start forming the balls if you skipped resting), preheat your oven to a good, hot 400°F (200°C). A hot oven is crucial for achieving that lovely golden-brown exterior and ensuring the “Baked Zucchini Balls” cook through without getting mushy.
- Prepare Your Baking Sheet: Line a large baking sheet with parchment paper. This prevents sticking and makes cleanup a breeze. Lightly brush the parchment paper with the remaining 1 tablespoon of olive oil, or use a non-stick cooking spray, to ensure the balls don’t stick and get a nice crust.
-
Form the “Baked Zucchini Balls”: Now comes the fun part! Take about 1.5 to 2 tablespoons of the zucchini mixture and roll it firmly between your palms to form a compact ball, roughly the size of a golf ball or a large walnut. The key here is to make them relatively uniform in size so they cook evenly. If they are too loose, they might crumble during baking. If they feel too sticky, you can lightly moisten your hands with water or oil.
As you form each “Baked Zucchini Ball,” place it on the prepared baking sheet, ensuring there’s a little space between each one (about an inch) to allow for proper air circulation. Don’t overcrowd the pan; if necessary, use two baking sheets. Crowding can lead to steaming instead of baking, which means less crispiness!
- Optional: Lightly Brush with Olive Oil: For an extra boost of golden crispiness and flavor, you can very lightly brush the tops of your formed “Baked Zucchini Balls” with a tiny bit more olive oil. This step isn’t strictly necessary but adds a lovely touch.
-
Bake to Golden Perfection: Place the baking sheet with your beautifully formed “Baked Zucchini Balls” into the preheated oven. Bake for 20-25 minutes, or until they are golden brown and firm to the touch.
Mid-Baking Turn: About halfway through the baking time (around 10-12 minutes), carefully flip each “Baked Zucchini Ball” over using a spatula. This helps ensure even browning and crispness on all sides. Continue baking until they are deeply golden and feel wonderfully firm when gently pressed.
Every oven is a little different, so keep an eye on them. You’re looking for that appealing, appetizing golden hue that signals they’re perfectly cooked through and delicious.
- Cool Slightly Before Serving: Once baked, remove the “Baked Zucchini Balls” from the oven. Let them cool on the baking sheet for a few minutes before transferring them to a serving platter. They will firm up a bit more as they cool, and this also makes them easier to handle without breaking.
Serving Your Delicious Baked Zucchini Balls
-
Serve Warm: These “Baked Zucchini Balls” are best served warm, straight from the oven, when they are at their crispiest and most flavorful.
They make an absolutely fantastic appetizer for parties, a delightful side dish with your favorite main course, or even a light and satisfying lunch. I often find myself making a double batch because they disappear so quickly!
-
Pair with Your Favorite Dip: Elevate the experience by serving your “Baked Zucchini Balls” with a complementary dipping sauce. A classic marinara sauce is always a winner, offering a tangy contrast. For something fresh and creamy, a homemade Greek yogurt dip with fresh dill, lemon juice, and a hint of garlic is absolutely divine. A simple garlic aioli or even just a squeeze of fresh lemon juice can also brighten them up wonderfully.
Garnish with a sprinkle of fresh parsley or dill for a final flourish. The vibrant green not only looks beautiful but also adds another layer of freshness. These “Baked Zucchini Balls” are incredibly versatile and are sure to be a hit with both vegetarians and meat-lovers alike!
Tips for Perfect Baked Zucchini Balls:
- Don’t Skip the Squeeze: I cannot stress this enough! The success of your “Baked Zucchini Balls” truly hinges on removing as much moisture from the grated zucchini as possible. A wet mixture means mushy balls.
- Experiment with Herbs: While parsley and dill are my favorites, feel free to get creative! Fresh mint, basil, chives, or even a touch of rosemary can completely change the flavor profile. Dried Italian seasoning is also a great substitute for fresh herbs if you’re in a pinch.
- Cheese Variations: If you’re not a fan of Parmesan, crumbled feta cheese offers a lovely tangy saltiness, while shredded sharp cheddar or mozzarella would provide a creamier, milder flavor. You can even mix and match cheeses!
- Add a Kick: For those who love a bit of heat, a pinch of red pepper flakes added to the mixture will give your “Baked Zucchini Balls” a delightful spicy warmth.
- Even Sizing is Key: Try to make your balls as uniform in size as possible. This ensures that they all cook evenly and are ready at the same time, preventing some from being overcooked while others are still soft in the middle.
- Don’t Overcrowd the Pan: Give your “Baked Zucchini Balls” plenty of space on the baking sheet. If they’re too close together, they’ll steam instead of bake, which means you won’t get that wonderful crispy exterior. Use two baking sheets if necessary.
- Make Ahead and Storage: The prepared zucchini mixture can be stored in an airtight container in the refrigerator for up to 24 hours before forming and baking. Leftover “Baked Zucchini Balls” can be stored in an airtight container in the refrigerator for 3-4 days. They reheat beautifully in a toaster oven or a conventional oven at 350°F (175°C) for about 10-15 minutes, which helps them regain some of their crispness. Microwaving is an option, but they might lose some of their delightful texture.
- Freezing Instructions: You can also freeze these “Baked Zucchini Balls”! After baking and allowing them to cool completely, arrange them in a single layer on a baking sheet and freeze until solid. Then, transfer the frozen balls to a freezer-safe bag or container. They can be stored for up to 2-3 months. To reheat, bake them directly from frozen at 375°F (190°C) for 15-20 minutes, or until heated through and crispy. This is a fantastic way to have a quick, healthy snack or side dish ready to go!
- Gluten-Free Option: To make these “Baked Zucchini Balls” gluten-free, simply use gluten-free breadcrumbs. The rest of the ingredients are naturally gluten-free.

Conclusion:
Well, my friends, we’ve journeyed through the simple yet profoundly satisfying world of creating what I believe will become a staple in your kitchen. If you’ve been searching for that perfect dish that effortlessly combines health, flavor, and incredible ease, then look no further. This recipe for
Baked Zucchini Balls
truly delivers on all fronts. They’re not just a clever way to use up that abundant garden zucchini; they’re a revelation in taste and texture. Imagine a golden-crisp exterior giving way to a tender, savory interior, bursting with fresh herbs and a hint of cheese – all without the guilt of deep-frying. I promise you, once you taste these, you’ll understand why I’m so passionate about them. They’re a fantastic alternative to heavier appetizers and a wonderful way to sneak more vegetables into anyone’s diet, even the most discerning eaters. The simplicity of the ingredients and the straightforward preparation method mean that even novice cooks can achieve stellar results, making them an absolute must-try for everyone.
One of the most appealing aspects of these delightful bites is their incredible versatility. They shine as an elegant appetizer at your next dinner party, providing a light yet flavorful start to any meal. Think about serving them alongside a vibrant antipasto platter or as a healthier alternative to traditional fried snacks during game night. But don’t relegate them solely to the appetizer category! I often enjoy them as a satisfying side dish to grilled chicken or fish, adding a lovely textural contrast and a boost of fresh flavor. For a lighter lunch or dinner, pile a generous serving onto a bed of mixed greens with a drizzle of your favorite vinaigrette, transforming them into the star of a hearty salad. They’re also fantastic for meal prepping; whip up a big batch on Sunday, and you’ll have delicious, healthy additions to your meals throughout the week. Their ability to adapt to so many different meal scenarios truly makes them an indispensable recipe to have in your culinary repertoire.
Now, let’s talk about taking your
Baked Zucchini Balls
experience to the next level with some fantastic serving suggestions and creative variations. For dipping, a classic marinara sauce is always a winner, but don’t stop there! Try a creamy Greek tzatziki for a refreshing contrast, or a spicy sriracha mayo to add a kick. A simple garlic aioli or a vibrant pesto also pair beautifully, offering different flavor profiles to explore. For a more substantial meal, consider crumbling them over pasta with a light tomato sauce instead of meatballs, or tuck them into warm pita bread with crisp lettuce and a dollop of hummus for a Mediterranean-inspired wrap. They even make a wonderful topping for a homemade pizza, adding a unique and healthy dimension.
Feeling adventurous? The beauty of this recipe lies in its adaptability. You can easily switch up the cheese – a smoked gouda or a sharp cheddar would introduce a delightful new character, while a vegan parmesan substitute works perfectly for plant-based diets. Experiment with different herbs: fresh dill or oregano could provide an entirely new aromatic experience. For an extra layer of flavor and texture, try adding finely grated carrots, a touch of corn kernels, or even some finely chopped bell peppers to the mixture before baking. If you’re looking for a bit of heat, a pinch of red pepper flakes will do the trick. To make them gluten-free, simply ensure your breadcrumbs are certified gluten-free, or use almond flour or ground oats as a binder. The possibilities are truly endless, allowing you to tailor this basic recipe to your personal taste and whatever ingredients you have on hand. Don’t be afraid to make it your own; that’s where the real fun of cooking begins!
So, my friends, what are you waiting for? I wholeheartedly encourage you to roll up your sleeves, gather your ingredients, and give these marvelous
Baked Zucchini Balls
a try. I am confident that they will quickly become a cherished favorite in your household, just as they have in mine. The joy of creating something so delicious and wholesome from scratch is incredibly rewarding, and this recipe makes it effortlessly achievable. Once you’ve experienced the magic of these golden-baked delights, I would absolutely love to hear about it! Please come back and share your cooking adventures, your favorite serving ideas, or any creative variations you came up with in the comments section. Your feedback and culinary explorations inspire me and our entire community. Happy cooking, and prepare to fall in love with your new go-to zucchini recipe!

Baked Zucchini Balls
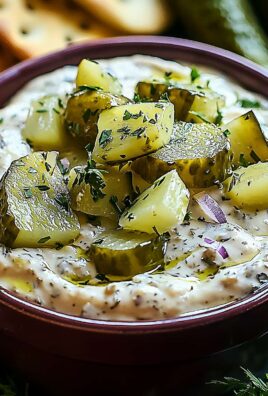
Healthy, easy, and delicious Baked Zucchini Balls: crispy on the outside, tender and savory inside. These versatile vegetarian delights can be served with marinara, alongside pasta, as appetizers, or in sub sandwiches with melty mozzarella, delighting even traditionalists.
Ingredients
-
3 medium zucchini (1.5-2 lbs / 700-900g)
-
1/2 cup finely chopped yellow onion
-
2 cloves garlic, minced
-
1 large egg, lightly beaten
-
1/2 cup Panko breadcrumbs (or plain)
-
1/2 cup grated Parmesan cheese
-
1/4 cup fresh parsley, finely chopped
-
1 tbsp fresh dill, finely chopped (optional)
-
1 tsp dried oregano
-
1/2 tsp salt
-
1/4 tsp black pepper
-
2 tbsp olive oil (plus more for greasing)
-
Optional: Marinara sauce or Greek yogurt dill dip (for serving)
Instructions
-
Step 1
Wash and trim zucchini. Grate zucchini using a box grater or food processor. -
Step 2
Place grated zucchini in a clean kitchen towel and squeeze out as much excess water as possible. Transfer dry zucchini to a large bowl. -
Step 3
In a small skillet, heat 1 tbsp olive oil over medium heat. Sauté chopped onion for 5-7 minutes until soft. Add minced garlic and cook for 1 minute until fragrant. Remove from heat. -
Step 4
Add sautéed onion and garlic to the bowl with zucchini. Add beaten egg, breadcrumbs, Parmesan, parsley, dill (if using), oregano, salt, and pepper. -
Step 5
Mix thoroughly by hand until well combined and cohesive enough to form balls. (Optional: Refrigerate mixture for 15-30 mins for better flavor integration and binding.) -
Step 6
Preheat oven to 400°F (200°C). Line a baking sheet with parchment paper and lightly brush with olive oil. -
Step 7
Take 1.5-2 tablespoons of mixture and roll firmly into golf-ball-sized balls. Place on the prepared baking sheet, ensuring space between each to prevent steaming. -
Step 8
Bake for 20-25 minutes, flipping halfway through (around 10-12 minutes), until golden brown and firm. -
Step 9
Remove from oven and let cool slightly on the baking sheet before serving. -
Step 10
Serve warm with your favorite dipping sauce like marinara or a Greek yogurt dill dip. Garnish with fresh herbs if desired.
Important Information
Nutrition Facts (Per Serving)
It is important to consider this information as approximate and not to use it as definitive health advice.
Allergy Information
Please check ingredients for potential allergens and consult a health professional if in doubt.


Leave a Comment