

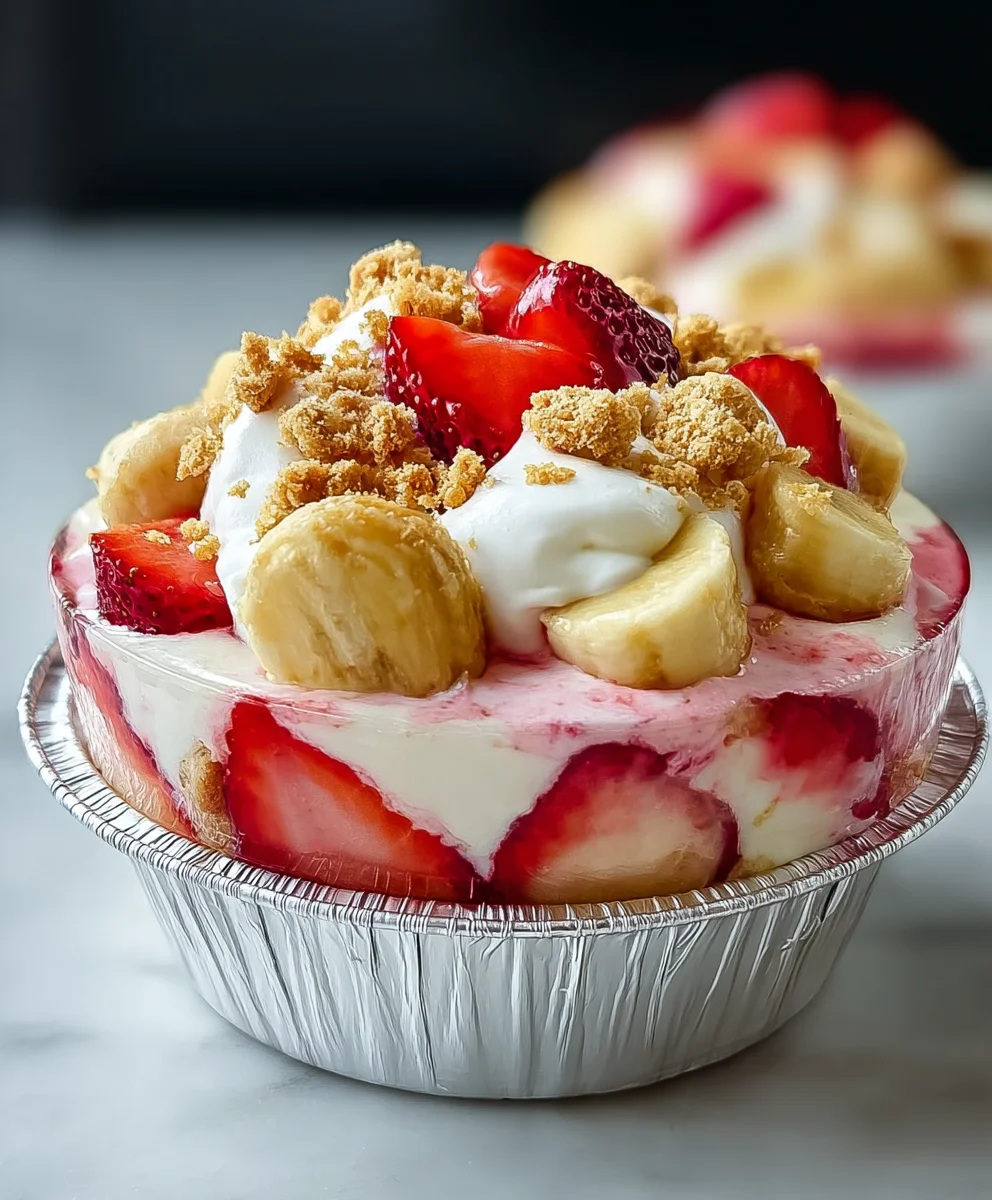
Easy Strawberry Cheesecake Banana Pudding – just the name alone promises a symphony of delightful flavors, doesn’t it? Imagine the creamy richness of cheesecake, the sweet burst of fresh strawberries, and the comforting layers of classic banana pudding all in one incredibly simple, no-bake dessert. Banana pudding holds a special place in many hearts, particularly in Southern cuisine, as the ultimate comfort food. This recipe takes that cherished tradition and infuses it with a modern, irresistible twist by blending it with the beloved tang of cheesecake and the vibrant sweetness of strawberries.
It’s a dish that truly has it all: the smooth, velvety texture of pudding, the delightful chewiness of ripe bananas, the crumbly comfort of vanilla wafers, and that bright, refreshing lift from the strawberries and cream cheese. The best part? It’s remarkably simple to assemble, making it the perfect showstopper for any gathering without hours of effort. This particular Easy Strawberry Cheesecake Banana Pudding is not just a dessert; it’s an experience, delivering layer after layer of pure bliss that will undoubtedly become a new family favorite.

Ingredients:
- For the Creamy Vanilla-Cheesecake Layers:
- 2 (3.4 ounce) packages instant vanilla pudding mix
- 4 cups cold whole milk (or 2%, but whole milk makes it extra creamy!)
- 1 (8 ounce) block full-fat cream cheese, softened at room temperature
- 1/2 cup powdered sugar (also known as confectioners’ sugar)
- 1 teaspoon pure vanilla extract
- 1 (12 ounce) container frozen whipped topping, thawed (like Cool Whip)
- For the Fresh Fruit:
- 2 pounds fresh strawberries, hulled and thinly sliced
- 1/4 cup granulated sugar (optional, for sweetening strawberries)
- 4-5 ripe but firm bananas, sliced into 1/4-inch rounds
- 1 tablespoon fresh lemon juice (optional, for banana slices)
- For the Structure and Crunch:
- 1 (12 ounce) box vanilla wafers (like Nilla Wafers)
Preparing the Creamy Pudding Base for Your Easy Strawberry Cheesecake Banana Pudding
- Whisk the Instant Pudding: In a large mixing bowl, combine the two packages of instant vanilla pudding mix with the 4 cups of cold milk. Whisk vigorously for about 2 minutes until the mixture begins to thicken. It won’t be super thick yet, but it will start to set. Place this mixture in the refrigerator for 5-10 minutes to allow it to firm up a bit more while you prepare the cream cheese component. This quick chill is key for a stable base.
- Prepare the Cheesecake Dream: While the pudding is chilling, take out your softened cream cheese. It’s absolutely essential for your cream cheese to be at room temperature; otherwise, you’ll end up with lumps, and we want a silky-smooth cheesecake layer for our Easy Strawberry Cheesecake Banana Pudding. In a separate large bowl, using an electric mixer (either a stand mixer with a paddle attachment or a hand mixer), beat the softened cream cheese on medium speed until it’s light and fluffy, about 2-3 minutes. Scrape down the sides of the bowl as needed to ensure everything is evenly incorporated.
- Sweeten and Flavor the Cream Cheese: Gradually add the 1/2 cup of powdered sugar to the cream cheese, beating on low speed until combined, then increase to medium-high and beat until smooth and airy, another 1-2 minutes. Stir in the vanilla extract. This creates a wonderfully tangy-sweet cheesecake base that truly elevates the banana pudding experience.
- Combine for Ultimate Creaminess: Now for the magic! Retrieve your slightly thickened vanilla pudding from the refrigerator. Add the whipped cream cheese mixture to the bowl with the vanilla pudding. Using your electric mixer, beat on medium speed until the two are fully combined and the mixture is smooth, fluffy, and looks like a glorious cheesecake cloud. This ensures every bite of your Easy Strawberry Cheesecake Banana Pudding has that delightful cheesecake essence.
- Gently Fold in Whipped Topping: Finally, gently fold in the thawed whipped topping. Use a rubber spatula for this step, incorporating it carefully until no streaks remain. The goal here is to maintain as much air as possible for a light and airy texture. Do not overmix! This incredible creamy concoction will be the heart of your pudding, offering that luxurious “cheesecake” dimension. Set this aside; it’s ready for layering.
Prepping the Fruit for Freshness and Flavor
- Prepare the Strawberries: Take your fresh strawberries. First, you’ll want to hull them, which means removing the green leafy tops and the small white core. Then, slice them thinly. Aim for about 1/4-inch slices for a nice distribution throughout the layers. If your strawberries aren’t super sweet, you can toss them gently with 1/4 cup of granulated sugar in a medium bowl. This step is optional but can enhance their natural sweetness and create a lovely, slightly syrupy element. Let them sit for a few minutes while you prepare the bananas.
- Slice the Bananas: Peel your ripe but firm bananas. Slice them into even 1/4-inch rounds. To prevent them from browning, which happens quickly, you can gently toss them in a small bowl with 1 tablespoon of fresh lemon juice. This simple trick helps maintain their beautiful yellow color and prevents them from turning mushy too fast, ensuring your Easy Strawberry Cheesecake Banana Pudding looks as good as it tastes.
Assembling Your Easy Strawberry Cheesecake Banana Pudding
- Choose Your Dish: For this delightful dessert, you’ll need a large, clear serving dish, preferably a trifle bowl (about 3-4 quart capacity) or a 9×13-inch baking dish. Using a clear dish allows everyone to admire the beautiful layers of your Easy Strawberry Cheesecake Banana Pudding.
- First Layer – Vanilla Wafers: Arrange a single layer of vanilla wafers on the bottom of your chosen dish. You might need to break some wafers to fit them snugly and cover the entire base. This creates a wonderful foundational crunch that will soften just enough as the pudding chills.
- Second Layer – Creamy Cheesecake Goodness: Spread about one-third of your creamy vanilla-cheesecake mixture evenly over the vanilla wafers. Take your time to gently spread it to the edges, ensuring a smooth, consistent layer. This is where the “cheesecake” part of our Easy Strawberry Cheesecake Banana Pudding really starts to shine through!
- Third Layer – Bananas: Carefully arrange half of your sliced bananas over the creamy layer. Try to get an even distribution so that every serving gets a good amount of banana. Their sweet, soft texture is a classic pairing with the pudding.
- Fourth Layer – More Creamy Cheesecake: Spoon another one-third of the creamy mixture over the bananas, gently spreading it out to cover them completely. Be careful not to disturb the banana slices too much.
- Fifth Layer – Luscious Strawberries: Now, for the vibrant star! Arrange half of your prepared strawberry slices over the creamy layer. The bright red of the strawberries will pop against the pale pudding, making your Easy Strawberry Cheesecake Banana Pudding visually stunning.
- Repeat the Layers: Place another layer of vanilla wafers over the strawberries. Again, break them as needed to fill in gaps.
- Final Creamy Layer: Spread the remaining one-third of the creamy vanilla-cheesecake mixture over the vanilla wafers. This will be your top creamy layer.
- Garnish with Remaining Fruit: Artfully arrange the remaining banana slices on one side of the top creamy layer and the remaining strawberry slices on the other side, or alternate them for a beautiful pattern. This not only makes your Easy Strawberry Cheesecake Banana Pudding look professional but also gives a visual cue of the deliciousness within. If you have any extra vanilla wafers, you can crush a few and sprinkle them over the top for added texture or place a few whole ones around the edge.
Chilling and Serving Your Easy Strawberry Cheesecake Banana Pudding
- The Importance of Chilling: Once assembled, cover the dish tightly with plastic wrap. This step is absolutely crucial. Place your Easy Strawberry Cheesecake Banana Pudding in the refrigerator and chill for at least 4-6 hours, or even better, overnight. The longer it chills, the better the flavors will meld, and the wafers will soften to that perfect cake-like consistency. This chilling time allows all the individual components to come together in perfect harmony, transforming it from a collection of ingredients into a truly cohesive and indulgent dessert. The cheesecake elements will firm up, and the fruit flavors will infuse the pudding, making every spoonful a pure delight.
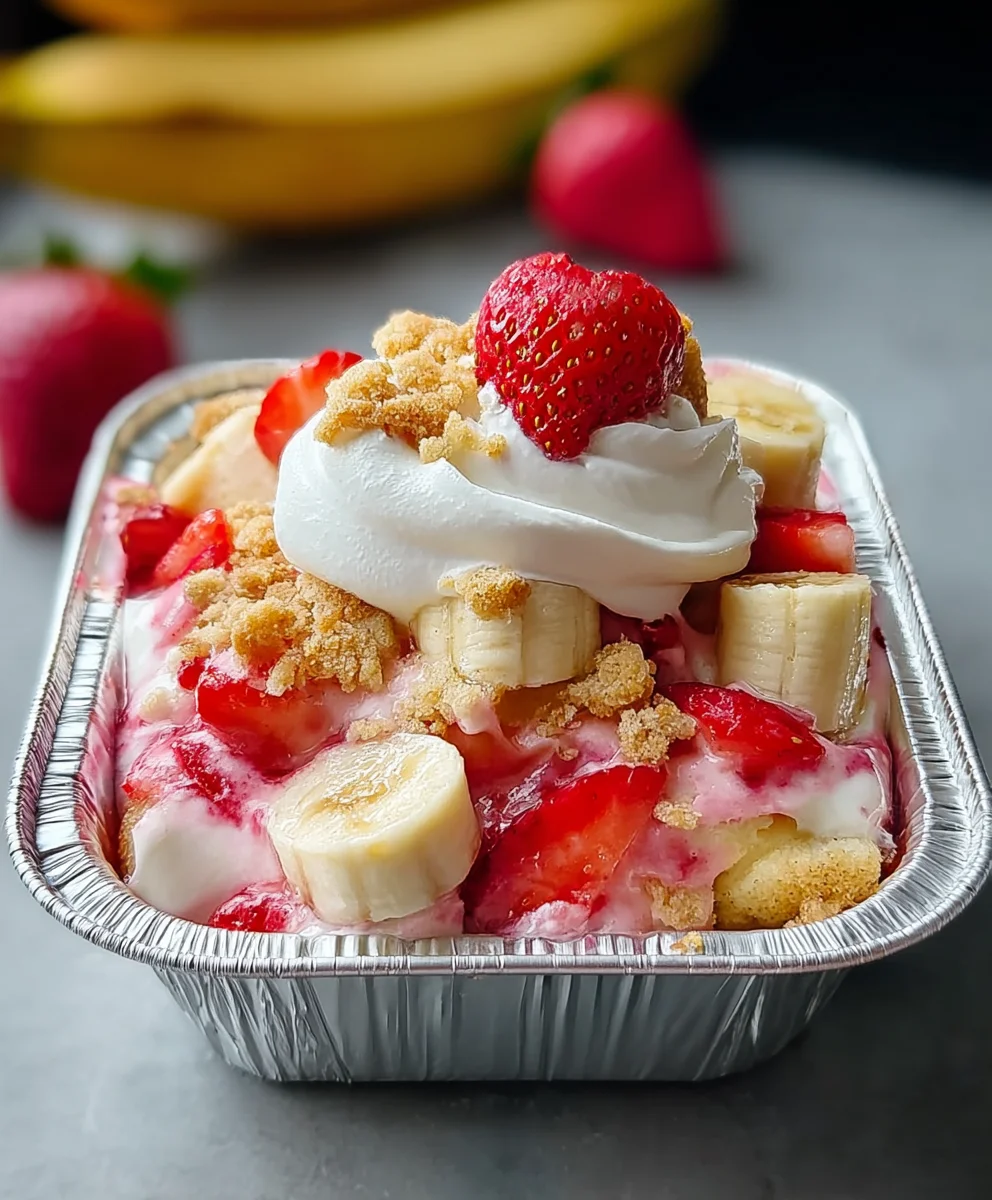
- Serving Suggestions: When you’re ready to serve, remove the plastic wrap. You can present your beautiful Easy Strawberry Cheesecake Banana Pudding directly from the dish. To serve, simply scoop generous portions into individual bowls. For an extra touch of elegance, you can garnish each serving with an additional fresh strawberry slice or a small dollop of whipped cream, perhaps even a sprig of mint if you’re feeling fancy. This dessert is a showstopper on its own, but these little additions can make it even more special.
- Storage: Any leftovers of your incredible Easy Strawberry Cheesecake Banana Pudding should be covered tightly and stored in the refrigerator. It’s best enjoyed within 2-3 days. While it’s still delicious beyond that, the bananas might start to darken, and the wafers might become a little too soft. But honestly, it’s so good, chances are there won’t be many leftovers! Enjoy every delightful, creamy, fruity bite of this easy-to-make, yet impressive, dessert.
Conclusion:
And there you have it, my friends! We’ve reached the sweet finale of our culinary journey, and I genuinely hope you’re as excited as I am about what we’ve created together. This isn’t just another dessert recipe; it’s a game-changer, a crowd-pleaser, and honestly, a little slice of heaven that you absolutely, positively need to experience. I speak from the heart when I say that the moment you take your first spoonful of this incredible concoction, you’ll understand why I’ve been raving about it.
What makes this particular treat a must-try? Well, it’s a harmonious symphony of textures and flavors that dance on your palate. Imagine the silky, smooth consistency of traditional banana pudding, infused with ripe, sweet banana notes, beautifully layered with the rich, tangy, and utterly decadent essence of cheesecake. Then, to elevate it even further, we introduce the vibrant, fruity burst of fresh strawberries, weaving through every bite. It’s this ingenious combination that sets our Easy Strawberry Cheesecake Banana Pudding apart from any other dessert you’ve ever tried. It manages to be comforting and familiar, yet excitingly fresh and new all at once. The “easy” part of its name is not just a suggestion; it’s a promise, meaning you can achieve gourmet-level results without spending hours in the kitchen, which, let’s be honest, is a huge win for all of us busy folks!
It’s the kind of dessert that elicits gasps of delight when it’s presented and murmurs of satisfaction with every mouthful. Perfect for family gatherings, potlucks, celebratory dinners, or even just a luxurious treat for yourself after a long week. You truly get the best of multiple dessert worlds—the creamy delight of pudding, the sophisticated tang of cheesecake, and the fresh fruitiness of a classic strawberry dessert—all rolled into one magnificent, no-bake masterpiece. This dessert isn’t just delicious; it’s an experience. It’s the kind of dish that people remember and ask you to make again and again. Its simplicity belies its profound impact, making it an invaluable addition to your recipe collection. You’ll love how effortlessly it comes together, and your guests will be utterly enchanted by its irresistible charm.
Serving Suggestions & Creative Variations:
Now that you’ve mastered the creation of this delightful pudding, let’s talk about presentation and personalization. While simply spooning it into a bowl is perfectly acceptable (and often the quickest route to enjoyment!), a little flair can make it truly shine. Consider serving individual portions in elegant clear glasses or mason jars. This not only looks beautiful, showcasing all those delightful layers, but also makes for easy grab-and-go servings at a party. For an extra touch of indulgence, a generous dollop of freshly whipped cream on top is always a welcome addition. You could even swirl a tiny bit of vanilla extract into your whipped cream for added fragrance. Garnishes are your friend here: a few perfectly ripe strawberry halves, a sprig of fresh mint for a pop of color, or a sprinkle of crushed vanilla wafers or graham crackers will add texture and visual appeal. For those who love a bit of chocolate, a light drizzle of white chocolate ganache or a scattering of white chocolate curls can be a truly decadent touch.
Feeling adventurous? The beauty of this recipe lies in its adaptability. While the core strawberry, cheesecake, and banana elements are divine, you can certainly put your own spin on it. Perhaps a seasonal variation featuring peaches or blueberries when they are at their peak? Or, for a truly tropical twist, a few flakes of toasted coconut sprinkled over the top could transport your taste buds to an island paradise. If you’re catering to different dietary needs, consider using sugar-free pudding mixes and whipped topping, or exploring gluten-free vanilla wafers. The possibilities are truly endless, limited only by your imagination!
Your Turn: Try It & Share Your Story!
So, dear reader, the moment of truth has arrived. I have poured my heart into sharing this recipe with you, and now it’s your turn to bring this magic to life in your own kitchen. I wholeheartedly encourage you to roll up your sleeves, gather your ingredients, and embark on the joyous journey of making this Easy Strawberry Cheesecake Banana Pudding. I am absolutely confident that you will be thrilled with the results – from the sheer ease of its preparation to the overwhelming deliciousness of every single bite. Don’t let anything stop you from experiencing this culinary delight!
Once you’ve had a chance to whip up your batch, please, please, please come back and share your experience with me and our wonderful community. I am genuinely eager to hear all about it! Did you love it as much as I do? Did you discover a clever shortcut or a unique serving suggestion? Perhaps you took some stunning photos of your finished masterpiece? I would be absolutely delighted if you’d leave a comment below, sharing your thoughts, tips, and triumphs. Better yet, snap a picture and share it on your favorite social media platforms, making sure to tag me so I can celebrate your success alongside you! Your feedback not only brightens my day but also helps inspire other home cooks to try new things. This recipe is an invitation to connect, to create, and to savor life’s sweet moments. Let’s make some memories, one delicious spoonful at a time. Happy no-baking!
Easy Strawberry Cheesecake Banana Pudding
A delightful, no-bake dessert combining the creamy richness of cheesecake, the sweet burst of fresh strawberries, and comforting layers of classic banana pudding. Simple to assemble, this dish is a perfect showstopper.
Ingredients
-
2 (3.4 oz) pkg instant vanilla pudding mix
-
4 cups cold whole milk
-
1 (8 oz) block full-fat cream cheese, softened
-
1/2 cup powdered sugar
-
1 tsp pure vanilla extract
-
1 (12 oz) container thawed whipped topping
-
2 lbs fresh strawberries, hulled & thinly sliced
-
1/4 cup granulated sugar (optional, for strawberries)
-
4-5 ripe but firm bananas, sliced
-
1 tbsp fresh lemon juice (optional, for bananas)
-
1 (12 oz) box vanilla wafers
Instructions
-
Step 1
In a large bowl, whisk 2 (3.4 oz) pkgs instant vanilla pudding mix with 4 cups cold milk for 2 minutes. Chill in the refrigerator for 5-10 minutes. -
Step 2
In a separate large bowl, beat 1 (8 oz) block softened cream cheese with an electric mixer until light and fluffy (2-3 minutes). Gradually add 1/2 cup powdered sugar and 1 tsp pure vanilla extract; beat until smooth and airy. -
Step 3
Add the prepared cream cheese mixture to the slightly thickened vanilla pudding. Beat on medium speed until fully combined, smooth, and fluffy. -
Step 4
Gently fold in 1 (12 oz) thawed whipped topping with a rubber spatula until no streaks remain. Do not overmix. Set aside. -
Step 5
Hull and thinly slice 2 lbs fresh strawberries. Optionally, toss with 1/4 cup granulated sugar. -
Step 6
Peel and slice 4-5 ripe but firm bananas into 1/4-inch rounds. Optionally, toss gently with 1 tbsp fresh lemon juice to prevent browning. -
Step 7
In a large (3-4 quart) clear serving dish or 9×13-inch baking dish, arrange a single layer of vanilla wafers on the bottom. Spread about one-third of the creamy vanilla-cheesecake mixture evenly over the wafers. Carefully arrange half of the sliced bananas over the creamy layer. -
Step 8
Spoon another one-third of the creamy mixture over the bananas. Arrange half of the prepared strawberry slices over this creamy layer. Add another layer of vanilla wafers. -
Step 9
Spread the remaining one-third of the creamy vanilla-cheesecake mixture over the last layer of wafers. Artfully arrange the remaining banana slices on one side and the remaining strawberry slices on the other side of the top layer. -
Step 10
Cover the dish tightly with plastic wrap and chill in the refrigerator for at least 4-6 hours, or preferably overnight, for flavors to meld and wafers to soften. Scoop generous portions into bowls to serve. Garnish with additional fresh strawberry slices or whipped cream if desired. Store leftovers covered in the refrigerator for 2-3 days.
Important Information
Nutrition Facts (Per Serving)
It is important to consider this information as approximate and not to use it as definitive health advice.
Allergy Information
Please check ingredients for potential allergens and consult a health professional if in doubt.


Leave a Comment