

Salted Caramel Apple Crumble Bars Fall Treat – just hearing those words evokes images of crisp autumn air, cozy evenings, and the comforting aroma of baked apples. I genuinely believe there’s no better way to usher in the cooler months than with a dessert that perfectly encapsulates the season’s bounty. While the concept of a “bar” dessert for portability is relatively modern, the humble apple crumble, or “crisp” as it’s known across the pond, boasts a rich history as a beloved, simple dessert, often gracing tables during harvest season. Our rendition takes this timeless classic and infuses it with a contemporary, irresistible flair that I know you’re going to adore.
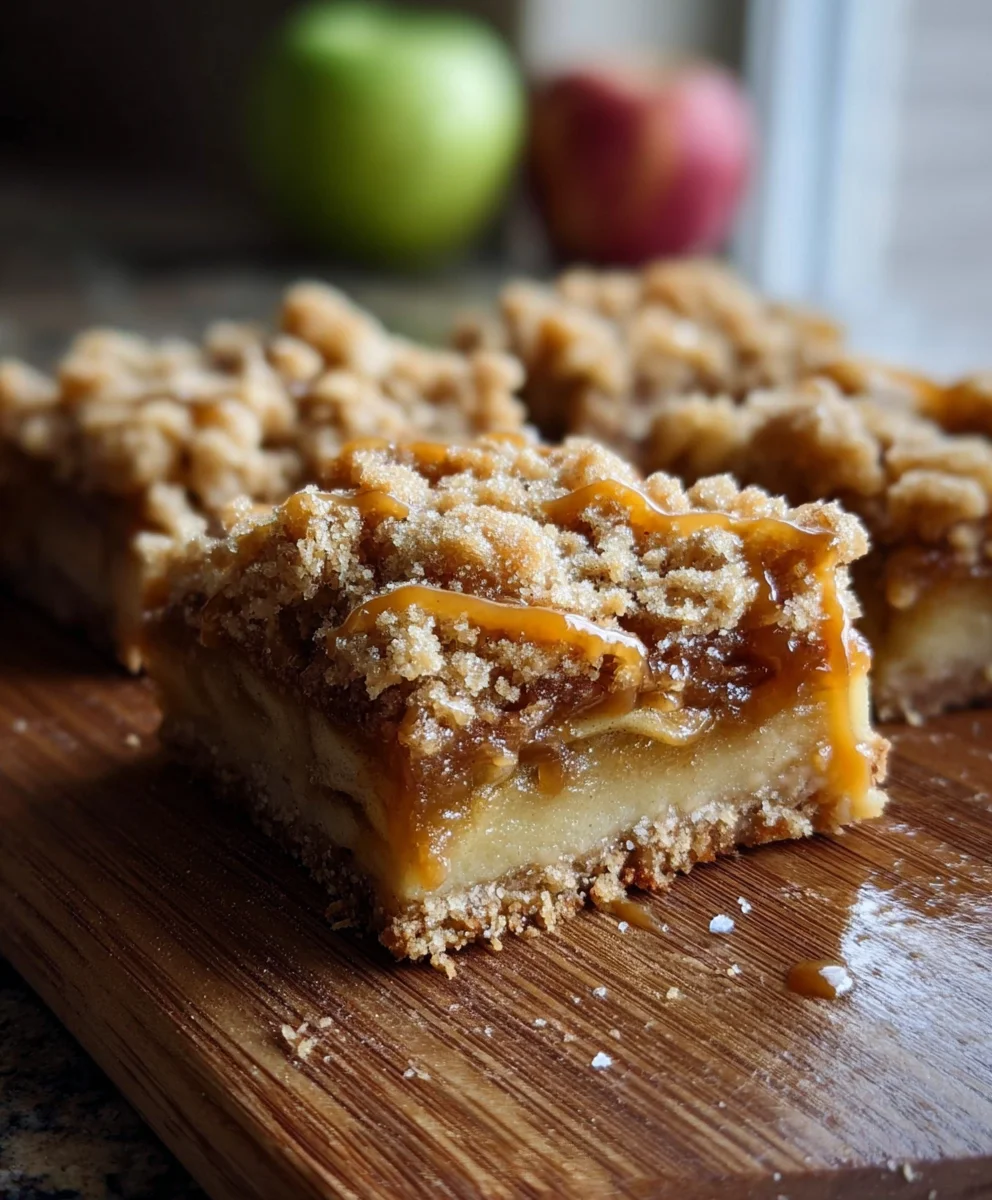
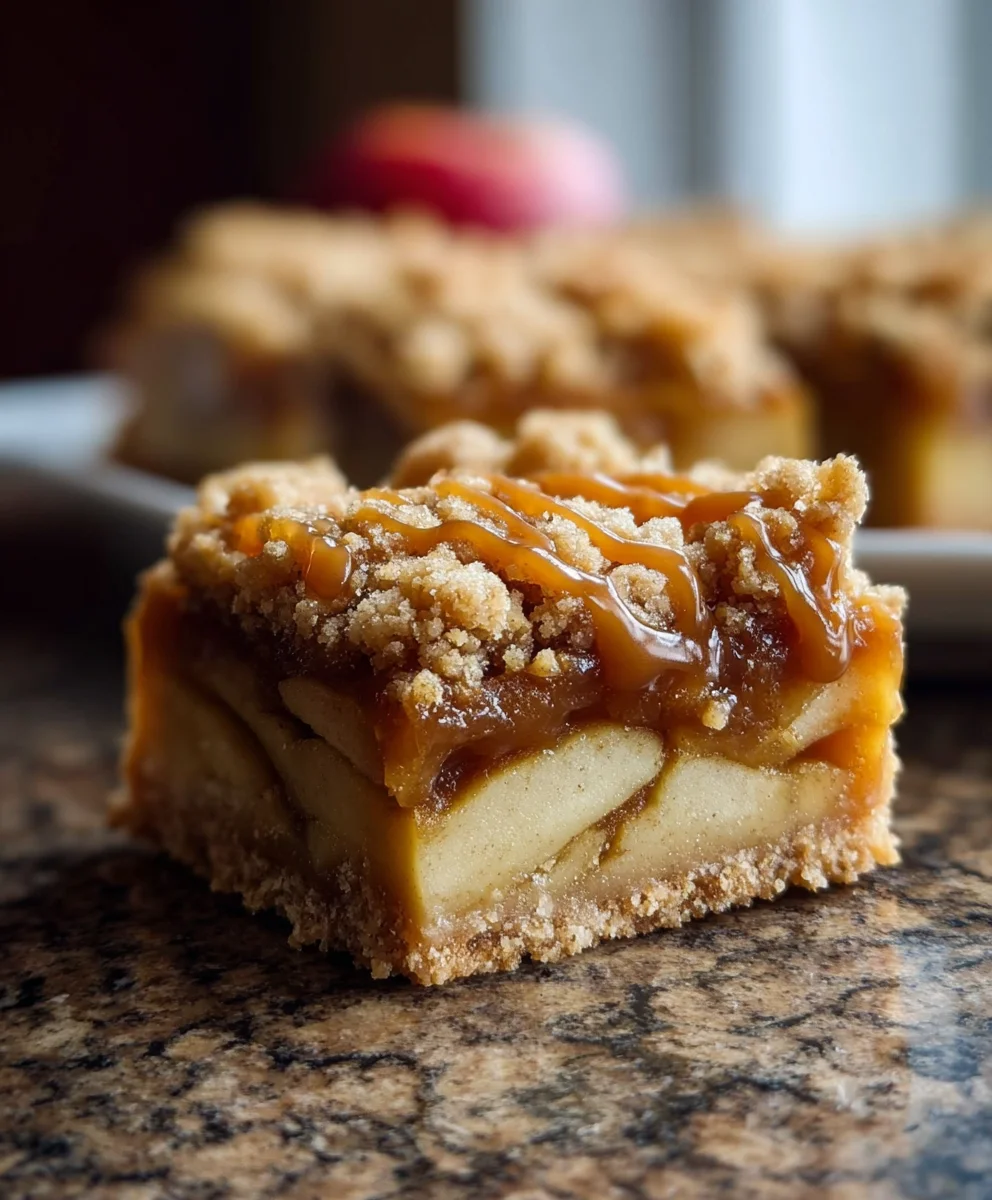
What makes these bars truly special, and why do people fall head over heels for them every year? It’s the exquisite symphony of flavors and textures that dance on your palate. Imagine biting into a chewy, buttery shortbread crust, followed by a layer of tender, warmly spiced apples, generously drizzled with luscious salted caramel, all crowned with a golden, crumbly oat topping. The magical balance of sweet, tart, and salty, combined with the contrasting textures of soft fruit and crunchy topping, makes for an utterly addictive experience. These convenient bars offer all the comforting charm of a traditional apple crumble without the need for a fork, making them the ultimate portable indulgence for potlucks, picnics, or simply a delightful afternoon pick-me-up. This truly is the definitive Salted Caramel Apple Crumble Bars Fall Treat you’ve been searching for.

Ingredients:
-
For the Shortbread Crust:
- 2 ½ cups (300g) all-purpose flour: I always use unbleached for the best texture in my crusts!
- ¾ cup (150g) granulated sugar: Just enough sweetness to balance the richness of the butter.
- ½ teaspoon baking powder: This gives the crust a slight lift and tender crumb, making it less dense than a traditional shortbread.
- ¼ teaspoon salt: Essential for balancing flavors and enhancing the sweetness.
- 1 cup (226g) unsalted butter, very cold and cut into ½-inch cubes: Keeping the butter cold is absolutely key for a flaky, tender shortbread. It prevents it from melting too quickly and allows it to create steam pockets during baking, resulting in that delightful crumbly texture.
- 1 large egg yolk: Adds richness and helps bind the dough, contributing to that lovely golden hue and a more tender crumb.
- 1 teaspoon pure vanilla extract: A classic flavor enhancer that truly elevates the base.
-
For the Apple Filling:
- 6-7 medium-sized apples (about 2-2.5 lbs), a mix of varieties works best: I love using Granny Smith for tartness paired with Honeycrisp or Fuji for sweetness and texture. These varieties hold their shape well during baking. You’ll need to peel, core, and slice them about ¼-inch thick. Consistency in slice thickness ensures even cooking.
- ½ cup (100g) granulated sugar: Adjust based on the natural sweetness of your chosen apples. If your apples are very sweet, you might reduce this slightly.
- 2 tablespoons all-purpose flour: This acts as a thickener, ensuring the filling isn’t too watery and preventing a soggy bottom crust. Cornstarch can be a substitute, but flour gives a slightly different, more cohesive consistency.
- 1 tablespoon fresh lemon juice: Brightens the apple flavor, prevents enzymatic browning of the apples, and provides a crucial acidic counterpoint to the sweetness. Don’t skip this!
- 1 teaspoon ground cinnamon: The quintessential apple spice! It provides warmth and that comforting aroma we associate with apple desserts.
- ¼ teaspoon ground nutmeg: Adds a warm, aromatic depth that pairs beautifully with cinnamon, enhancing the overall spice profile.
- ⅛ teaspoon ground cloves (optional): For an extra layer of warm, pungent spice, especially lovely in a Fall treat. A little goes a long way here.
-
For the Crumble Topping:
- 1 ½ cups (180g) all-purpose flour: The foundation of our buttery, crisp topping.
- ½ cup (100g) granulated sugar: For sweetness.
- ½ cup (100g) packed light brown sugar: Adds a lovely caramel-like flavor and moisture to the topping, which helps create those delightful, chewy clusters that are so irresistible.
- ½ teaspoon ground cinnamon: Echoes the spices in the filling for a cohesive and harmonious flavor profile throughout the bar.
- ¼ teaspoon salt: Crucial for balancing the sweetness and enhancing the rich butter notes in the crumble, preventing it from tasting flat.
- ¾ cup (170g) unsalted butter, very cold and cut into ½-inch cubes: Again, cold butter is paramount for a proper crumbly texture. It helps create those distinct little clusters we all love as it melts slowly during baking.
-
For the Salted Caramel Sauce (Homemade or Store-Bought):
- 1 cup (200g) granulated sugar: The base for our luscious, golden caramel.
- ¼ cup (60ml) water: Helps dissolve the sugar evenly, which is critical for preventing crystallization and ensuring a smooth caramel.
- 6 tablespoons (85g) unsalted butter, cut into small pieces: Adds incredible richness and a smooth, velvety texture to the finished caramel sauce.
- ½ cup (120ml) heavy cream, warmed: This is key to stopping the caramel from cooking further and giving it that silky, pourable consistency. Warming the cream beforehand helps prevent the caramel from seizing up when added.
- 1 teaspoon pure vanilla extract: For a classic depth of flavor that complements the butter and sugar.
- ½-1 teaspoon flaky sea salt: To achieve that perfect “salted caramel” balance that makes these Salted Caramel Apple Crumble Bars so addictively good. Adjust to your preference – I love a good generous pinch!
Preparing the Shortbread Crust
- First things first, let’s get our kitchen ready! Preheat your oven to 375°F (190°C). Then, line a 9×13-inch baking pan with parchment paper, leaving an overhang on the two longer sides. This “sling” will make it incredibly easy to lift the baked bars out of the pan later, ensuring a clean removal. I like to lightly grease the pan first to help the parchment stick securely.
- In a large mixing bowl, whisk together the 2 ½ cups all-purpose flour, ¾ cup granulated sugar, ½ teaspoon baking powder, and ¼ teaspoon salt until they are thoroughly combined. This preliminary step ensures all the dry ingredients are evenly distributed, leading to a consistent crust texture and preventing any pockets of unmixed ingredients.
- Now, it’s time for the butter. Add the very cold, cubed 1 cup unsalted butter to the dry ingredients. Using a pastry blender, your fingertips, or a food processor, cut the butter into the flour mixture until it resembles coarse crumbs. You’ll want some pea-sized pieces of butter still visible – these pockets of butter are what create that desirable tender, flaky texture as they melt and create steam during baking. If using your hands, work quickly and with light pressure to prevent the butter from getting too warm and melting prematurely.
- In a separate small bowl, lightly whisk the 1 large egg yolk with the 1 teaspoon pure vanilla extract. Pour this wet mixture over the butter-flour mixture. Continue to mix, either with your hands or a fork, until the dough just starts to come together. Be careful not to overmix at this stage; overworking the dough can develop the gluten too much, leading to a tough, rather than tender, crust. The dough will still look a bit crumbly, but when you press a handful together, it should hold its shape.
- Press about two-thirds of this dough mixture evenly and firmly into the bottom of your prepared 9×13-inch pan. I find it easiest to use the bottom of a flat glass or a measuring cup to get a nice, compact, and even layer. This forms the sturdy, buttery base of our delicious bars, providing a perfect foundation for the apple filling.
- Pop the pan with the pressed crust into the refrigerator while you prepare the apple filling. Chilling the crust for at least 15-20 minutes is a crucial step; it helps the butter firm up, preventing the crust from shrinking excessively during baking and giving it a superior crispness and tender crumb.
Crafting the Apple Filling
- While the crust is chilling, let’s get those apples ready! In a very large bowl, combine your peeled, cored, and ¼-inch sliced apples. Remember, a mix of tart and sweet apples truly shines here, offering a more complex flavor profile and better texture.
- Add the ½ cup granulated sugar, 2 tablespoons all-purpose flour, 1 tablespoon fresh lemon juice, 1 teaspoon ground cinnamon, ¼ teaspoon ground nutmeg, and the optional ⅛ teaspoon ground cloves to the sliced apples. Gently toss everything together until the apples are evenly coated with the spice and flour mixture. The flour will help to thicken the juices released by the apples during baking, preventing a soggy crust and ensuring a delightful, cohesive filling. The lemon juice is not just for flavor; it also helps prevent the apples from oxidizing and turning brown, keeping them looking fresh and vibrant.
Preparing the Crumble Topping
- In a separate medium-sized bowl, combine the 1 ½ cups all-purpose flour, ½ cup granulated sugar, ½ cup packed light brown sugar, ½ teaspoon ground cinnamon, and ¼ teaspoon salt. Whisk these dry ingredients together thoroughly. This ensures that the sugars, flour, and spices are evenly distributed, leading to a consistently flavored and textured crumble.
- Add the ¾ cup very cold, cubed unsalted butter to the dry mixture. Using a pastry blender or your fingertips (my favorite method for getting a feel for the texture!), work the butter into the flour mixture until coarse crumbs form. Again, some larger, pea-sized clumps are desirable – these will bake up into beautifully crisp, buttery clusters that are the hallmark of a great crumble topping. Don’t overmix; you want a rustic, crumbly texture, not a uniform paste, otherwise, you might end up with a denser, cakier topping rather than distinct crumbs.
Assembling and Baking Your Salted Caramel Apple Crumble Bars Fall Treat
- Retrieve the chilled crust from the refrigerator. Evenly spread the apple filling over the pressed shortbread crust. Try to get an even layer so that each bar gets a generous, consistent portion of apples, ensuring every bite is perfectly balanced.
- Crumble the topping mixture evenly over the apple filling. Don’t be shy; aim for full coverage. The more delicious, buttery crumble, the better, right? Distribute it well to ensure every part of the bar gets some of that glorious crunch.
- Place the pan into your preheated 375°F (190°C) oven. Bake for 50-65 minutes, or until the crumble topping is beautifully golden brown, the apples are tender when pierced with a knife, and the filling is visibly bubbly around the edges. The aroma filling your kitchen will be utterly intoxicating at this point! If you notice the topping browning too quickly, you can loosely tent the pan with aluminum foil for the last 15-20 minutes of baking to prevent over-browning while allowing the apples to finish cooking.
- Once baked to perfection, remove the pan from the oven and place it on a wire rack to cool completely. This is perhaps the hardest part of the recipe – waiting! Allowing the bars to cool fully is absolutely essential for the best results. The apple filling needs time to set properly, otherwise, they will be very messy and difficult to cut neatly. This can take at least 2-3 hours at room temperature, or even longer. For best results and the cleanest cuts, I often cool them for an hour or so at room temperature and then transfer them to the refrigerator to chill for another 2 hours or more. Patience truly pays off here.
Crafting the Salted Caramel Sauce (if homemade)
- While the bars are cooling, if you’re making your own salted caramel, let’s get started. In a heavy-bottomed saucepan (this is important for even heat distribution and preventing scorching), combine the 1 cup granulated sugar and ¼ cup water. Stir gently with a wooden spoon or heat-proof spatula to ensure all the sugar is moistened.
- Place the saucepan over medium heat. Do not stir once the sugar starts to dissolve and boil, as this can cause crystallization. Swirl the pan occasionally if needed to evenly distribute the heat and encourage even cooking. Watch it carefully! The sugar will melt, then bubble, and eventually turn a beautiful amber color. This process can take anywhere from 8-15 minutes, but the transition from perfect to burnt can happen very quickly, so stay attentive and do not walk away.
- Once the caramel reaches a deep amber color (think penny-brown, not dark mahogany, which indicates burning), immediately remove the pan from the heat. Carefully and slowly pour in the ½ cup warm heavy cream while constantly whisking. Be extremely cautious as the mixture will bubble up violently and release a lot of steam. Continue whisking until the mixture is smooth and fully combined. The warming of the cream helps prevent the caramel from seizing and turning into a solid lump.
- Add the 6 tablespoons of butter, one small piece at a time, whisking vigorously until each piece is fully incorporated and the sauce is smooth, glossy, and emulsified. This adds richness and further smooths out the caramel.
- Finally, whisk in the 1 teaspoon pure vanilla extract and ½ to 1 teaspoon flaky sea salt. Start with ½ teaspoon, taste, and add more if you like a stronger salty punch that truly contrasts with the sweetness. I personally love the balance a full teaspoon provides in a Salted Caramel Apple Crumble Bar.
- Allow the salted caramel sauce to cool slightly, stirring occasionally, until it has thickened to a pourable but not runny consistency. It will continue to thicken more as it cools further. If it gets too thick, you can gently warm it over low heat with a tiny splash of cream or water until it reaches your desired consistency.
Finishing Touches and Serving Your Salted Caramel Apple Crumble Bars
- Once the apple crumble bars are completely cooled (and I truly mean completely – this is the secret to clean cuts!), use the parchment paper overhang to carefully lift the entire slab out of the baking pan and onto a cutting board.
- Using a sharp knife, carefully cut the slab into individual bars. I usually aim for 12 large bars or 16 smaller ones, depending on how generous I’m feeling and the occasion. Wiping the knife clean between cuts with a damp cloth can help ensure neat, professional-looking edges for each bar.
- Now for the grand finale! Drizzle your homemade (or high-quality store-bought) salted caramel sauce generously over each bar. The amount is entirely up to your caramel-loving heart – some like a light drizzle, others prefer a decadent pooling of caramel. For an extra touch of indulgence and to truly make those “salted caramel” notes pop, you could sprinkle a tiny bit more flaky sea salt over the caramel just before serving.
- These Salted Caramel Apple Crumble Bars are absolutely perfect served at room temperature, allowing all the flavors and textures to shine. However, if you want to elevate the experience, a slightly warmed bar with a scoop of premium vanilla bean ice cream or a dollop of fresh whipped cream is nothing short of divine, especially on a crisp autumn evening. The combination of warm, spiced apples, buttery crumble, and cool ice cream with that irresistible salted caramel drizzle is truly a Fall treat that will impress everyone at your gathering!
- To store any leftover bars, place them in an airtight container at room temperature for up to 3 days, or in the refrigerator for up to 5 days. If you prefer them chilled, they’re delightful straight from the fridge. For longer storage, these bars freeze beautifully for up to 2 months. Just thaw at room temperature or gently reheat in the oven (around 300°F/150°C for 10-15 minutes) before serving to revive that fresh-baked warmth and crispness.
Conclusion:
Well, my friends, we’ve come to the delicious end of our journey, and I genuinely hope you’re feeling inspired and ready to get your hands sticky in the kitchen! This isn’t just another recipe; it’s an invitation to experience pure culinary bliss, a symphony of flavors and textures that simply demands your attention. From the very first bite, you’ll understand why these bars are destined to become a cherished favorite in your household. Imagine, if you will, the tender, sweet-tart apples, perfectly softened and infused with warm spices, nestled beneath a rich, gooey layer of homemade salted caramel. Then, there’s the crumble – a buttery, golden-brown crown, offering a delightful crunch that perfectly contrasts the soft filling, all resting on a sturdy, shortbread-like crust that holds every delicious component together. It’s truly a marvel of baking, a dessert that manages to be both incredibly comforting and undeniably elegant, hitting all the right notes for a satisfying treat.
What truly elevates this recipe to a must-try status is its incredible balance. The salt from the caramel cuts through the sweetness of the apples, creating a complex, crave-worthy profile that keeps you coming back for just one more square. The aroma alone, as these bake in your oven, is enough to fill your home with an intoxicating, cozy warmth, signaling that something truly special is about to emerge. It’s the kind of dessert that feels like a warm hug on a cool evening, making it the quintessential indulgence. I’ve poured my heart into perfecting this balance, ensuring that each element contributes to an unforgettable experience, making every bite a moment of pure joy. Trust me when I say, this is one of those recipes that will be requested again and again, becoming a staple in your repertoire for its sheer deliciousness and relative ease.
Now, let’s talk about how to best enjoy these delightful creations! While they are absolutely phenomenal served simply at room temperature, a truly magical experience awaits when they’re warmed slightly. Imagine a square, gently heated in the microwave or oven, then topped with a generous scoop of good quality vanilla bean ice cream. The cold, creamy ice cream melting into the warm, gooey caramel and tender apples is an utterly divine sensation. For an extra touch of decadence, a drizzle of extra homemade salted caramel sauce over the top, perhaps with a sprinkle of flaky sea salt, will elevate them to an even higher plane of dessert heaven. Don’t shy away from serving them with a dollop of freshly whipped cream, perhaps infused with a hint of cinnamon or maple for an added autumnal flair. And if you’re feeling adventurous, consider a few variations for your next batch: a handful of toasted pecans or walnuts added to the crumble topping can introduce a wonderful nutty crunch, or a pinch of freshly grated nutmeg alongside the cinnamon in the apple filling can deepen its aromatic appeal. For a different fruit profile, consider swapping out some of the apples for pears, creating a delightful apple-pear crumble bar.
I genuinely cannot wait for you to experience this magic for yourselves. My biggest hope is that you’ll embrace the joy of creating these wonderful bars and that they bring as much happiness to your table as they do to mine. Don’t be shy – dive in, follow the steps, and watch as these incredible bars come to life in your kitchen. This is more than just a recipe; it’s an experience waiting to happen, a culinary adventure that promises delicious rewards. Once you’ve had the pleasure of baking and tasting these phenomenal treats, I’d absolutely love to hear all about it! Please, share your creations, your triumphs, and any clever variations you come up with. Tag me in your photos, tell me how your family and friends reacted, or simply drop a comment below. Your feedback and stories are what truly inspire me and help this wonderful community grow. So go forth, bake, enjoy, and share the love for this magnificent Salted Caramel Apple Crumble Bars Fall Treat. I’m already looking forward to hearing about your delicious endeavors!
Salted Caramel Apple Crumble Bars Fall Treat
These Salted Caramel Apple Crumble Bars are the perfect fall treat, offering a symphony of sweet, tart, and salty flavors with contrasting textures. A chewy, buttery crust is topped with tender, spiced apples, drizzled with luscious salted caramel, and crowned with a golden, crumbly oat topping. Convenient and portable, they are ideal for any fall gathering or a delightful pick-me-up.
Ingredients
-
1 cup (2 sticks) unsalted butter, melted
-
1 1/2 cups granulated sugar
-
1 teaspoon vanilla extract
-
1/2 teaspoon salt
-
2 1/2 cups all-purpose flour
-
3 cups peeled and thinly sliced apples (about 3 medium)
-
1/2 cup salted caramel sauce
-
1 teaspoon ground cinnamon
-
1/4 teaspoon ground nutmeg
Instructions
-
Step 1
Preheat oven to 375°F (190°C). Line a 9×13-inch baking pan with parchment paper, leaving an overhang for easy lifting. -
Step 2
In a large bowl, combine 2 1/2 cups all-purpose flour, 1 cup granulated sugar (from 1 1/2 cups total), and 1/2 teaspoon salt. Add 1 cup melted unsalted butter and 1 teaspoon vanilla extract; mix until coarse crumbs form. Reserve 1/2 cup of this mixture for the crumble topping. -
Step 3
Press the remaining flour mixture evenly and firmly into the bottom of the prepared pan. Chill in the refrigerator for at least 15 minutes. -
Step 4
In a separate bowl, combine 3 cups peeled and thinly sliced apples with the remaining 1/2 cup granulated sugar, 1 teaspoon ground cinnamon, and 1/4 teaspoon ground nutmeg. Toss until the apples are evenly coated. -
Step 5
Evenly spread the apple filling over the chilled crust. Sprinkle the reserved crumble mixture evenly over the apples. -
Step 6
Bake for 50-65 minutes, or until the crumble topping is golden brown and the apples are tender. If the topping browns too quickly, loosely tent the pan with aluminum foil. -
Step 7
Remove from oven and cool completely on a wire rack (2-3 hours or more). Once cooled, use the parchment overhang to lift the slab, cut into bars, and generously drizzle with 1/2 cup salted caramel sauce. -
Step 8
Store leftover bars in an airtight container at room temperature for up to 3 days, or in the refrigerator for up to 5 days. Bars can be frozen for up to 2 months.
Important Information
Nutrition Facts (Per Serving)
It is important to consider this information as approximate and not to use it as definitive health advice.
Allergy Information
Please check ingredients for potential allergens and consult a health professional if in doubt.


Leave a Comment