

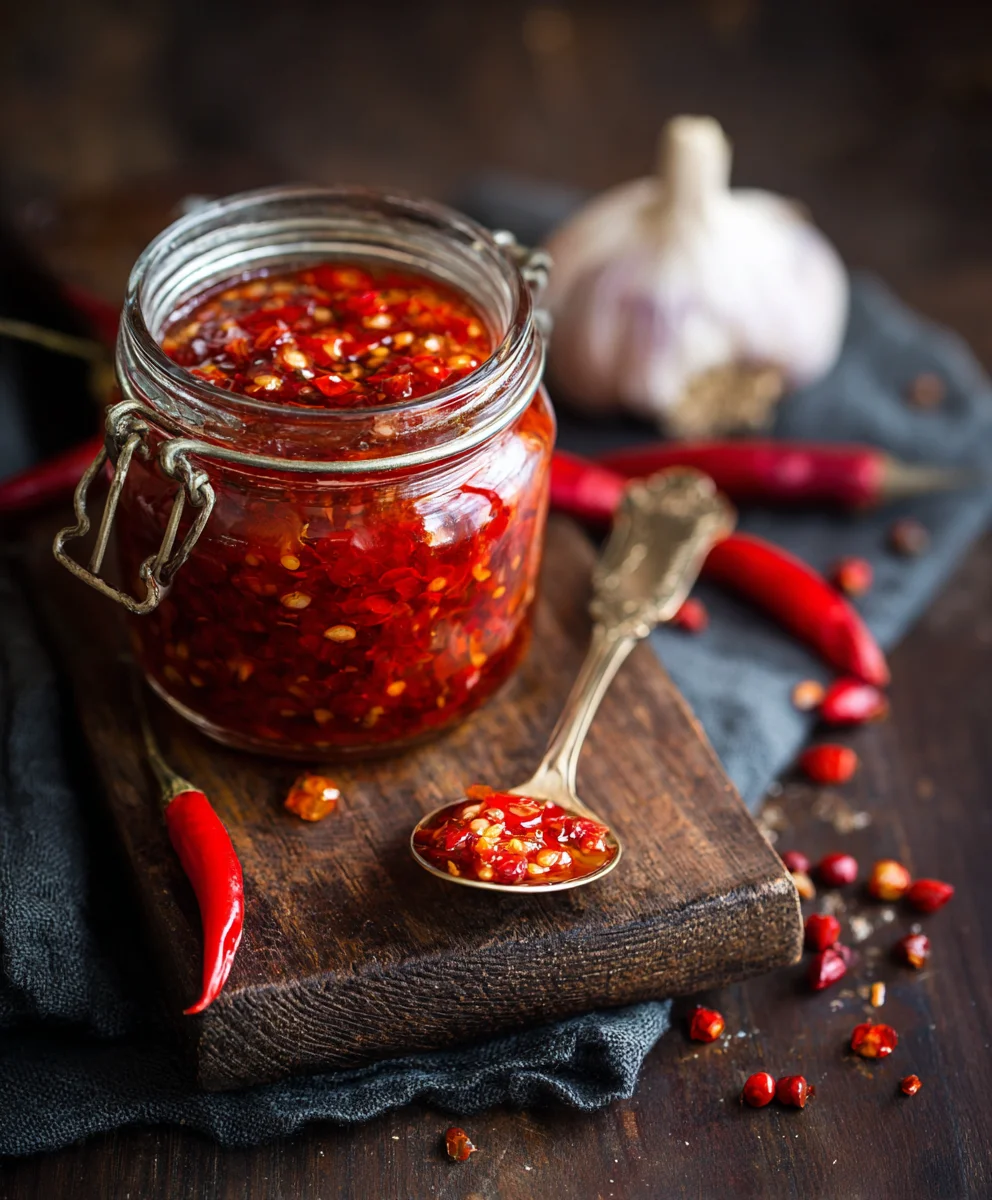
Homemade Chili Garlic Sauce – Are you ready to unlock a world of vibrant flavors and transform your everyday meals into extraordinary culinary experiences? There’s an undeniable magic in a condiment that packs both a fiery punch and an aromatic depth, elevating everything from a simple stir-fry to a humble bowl of noodles, or even your morning eggs. I believe the secret lies in crafting it yourself, ensuring unparalleled freshness and robust flavor that store-bought versions often lack.
Originating from the rich culinary traditions of Asia, particularly prevalent in Szechuan, Vietnamese, and Thai cuisines, chili garlic sauce has long been a foundational element, cherished for its ability to awaken the palate and add a layer of complex heat. Making your own connects you directly to this culinary heritage, allowing you to appreciate the authentic, nuanced profile that has delighted generations.
Unlike its store-bought counterparts, preparing your own Homemade Chili Garlic Sauce offers complete control over the heat level, the quality of ingredients, and the glorious freshness that simply cannot be replicated. You’ll find that the texture is perfect, the aroma intoxicating, and the taste profile perfectly balanced between spicy, savory, and subtly sweet notes. This vibrant, versatile condiment is more than just a sauce; it’s an essential flavor enhancer that promises to become a beloved staple in your kitchen, making every dish sing with an unforgettable zest and pungency.

Ingredients:
- 2 cups fresh red chilies: I love using a mix for depth of flavor and heat. A combination of Fresno, Thai bird’s eye, and a few dried Guajillo rehydrated in hot water can be fantastic. You can adjust the types based on your desired heat level. For a milder sauce, use mostly Fresno or similar; for intense heat, lean heavily on bird’s eye or even Habanero, but use them judiciously!
- 1 whole head of garlic: Yes, an entire head! Freshly peeled and roughly chopped. You’ll want about 1/2 to 3/4 cup once it’s prepped. Don’t skimp on the garlic; it’s half the magic in our Homemade Chili Garlic Sauce.
- 1/2 cup neutral oil: I prefer grapeseed, canola, or vegetable oil. They have a high smoke point and won’t impart a strong flavor, allowing the chili and garlic to shine.
- 2 tablespoons rice vinegar: Or apple cider vinegar if you prefer. The acidity brightens the sauce and helps balance the heat and richness.
- 1 tablespoon granulated sugar: This isn’t just for sweetness; it rounds out the flavors beautifully and helps to temper the chili’s fiery kick.
- 1 teaspoon salt: I generally start with this amount and adjust later. Fine sea salt is excellent here.
- Optional additions for depth and complexity:
- 1 tablespoon gochugaru (Korean chili flakes): Adds a wonderful texture and a different layer of chili flavor, often with a hint of smokiness.
- 1 teaspoon smoked paprika: For an extra smoky dimension.
- 1 teaspoon fish sauce: A tiny dash can add an incredible umami depth, but it’s entirely optional if you prefer to keep it vegetarian/vegan.
- Zest of 1 lime or lemon: Adds a fragrant, bright lift at the end.
Preparing Our Key Aromatics: The Chilies and Garlic for Homemade Chili Garlic Sauce
-
First, let’s tackle those chilies! This is perhaps the most important foundational step for our Homemade Chili Garlic Sauce. Begin by washing your fresh red chilies thoroughly under cold running water. Pat them completely dry with a clean kitchen towel.
A very important safety note here: I always recommend wearing disposable gloves when handling chilies, especially if you’re working with hotter varieties like Thai bird’s eye. The capsaicin oils can linger on your skin and cause irritation if you accidentally touch your eyes or other sensitive areas. Believe me, I’ve learned this the hard way!
Once clean and dry, you’ll need to remove the stems from all the chilies. For those seeking a milder sauce, or if you’re using very hot chilies and want to reduce the intensity significantly, you can carefully slice the chilies lengthwise and use a small spoon or the tip of a knife to scrape out the seeds and internal white membranes. These parts hold a large concentration of capsaicin, which is the compound responsible for chili’s heat. If you love the heat and want a truly fiery sauce, feel free to leave the seeds in. For a balanced, medium-hot sauce, I usually deseed about half of my chilies and leave the seeds in the other half. After deseeding (if desired), give them a rough chop. Don’t worry about perfection here, as they’ll be going into the food processor.
Regarding chili selection: If you’re mixing fresh and dried chilies (like the rehydrated Guajillos I mentioned), ensure the dried ones are fully softened before processing. To rehydrate, simply soak them in very hot water for about 20-30 minutes, then drain thoroughly before adding them to the mix. The blend of fresh, vibrant heat with the deeper, often fruitier notes of dried chilies creates a more complex and nuanced flavor profile for our Homemade Chili Garlic Sauce.
-
Next up: the garlic! Peel your entire head of garlic. I find the easiest way to do this is to smash each clove gently with the flat side of a chef’s knife; the skin usually peels right off. If you’re struggling, a quick blanch in hot water for 30 seconds, followed by an ice bath, can make peeling a breeze. Once peeled, give the cloves a rough chop. Again, no need for meticulous mincing at this stage, as our trusty food processor will do most of the work for us.
Why so much garlic? Garlic and chili are a match made in culinary heaven. The garlic provides a pungent, aromatic foundation that beautifully complements and mellows the chili’s heat. When cooked slowly, as we will do, the garlic sweetens and develops an incredible depth that is absolutely essential to the character of a truly outstanding Homemade Chili Garlic Sauce. Using fresh garlic is non-negotiable here; pre-minced garlic in a jar simply won’t yield the same vibrant flavor.
Crafting the Flavorful Paste for Our Homemade Chili Garlic Sauce
-
Time to blend! Carefully transfer your roughly chopped chilies and garlic into the bowl of a food processor. Make sure the lid is securely fastened. Now, pulse the mixture. You’re aiming for a coarse, somewhat chunky paste, not a completely smooth purée. I usually pulse it about 10-15 times, stopping to scrape down the sides of the bowl with a spatula once or twice to ensure everything is evenly processed.
Texture is key here. A good Homemade Chili Garlic Sauce should have some body and texture, allowing you to see flecks of chili and garlic. If you over-process it, you risk ending up with a watery consistency and a less appealing mouthfeel. We want that satisfying bite!
If you find your food processor struggling to blend the mixture, you can add a tablespoon or two of the neutral oil listed in the ingredients to help it along, but avoid adding too much liquid at this stage, as we want to control the final consistency during the cooking process. The natural moisture from the chilies and garlic should be sufficient to create a paste.
This step is critical because the consistency of the paste will directly impact how the sauce cooks and its final texture. A finer chop will cook down more quickly and result in a smoother sauce, while a coarser chop will give you more texture. I personally lean towards a slightly coarser chop, allowing the distinct flavors and textures of the chili and garlic to remain pronounced, which I find adds immensely to the homemade charm of this sauce.
The Heart of the Recipe: Cooking Our Homemade Chili Garlic Sauce to Perfection
-
Sautéing the aromatics: Place a medium-sized heavy-bottomed pot or a deep skillet over medium-low heat. Add the 1/2 cup of neutral oil. Once the oil is shimmering gently, carefully add your chili and garlic paste to the pot.
Be prepared for some sputtering! The moisture from the paste will react with the hot oil, so it’s wise to have a splatter screen handy or to stand back a bit. Stir the mixture constantly for the first few minutes to prevent any sticking or burning.
Now, this is where the magic really starts to happen for our Homemade Chili Garlic Sauce. You’re not just cooking; you’re developing layers of flavor. Reduce the heat to low and allow the paste to slowly simmer in the oil. This slow cooking process, often referred to as “blooming” the aromatics, is crucial. It allows the garlic to mellow and sweeten, transforming its sharp edge into a rich, nutty flavor, while the chili’s raw heat softens and its fruitier notes emerge.
You’ll want to cook it for at least 20-30 minutes, stirring occasionally to ensure even cooking and to prevent the bottom from scorching. What you’re looking for is a change in color and aroma. The garlic will turn a light golden brown, and the chili paste will deepen in color. The kitchen will fill with an incredibly inviting, savory, and subtly spicy aroma. Don’t rush this step; patience here truly pays off in the final depth of flavor of your Homemade Chili Garlic Sauce.
If you chose to add optional gochugaru or smoked paprika, now is a good time to stir them in, about 10 minutes into the cooking process. This allows their flavors to bloom in the hot oil as well, integrating them seamlessly into the sauce. The gochugaru, in particular, will contribute to a beautiful vibrant red color.
-
Seasoning and simmering to perfection: After your chili and garlic paste has cooked down beautifully and the oil is infused with all those amazing flavors (around the 20-30 minute mark, but it could be longer depending on the moisture content of your chilies and the heat), it’s time to add the remaining ingredients.
Stir in the 2 tablespoons of rice vinegar, the 1 tablespoon of granulated sugar, and the 1 teaspoon of salt. If you’re using optional fish sauce, add it now too.
Give everything a thorough stir to combine. The addition of the vinegar will create a wonderful fragrance and help cut through the richness of the oil and the heat of the chilies. The sugar will balance the acidity and the spice, creating a harmonious flavor profile.
Continue to simmer the sauce on low heat for another 10-15 minutes. During this final simmer, the flavors will meld together even further, and any remaining excess moisture will evaporate, concentrating the sauce. You’ll notice the sauce thickening slightly and becoming more cohesive. The oil will separate and gather around the chili and garlic solids, which is exactly what we want. This oil layer is not just for flavor; it’s also a natural preservative.
Taste and adjust: This is a crucial moment for your Homemade Chili Garlic Sauce. Carefully taste a small amount of the sauce (be cautious, it will be hot!). Does it need more salt? A little more sugar to round it out? Perhaps a tiny splash more vinegar for brightness? Adjust according to your personal preference. Remember, it’s easier to add more than to take away, so add incrementally. If you find it too spicy, a bit more sugar or a touch of lime juice can help temper the heat. If it’s not spicy enough, you might consider stirring in a bit more gochugaru or a pinch of cayenne pepper, though it won’t have the same fresh chili flavor development.
If you’re adding fresh citrus zest (lime or lemon), stir it in during the last minute of simmering or even right after you remove the pot from the heat. This preserves its vibrant, aromatic oils.
Cooling and Storing Your Homemade Chili Garlic Sauce
-
Cooling down: Once you’re happy with the flavor and consistency of your Homemade Chili Garlic Sauce, remove the pot from the heat. Allow the sauce to cool completely at room temperature before transferring it to storage containers. This is an important step for both safety and flavor preservation. Transferring hot sauce to a sealed container can create condensation, which can introduce moisture and potentially lead to spoilage. Cooling slowly also allows the flavors to continue to deepen and meld.
You can leave it in the pot, stirring occasionally as it cools, or spread it out slightly on a baking sheet to speed up the cooling process, though I find simply leaving it in the pot works well. Ensure it reaches room temperature, which can take several hours, depending on the volume.
-
Storage savvy: For the best shelf life and safety, I highly recommend sterilizing your storage jars. You can do this by washing glass jars and lids in hot, soapy water, rinsing them thoroughly, and then placing them in a preheated oven at 275°F (135°C) for 10-15 minutes. Alternatively, you can run them through a hot cycle in your dishwasher. Make sure they are completely dry before filling.
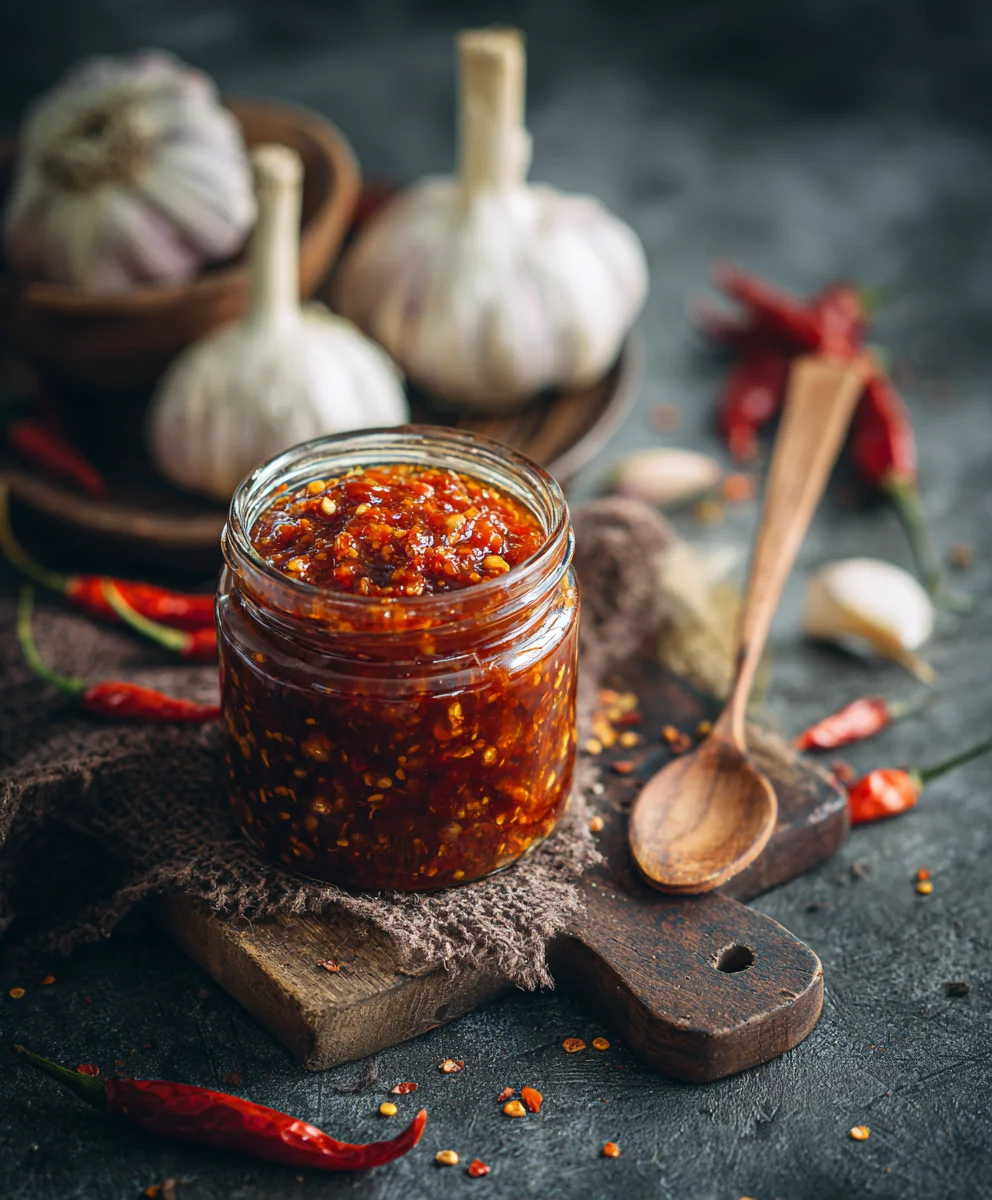
Once cooled, spoon the Homemade Chili Garlic Sauce into your clean, sterilized jars. Make sure to leave a little headspace at the top. The beauty of this sauce is that the oil acts as a natural preservative. After filling the jars, I like to ensure there’s a visible layer of oil on top of the sauce. If needed, you can gently pour a little extra neutral oil over the top to create a protective seal. This helps to prevent air exposure and inhibit spoilage.
Seal the jars tightly with their lids. Store your homemade chili garlic sauce in the refrigerator. Properly stored in sterilized jars with an oil seal, it should last for at least 3-4 weeks, if not longer. I’ve had batches last well over a month, but always trust your senses – if it smells off or you see any signs of mold, it’s best to discard it.
For longer storage: This sauce also freezes beautifully! You can transfer smaller portions into ice cube trays, freeze until solid, then pop out the cubes and store them in a freezer-safe bag or container. This way, you can grab just a single serving whenever you need a boost of flavor. Frozen, it can last for several months, ensuring you always have a supply of your amazing Homemade Chili Garlic Sauce on hand.
Tips for Enjoying Your Homemade Chili Garlic Sauce
-
Embrace its versatility: Your freshly made Homemade Chili Garlic Sauce is incredibly versatile and will elevate almost any dish. It’s not just a condiment; it’s a flavor powerhouse.
- Stir-fries and Noodles: A spoonful stirred into your favorite stir-fry or noodle dish adds instant depth, heat, and garlic punch. It’s particularly fantastic in a quick lo mein or a spicy ramen broth.
- Dipping Sauce: Mix it with a bit of soy sauce, a dash of sesame oil, and a squeeze of lime juice for an amazing dumpling or spring roll dipping sauce. It’s also phenomenal straight up with crispy fried chicken or even just a piece of crusty bread.
- Marinades: Incorporate it into marinades for chicken, beef, or tofu to infuse a delightful spicy-garlicky flavor before grilling, roasting, or pan-frying.
- Eggs and Breakfast: A dollop on scrambled eggs, a fried egg, or even avocado toast can transform a simple breakfast into something extraordinary.
- Soups and Stews: Stir a teaspoon or two into your soup or stew just before serving for an extra layer of warmth and complexity. It’s especially good in lentil soups or a hearty chili.
- Sandwiches and Wraps: Spread a thin layer on your sandwiches or wraps for a spicy kick that wakes up all the other flavors.
- Vegetable Roasts: Toss roasted vegetables like broccoli, cauliflower, or potatoes with a bit of the sauce after they come out of the oven for a vibrant finish.
Remember, the flavor will continue to deepen over the first few days in the refrigerator, so it might taste even better after a short rest. Don’t be afraid to experiment and find your favorite ways to use this incredibly delicious and robust Homemade Chili Garlic Sauce. It’s a staple in my kitchen, and I’m confident it will become one in yours too!
<h2>Conclusion:</h2>
<p>Well, my friends, we’ve reached the end of our culinary journey, but truly, this is just the beginning of countless delicious adventures for you! I genuinely believe that mastering this recipe for <strong>Homemade Chili Garlic Sauce</strong> isn’t just about adding another jar to your pantry; it’s about unlocking a new dimension of flavor in your cooking. Forget those lackluster, one-note store-bought options that often taste more of preservatives than fresh ingredients. My recipe, crafted with care and a touch of passion, promises a vibrant, aromatic, and deeply satisfying experience that will elevate even the simplest dishes to gourmet status. The process itself is incredibly rewarding, filling your kitchen with an intoxicating aroma that will make your taste buds tingle in anticipation. You’re not just making a condiment; you’re creating a secret weapon, a flavor enhancer that offers a perfect balance of fiery heat, pungent garlic, and savory depth, completely customizable to your palate.</p>
<h4>Unleashing the Flavor: How to Enjoy Your Sauce</h4>
<p>Now that you’ve got your beautiful jar of liquid gold, the possibilities are truly endless! This isn’t a sauce meant to sit quietly in the fridge; it demands to be used liberally and creatively. Let me share some of my favorite ways to incorporate this versatile condiment into everyday meals, turning ordinary into extraordinary. <strong>Think beyond just dipping!</strong> For a quick and fiery breakfast, a dollop drizzled over scrambled eggs or avocado toast is an absolute game-changer, waking up your senses in the best possible way. Imagine mixing it into your morning omelet or whisking it into a savory breakfast bowl. At lunchtime, stir a spoonful into your instant ramen or pho for an authentic, restaurant-quality kick. It’s magnificent swirled into a simple chicken noodle soup, adding layers of warmth and zest. For dinner, it transforms plain white rice into a fragrant masterpiece, or you can mix it into stir-fries, noodle dishes, or even use it as a flavorful base for marinades for grilled chicken, shrimp, or tofu. My personal favorite is to toss roasted vegetables like broccoli or Brussels sprouts with a generous amount right after they come out of the oven – the heat from the veggies helps to release even more of the sauce’s incredible aroma. It also makes for an unbelievably good dipping sauce for dumplings, spring rolls, or even just humble crusty bread. Don’t be afraid to experiment! Mix it with some mayonnaise for a spicy sandwich spread, or blend it into cream cheese for an amazing cracker dip. Trust me, once you start, you’ll find yourself reaching for it constantly.</p>
<h4>Your Culinary Canvas: Customizing Your <strong>Homemade Chili Garlic Sauce</strong></h4>
<p>One of the greatest joys of making things from scratch, especially something as adaptable as chili garlic sauce, is the freedom to make it uniquely yours. While my recipe provides a fantastic foundation, consider it a starting point for your own culinary creativity. Want more heat? Feel free to add a few extra dried chilies or even a fresh habanero or two (handle with extreme caution!). For a less intense experience, you can reduce the number of chilies or even remove some of the seeds. <strong>Don’t hesitate to play with aromatics!</strong> A small piece of fresh ginger, finely minced, adds a beautiful zing and complexity, especially if you’re pairing it with Asian-inspired dishes. A touch of rice vinegar or a squeeze of fresh lime juice can brighten the flavors, adding a subtle tang that cuts through the richness. If you prefer a slightly sweeter profile, a tiny pinch of sugar or a drizzle of maple syrup can balance the heat beautifully. For an even deeper umami punch, a splash of soy sauce or a spoonful of fermented black beans can work wonders, lending an authentic depth that’s simply irresistible. You can also experiment with different oils – toasted sesame oil will give it a nutty aroma, while peanut oil can add a subtle, earthy note. The texture is also up to you; pulse it a bit less for a chunkier sauce with more discernible chili flakes and garlic bits, or blend it longer for a smoother, more uniform consistency. This <strong>Homemade Chili Garlic Sauce</strong> is truly your canvas, and I encourage you to paint with flavors that speak to you.</p>
<p>So, what are you waiting for? I genuinely hope you take the plunge and whip up a batch of this extraordinary sauce. The satisfaction of creating something so flavorful and versatile with your own hands is immense, and I promise you won’t regret it. It’s a testament to the fact that the best flavors often come from the simplest, freshest ingredients, prepared with a little love. Once you’ve made it, I would absolutely love to hear about your experience! <strong>Please, share your creations and your favorite ways to use this sauce</strong>. Did you try any unique variations? What dishes did it transform for you? Your feedback and culinary adventures inspire me, and I can’t wait to see how this incredible <strong>Homemade Chili Garlic Sauce</strong> becomes a beloved staple in your kitchen. Happy cooking!</p>
Homemade Chili Garlic Sauce
Unlock vibrant flavors with this easy-to-make Homemade Chili Garlic Sauce. A fiery, aromatic condiment, it’s perfect for stir-fries, noodles, eggs, and more. Crafting it yourself ensures unparalleled freshness, robust flavor, and control over heat, bringing authentic Asian culinary heritage to your kitchen. Fresh garlic, a key ingredient, naturally boosts your immune system.
Ingredients
-
2 cups fresh red chilies (e.g., Fresno, Thai bird’s eye)
-
1 whole head of garlic, peeled & chopped
-
1/2 cup neutral oil (grapeseed, canola, or vegetable)
-
2 tbsp rice vinegar (or apple cider vinegar)
-
1 tbsp granulated sugar
-
1 tsp salt
-
Optional: 1 tbsp gochugaru (Korean chili flakes)
-
Optional: 1 tsp smoked paprika
-
Optional: 1 tsp fish sauce (or skip for vegan)
-
Optional: Zest of 1 lime or lemon
Instructions
-
Step 1
Wash and dry chilies (wear gloves!). Remove stems. Deseed partially or fully based on desired heat, then roughly chop. Peel and roughly chop 1 whole head of garlic. -
Step 2
In a food processor, pulse chopped chilies and garlic until a coarse, chunky paste forms. Scrape sides as needed. -
Step 3
Heat 1/2 cup neutral oil in a heavy pot over medium-low heat. Add chili-garlic paste. Sauté slowly for 20-30 minutes, stirring occasionally, until garlic is light golden and paste deepens in color. If using, stir in gochugaru or smoked paprika after 10 minutes. -
Step 4
Stir in 2 tbsp rice vinegar, 1 tbsp granulated sugar, 1 tsp salt, and optional fish sauce. Simmer on low for 10-15 minutes, allowing flavors to meld and sauce to thicken. Taste and adjust seasoning. Stir in citrus zest (if using) at the very end. -
Step 5
Let sauce cool completely at room temperature. Transfer to sterilized jars, ensuring a layer of oil covers the top for preservation. Store in the refrigerator for 3-4 weeks or freeze for longer storage.
Important Information
Nutrition Facts (Per Serving)
It is important to consider this information as approximate and not to use it as definitive health advice.
Allergy Information
Please check ingredients for potential allergens and consult a health professional if in doubt.

Leave a Comment