

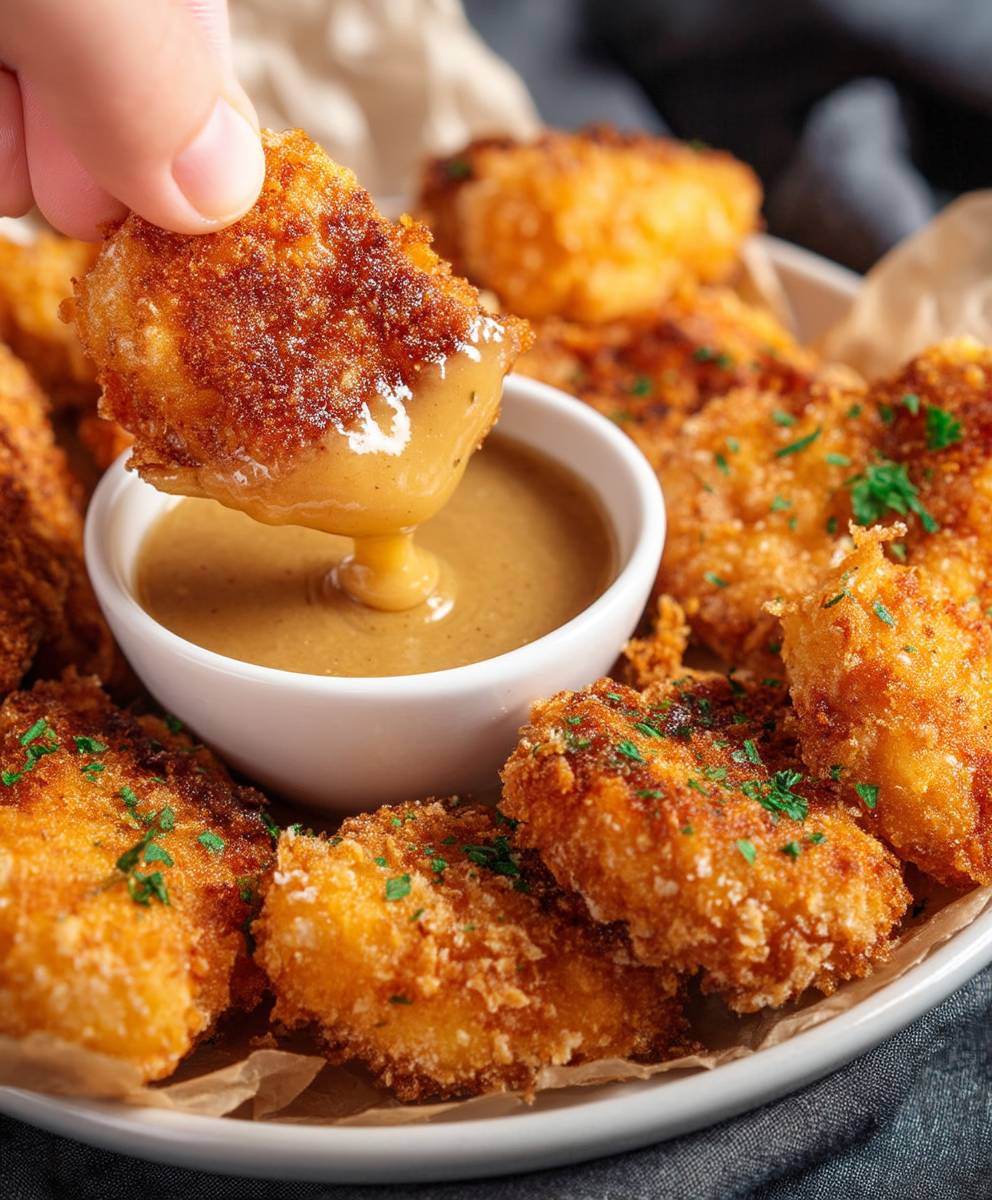
Keto Chicken Nuggets: Craving that crispy, golden goodness of a classic chicken nugget but trying to stick to your keto goals? You’re in the right place! Forget those carb-laden fast-food versions. I’m about to show you how to create unbelievably delicious and satisfying keto chicken nuggets that will have you saying, “Goodbye, carbs! Hello, flavor!”
While chicken nuggets might seem like a purely modern invention, their roots can be traced back to the desire for convenient and kid-friendly meals. Over time, they’ve become a global phenomenon, a staple in countless households. But the traditional recipe is often loaded with unhealthy ingredients. That’s where my keto-friendly version comes in!
People adore chicken nuggets for their irresistible combination of crispy exterior and tender, juicy interior. They’re quick, easy to eat, and undeniably comforting. My keto chicken nuggets capture all of that magic without the guilt. We’re talking about a protein-packed, low-carb delight that’s perfect for a quick lunch, a satisfying snack, or even a fun dinner. Get ready to experience the joy of guilt-free nuggets!

Ingredients:
- 1.5 lbs boneless, skinless chicken breasts, cut into 1-inch pieces
- 1 cup almond flour
- 1/2 cup grated Parmesan cheese
- 2 large eggs, beaten
- 1/4 cup olive oil
- 1 tbsp garlic powder
- 1 tbsp onion powder
- 1 tsp paprika
- 1/2 tsp dried oregano
- 1/2 tsp dried basil
- 1/4 tsp cayenne pepper (optional, for a little kick)
- Salt and freshly ground black pepper to taste
Preparing the Chicken and Coating
- First, let’s get our chicken ready. Take your 1.5 lbs of boneless, skinless chicken breasts and cut them into bite-sized, 1-inch pieces. This size is perfect for even cooking and easy dipping later on. Make sure to trim off any excess fat or gristle. Nobody wants chewy bits in their nuggets!
- Now, grab three shallow dishes. In the first dish, we’ll add our beaten eggs. Whisk them well to ensure they’re nice and smooth. This will help the coating adhere properly to the chicken.
- In the second dish, combine the almond flour, grated Parmesan cheese, garlic powder, onion powder, paprika, oregano, basil, cayenne pepper (if using), salt, and pepper. Mix these dry ingredients thoroughly. This is where all the flavor comes from, so make sure everything is evenly distributed. I like to use a fork to break up any clumps in the almond flour.
- Now, for the coating process! Take each piece of chicken and dip it into the beaten eggs, making sure it’s fully coated. Let the excess egg drip off before moving on to the next step. This prevents the coating from becoming too thick and soggy.
- Next, dredge the egg-coated chicken in the almond flour mixture, pressing gently to ensure the coating adheres well. Make sure every surface of the chicken is covered in the flavorful almond flour mixture. This is what will give our nuggets that crispy, golden-brown crust.
- Place the coated chicken nuggets on a plate or baking sheet lined with parchment paper. This will prevent them from sticking and make cleanup a breeze. Repeat the egg and almond flour coating process for all the chicken pieces.
Cooking Process: Baking
- Preheat your oven to 400°F (200°C). It’s important to preheat the oven properly to ensure even cooking and a crispy exterior.
- While the oven is preheating, drizzle the olive oil over the coated chicken nuggets on the baking sheet. Make sure the nuggets are evenly coated with the oil. This will help them brown nicely in the oven.
- Bake for 15-20 minutes, or until the chicken is cooked through and the coating is golden brown and crispy. The exact cooking time will depend on the size of your chicken pieces and the accuracy of your oven. I recommend checking the internal temperature of the chicken with a meat thermometer. It should reach 165°F (74°C).
- Flip the nuggets halfway through the cooking time to ensure even browning on both sides. This will give you that perfect, all-around crispy texture.
- Once the chicken is cooked through and the coating is golden brown, remove the baking sheet from the oven and let the nuggets cool slightly before serving. This will prevent you from burning your mouth!
Cooking Process: Air Frying
- Preheat your air fryer to 375°F (190°C). Air frying is a fantastic way to get that crispy, fried texture without all the extra oil.
- Place the coated chicken nuggets in the air fryer basket in a single layer. Avoid overcrowding the basket, as this will prevent the nuggets from cooking evenly and becoming crispy. You may need to cook them in batches.
- Air fry for 8-12 minutes, or until the chicken is cooked through and the coating is golden brown and crispy. The exact cooking time will depend on your air fryer and the size of your chicken pieces.
- Flip the nuggets halfway through the cooking time to ensure even browning on both sides. This will give you that perfect, all-around crispy texture.
- Once the chicken is cooked through and the coating is golden brown, remove the nuggets from the air fryer and let them cool slightly before serving.
Cooking Process: Pan Frying
- Heat the remaining olive oil in a large skillet over medium-high heat. Make sure the skillet is hot before adding the chicken nuggets.
- Carefully place the coated chicken nuggets in the hot skillet in a single layer. Avoid overcrowding the skillet, as this will lower the temperature of the oil and prevent the nuggets from browning properly. You may need to cook them in batches.
- Cook for 3-4 minutes per side, or until the chicken is cooked through and the coating is golden brown and crispy. Keep a close eye on the nuggets to prevent them from burning.
- Remove the cooked chicken nuggets from the skillet and place them on a plate lined with paper towels to drain any excess oil.
- Let the nuggets cool slightly before serving.
Serving Suggestions
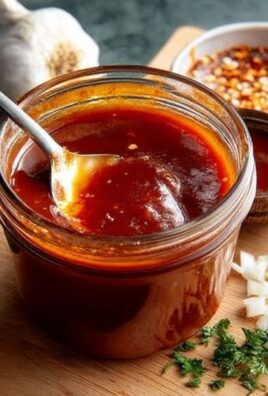
These Keto Chicken Nuggets are delicious on their own, but they’re even better with a dipping sauce! Here are a few of my favorite keto-friendly dipping sauces:
- Sugar-free ketchup
- Ranch dressing (make sure it’s keto-friendly!)
- Mustard
- Avocado ranch
- Garlic aioli
You can also serve these nuggets with a side of roasted vegetables, a salad, or cauliflower rice for a complete and satisfying keto meal.
Tips and Variations
- Spice it up: Add a pinch of red pepper flakes to the almond flour mixture for a spicier kick.
- Cheese variations: Experiment with different types of cheese in the coating, such as cheddar, mozzarella, or pepper jack.
- Herb variations: Try adding different herbs to the almond flour mixture, such as thyme, rosemary, or sage.
- Make it ahead: You can prepare the coated chicken nuggets ahead of time and store them in the refrigerator for up to 24 hours before cooking.
- Freezing: These nuggets freeze well. Place the cooked and cooled nuggets in a single layer on a baking sheet and freeze for 1-2 hours. Then, transfer them to a freezer bag or container and store for up to 2 months. Reheat in the oven or air fryer until heated through.
Nutritional Information (per serving, approximate):
Please note that the nutritional information is an estimate and may vary depending on the specific ingredients used.
- Calories: Approximately 350-400
- Fat: 25-30g
- Protein: 30-35g
- Net Carbs: 5-7g
Enjoy your delicious and healthy Keto Chicken Nuggets!
Conclusion:
So there you have it! These Keto Chicken Nuggets are more than just a quick and easy meal; they’re a game-changer for anyone following a ketogenic lifestyle, or simply looking for a healthier, tastier alternative to traditional nuggets. I truly believe this recipe is a must-try, and here’s why: they’re incredibly flavorful, satisfyingly crispy, and surprisingly simple to make. Forget those bland, processed nuggets from the freezer aisle these homemade delights are packed with real chicken flavor and a satisfying crunch that will leave you wanting more.
But the best part? You don’t have to sacrifice taste or convenience to stay on track with your health goals. These nuggets are perfect for a quick lunch, a satisfying snack, or even a fun dinner for the whole family. My kids absolutely love them, and they have no idea they’re actually eating something good for them! That’s a win-win in my book.
Serving Suggestions and Variations:
Now, let’s talk about how to enjoy these little golden nuggets of goodness. The possibilities are endless! For a classic pairing, serve them with a side of sugar-free ketchup or mustard. But don’t stop there! Get creative with your dipping sauces. A creamy avocado ranch, a spicy sriracha mayo, or even a tangy lemon-herb aioli would be absolutely divine.
If you’re looking to make a complete meal, consider serving them alongside a fresh salad, some roasted vegetables, or even a side of cauliflower rice. For a fun twist, you could even chop them up and add them to a keto-friendly wrap or lettuce cup. And if you’re feeling adventurous, why not try experimenting with different seasonings? A sprinkle of smoked paprika, garlic powder, or even a touch of cayenne pepper can add a whole new dimension of flavor.
Another variation I love is to use different types of cheese in the breading. Parmesan cheese adds a salty, nutty flavor, while cheddar cheese provides a classic, comforting taste. You could even try a blend of different cheeses for a truly unique and delicious experience. Don’t be afraid to get creative and experiment with different flavors and textures until you find your perfect combination.
And for those who prefer baking over frying, you can absolutely bake these nuggets in the oven. Simply preheat your oven to 400°F (200°C), place the nuggets on a baking sheet lined with parchment paper, and bake for about 20-25 minutes, or until they’re golden brown and cooked through. While they won’t be quite as crispy as the fried version, they’ll still be incredibly delicious and a healthier alternative.
I’m so confident that you’ll love these Keto Chicken Nuggets as much as I do. They’re a simple, satisfying, and guilt-free way to enjoy a classic comfort food. So, what are you waiting for? Head to your kitchen, gather your ingredients, and give this recipe a try. I promise you won’t be disappointed!
Once you’ve made them, I’d absolutely love to hear about your experience. Did you try any of the variations I suggested? Did you come up with your own unique twist? Share your photos and comments on social media using #KetoChickenNuggets and tag me so I can see your creations. I can’t wait to hear what you think!
Keto Chicken Nuggets: The Ultimate Guide to Crispy, Low-Carb Nuggets
Crispy, flavorful keto chicken nuggets made with almond flour and Parmesan cheese. A healthy and satisfying meal or snack!
Ingredients
- 1.5 lbs boneless, skinless chicken breasts, cut into 1-inch pieces
- 1 cup almond flour
- 1/2 cup grated Parmesan cheese
- 2 large eggs, beaten
- 1/4 cup olive oil
- 1 tbsp garlic powder
- 1 tbsp onion powder
- 1 tsp paprika
- 1/2 tsp dried oregano
- 1/2 tsp dried basil
- 1/4 tsp cayenne pepper (optional, for a little kick)
- Salt and freshly ground black pepper to taste
Instructions
- Cut chicken breasts into 1-inch pieces, trimming any excess fat.
- Place beaten eggs in a shallow dish.
- In a separate shallow dish, combine almond flour, Parmesan cheese, garlic powder, onion powder, paprika, oregano, basil, cayenne pepper (if using), salt, and pepper. Mix well.
- Dip each chicken piece into the beaten eggs, letting excess drip off.
- Dredge the egg-coated chicken in the almond flour mixture, pressing gently to coat.
- Place coated chicken nuggets on a plate or baking sheet lined with parchment paper. Repeat for all chicken pieces.
- Preheat oven to 400°F (200°C).
- Drizzle olive oil over the coated chicken nuggets on the baking sheet.
- Bake for 15-20 minutes, or until chicken is cooked through (internal temperature of 165°F/74°C) and the coating is golden brown and crispy.
- Flip the nuggets halfway through the cooking time for even browning.
- Let cool slightly before serving.
- Preheat air fryer to 375°F (190°C).
- Place coated chicken nuggets in the air fryer basket in a single layer (cook in batches if needed).
- Air fry for 8-12 minutes, or until chicken is cooked through and the coating is golden brown and crispy.
- Flip the nuggets halfway through the cooking time for even browning.
- Let cool slightly before serving.
- Heat olive oil in a large skillet over medium-high heat.
- Carefully place coated chicken nuggets in the hot skillet in a single layer (cook in batches if needed).
- Cook for 3-4 minutes per side, or until chicken is cooked through and the coating is golden brown and crispy.
- Remove cooked chicken nuggets from the skillet and place them on a plate lined with paper towels to drain any excess oil.
- Let cool slightly before serving.
Notes
- Serve with keto-friendly dipping sauces like sugar-free ketchup, ranch dressing, mustard, avocado ranch, or garlic aioli.
- Serve with a side of roasted vegetables, a salad, or cauliflower rice.
- Spice it up: Add a pinch of red pepper flakes to the almond flour mixture for a spicier kick.
- Cheese variations: Experiment with different types of cheese in the coating, such as cheddar, mozzarella, or pepper jack.
- Herb variations: Try adding different herbs to the almond flour mixture, such as thyme, rosemary, or sage.
- Make it ahead: You can prepare the coated chicken nuggets ahead of time and store them in the refrigerator for up to 24 hours before cooking.
- Freezing: These nuggets freeze well. Place the cooked and cooled nuggets in a single layer on a baking sheet and freeze for 1-2 hours. Then, transfer them to a freezer bag or container and store for up to 2 months. Reheat in the oven or air fryer until heated through.
Leave a Comment