

Chewy Chocolate Crinkle Cookies are a delightful treat that never fails to bring a smile to my face. These cookies, with their rich chocolate flavor and irresistible chewy texture, have a special place in my heart and in the hearts of many cookie lovers around the world. Originating from the classic American baking tradition, these cookies are often associated with holiday celebrations and family gatherings, making them a nostalgic favorite for many.
What I love most about Chewy Chocolate Crinkle Cookies is their perfect balance of sweetness and cocoa, combined with a slightly crisp exterior that gives way to a soft, fudgy center. The powdered sugar coating not only adds a beautiful contrast but also enhances the overall experience with a delightful sweetness. Whether enjoyed with a glass of milk or served at a festive gathering, these cookies are a convenient and crowd-pleasing dessert that everyone can appreciate. Join me as we dive into the world of Chewy Chocolate Crinkle Cookies and discover how to make this beloved treat in your own kitchen!

Ingredients:
- 1 cup granulated sugar
- 1/2 cup packed brown sugar
- 1/2 cup unsweetened cocoa powder
- 1/2 cup vegetable oil
- 2 large eggs
- 1 teaspoon vanilla extract
- 1 1/2 cups all-purpose flour
- 2 teaspoons baking powder
- 1/2 teaspoon salt
- 1 cup semi-sweet chocolate chips (optional)
- 1/2 cup powdered sugar (for rolling)
Preparing the Dough
1. In a large mixing bowl, I start by combining the granulated sugar and brown sugar. I like to use a whisk to ensure they blend well together, creating a nice, even mixture. 2. Next, I sift in the unsweetened cocoa powder. Sifting helps to break up any clumps and ensures a smooth texture in the final cookies. I give it another good whisk to combine everything. 3. Now, I pour in the vegetable oil. This is where the cookies get their chewy texture, so I make sure to mix it in thoroughly. 4. I crack in the two large eggs and add the vanilla extract. Using a hand mixer or a whisk, I beat the mixture until its well combined and smooth. The batter should be glossy and thick at this point. 5. In a separate bowl, I measure out the all-purpose flour, baking powder, and salt. I whisk these dry ingredients together to ensure they are evenly distributed. 6. Gradually, I add the dry ingredients to the wet mixture. I like to do this in three parts, mixing gently after each addition. This helps to avoid overmixing, which can lead to tough cookies. 7. If Im using chocolate chips, I fold them in at this stage. The chocolate chips add an extra layer of deliciousness and texture to the cookies. 8. Once everything is combined, I cover the bowl with plastic wrap and place it in the refrigerator for at least 30 minutes. Chilling the dough is crucial for achieving that perfect chewy texture and helps the cookies maintain their shape while baking.Prepping for Baking
9. After the dough has chilled, I preheat my oven to 350°F (175°C). This ensures that the cookies start baking at the right temperature for the best results. 10. While the oven is heating, I line two baking sheets with parchment paper. This prevents the cookies from sticking and makes for easy cleanup. 11. Once the oven is ready, I take the dough out of the refrigerator. Using a cookie scoop or a tablespoon, I scoop out portions of the dough and roll them into balls. I aim for about 1 inch in diameter. 12. After rolling the dough into balls, I roll each ball in powdered sugar until they are completely coated. This gives the cookies their signature crinkle effect once they bake.Baking the Cookies
13. I place the powdered sugar-coated dough balls on the prepared baking sheets, spacing them about 2 inches apart. This allows room for the cookies to spread as they bake. 14. I pop the baking sheets into the preheated oven and bake for 10-12 minutes. I like to keep an eye on them; the cookies are done when the edges look set but the centers are still soft. They will continue to firm up as they cool. 15. Once baked, I remove the cookies from the oven and let them cool on the baking sheets for about 5 minutes. This allows them to set a bit before transferring them to a wire rack to cool completely.Storing and Enjoying
16. After the cookies have cooled completely, I store them in an airtight container. They can last for up to a week, but I can guarantee they wont last that long because theyre just too delicious! 17. If I want to enjoy them warm, I can pop them in the microwave for a few seconds. The chocolate chips will melt slightly, making them even more indulgent. 18. These chewy chocolate crinkle cookies are perfect for sharing with friends and family or enjoying with a glass of milk. I love how they look with their beautiful crinkle tops and how they taste with that rich chocolate flavor. 19. If Im feeling adventurous, I sometimes experiment by adding different mix-ins like nuts or dried fruit. The base recipe is versatile, and I can easily customize it to suit my taste. 20. Lastly, I love to serve these cookies at gatherings or bake them as gifts. They always receive rave reviews, and
Conclusion:
In summary, these Chewy Chocolate Crinkle Cookies are an absolute must-try for anyone who loves a rich, chocolatey treat with a delightful texture. The combination of a soft, chewy center and a slightly crisp exterior, dusted with powdered sugar, creates a cookie experience that is simply irresistible. Whether you’re baking for a special occasion, a holiday gathering, or just to satisfy your sweet tooth, these cookies are sure to impress. For serving suggestions, I recommend pairing these cookies with a tall glass of cold milk or a warm cup of coffee to enhance the chocolate flavor. You can also get creative with variations by adding in some chocolate chips, nuts, or even a hint of peppermint extract for a festive twist. If you’re feeling adventurous, try swapping out some of the cocoa powder for espresso powder to give your cookies a deeper, more complex flavor. I encourage you to give this recipe a try and experience the joy of baking these Chewy Chocolate Crinkle Cookies yourself. Once you do, I would love to hear about your experience! Share your thoughts, any variations you tried, or even a photo of your delicious creations. Happy baking, and enjoy every chewy, chocolatey bite! Print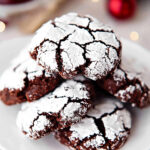
Chewy Chocolate Crinkle Cookies: The Ultimate Recipe for Decadent Treats
- Total Time: 60 minutes
- Yield: 24 cookies 1x
Description
Enjoy these Chewy Chocolate Crinkle Cookies, boasting a rich chocolate flavor and a delightful crinkled texture. Dusted with powdered sugar, they are perfectly chewy and make a great treat for any occasion!
Ingredients
- 1 cup granulated sugar
- 1/2 cup packed brown sugar
- 1/2 cup unsweetened cocoa powder
- 1/2 cup vegetable oil
- 2 large eggs
- 1 teaspoon vanilla extract
- 1 1/2 cups all-purpose flour
- 2 teaspoons baking powder
- 1/2 teaspoon salt
- 1 cup semi-sweet chocolate chips (optional)
- 1/2 cup powdered sugar (for rolling)
Instructions
- In a large mixing bowl, combine the granulated sugar and brown sugar using a whisk until well blended.
- Sift in the unsweetened cocoa powder and whisk again to ensure a smooth mixture.
- Pour in the vegetable oil and mix thoroughly to achieve a consistent texture.
- Crack in the two large eggs and add the vanilla extract. Beat the mixture with a hand mixer or whisk until smooth and glossy.
- In a separate bowl, whisk together the all-purpose flour, baking powder, and salt.
- Gradually add the dry ingredients to the wet mixture in three parts, mixing gently after each addition to avoid overmixing.
- If using, fold in the chocolate chips at this stage.
- Cover the bowl with plastic wrap and refrigerate the dough for at least 30 minutes.
- Preheat the oven to 350°F (175°C) and line two baking sheets with parchment paper.
- Scoop out portions of the chilled dough and roll them into 1-inch balls.
- Roll each ball in powdered sugar until fully coated.
- Place the dough balls on the prepared baking sheets, spacing them about 2 inches apart.
- Bake in the preheated oven for 10-12 minutes, until the edges are set but the centers remain soft.
- Remove from the oven and let the cookies cool on the baking sheets for about 5 minutes before transferring them to a wire rack to cool completely.
- Store the cooled cookies in an airtight container for up to a week. For a warm treat, microwave for a few seconds before serving.
Notes
- For added texture, consider mixing in nuts or dried fruit.
- These cookies are perfect for sharing or gifting, and they always receive rave reviews!
- Prep Time: 30 minutes
- Cook Time: 10-12 minutes


Leave a Comment