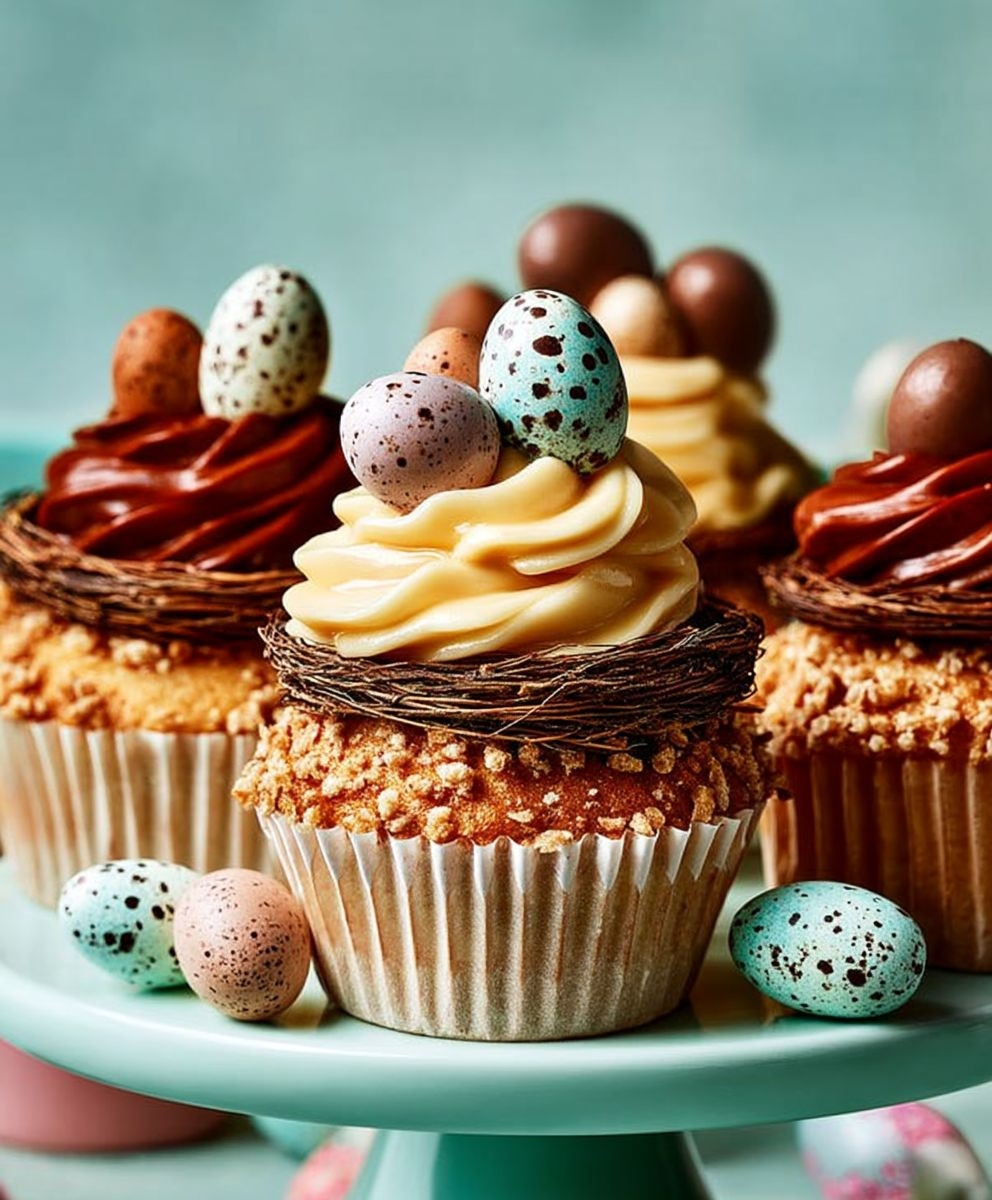
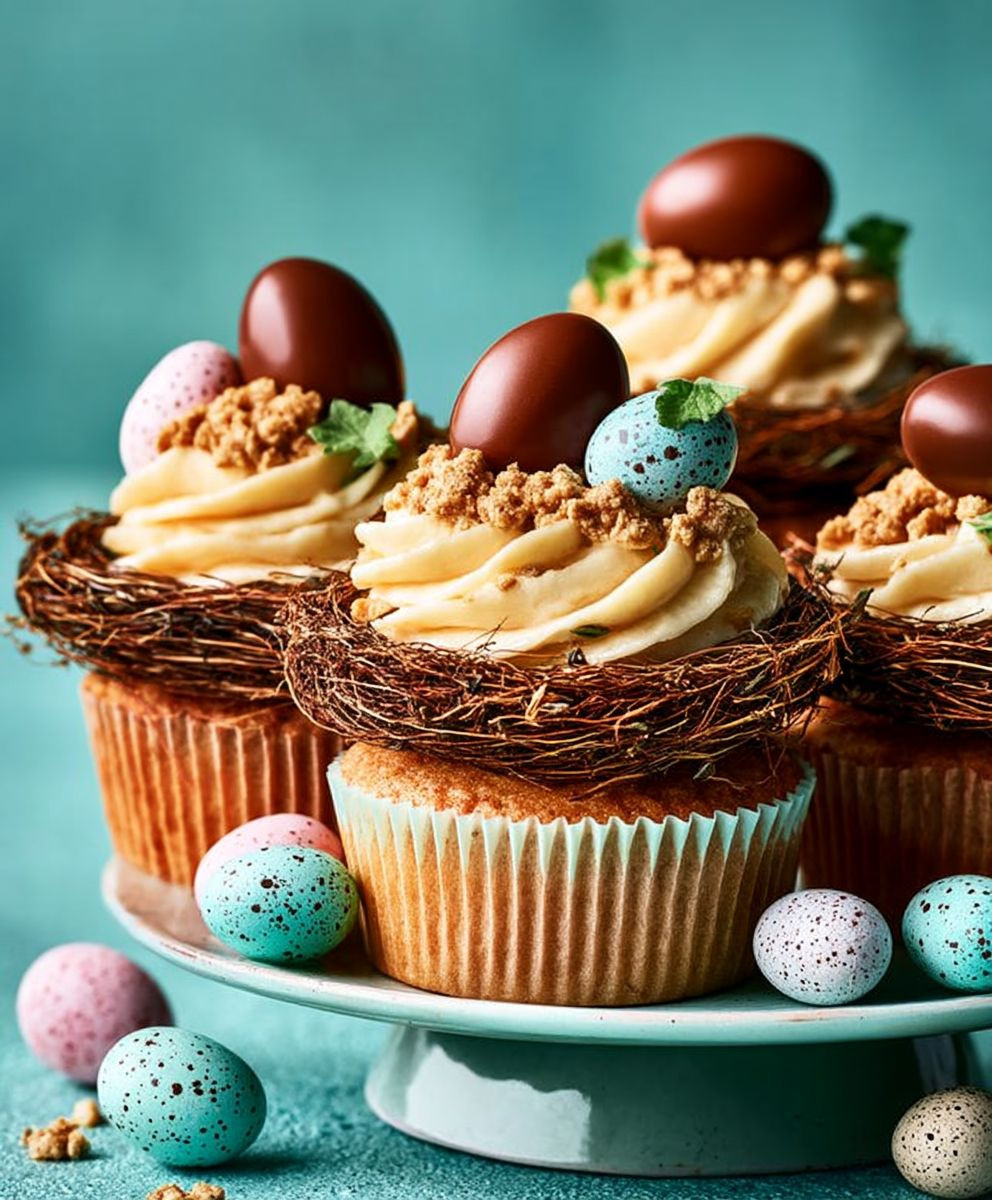
Easter chocolate nest cupcakes are not just a delightful treat; they’re a miniature celebration of spring and new beginnings, all nestled within a single, scrumptious bite! Imagine sinking your teeth into a moist, chocolatey cupcake, topped with a creamy frosting and adorned with a charming “nest” of crispy noodles, speckled with colorful candy eggs. It’s a feast for the eyes and the taste buds, perfect for sharing with loved ones during the Easter season.
The tradition of Easter nests, in general, has deep roots in pagan symbolism, representing fertility and rebirth. While the exact origins of the chocolate nest cupcake are more modern, they cleverly borrow from this rich history, transforming a simple dessert into a meaningful and festive symbol. These aren’t just any cupcakes; they’re edible works of art that capture the essence of Easter.
What makes Easter chocolate nest cupcakes so universally loved? It’s the perfect combination of textures and flavors. The rich, decadent chocolate of the cupcake contrasts beautifully with the light, airy frosting. And the crunchy, sweet “nest” adds a playful element that kids and adults alike adore. Plus, they’re relatively easy to make, making them a fantastic baking project for families to enjoy together. So, gather your ingredients, preheat your oven, and let’s create some Easter magic in the kitchen!
Ingredients:
- For the Cupcakes:
- 175g (6 oz) self-raising flour
- 175g (6 oz) caster sugar
- 175g (6 oz) softened butter (unsalted)
- 3 large eggs
- 1 tsp vanilla extract
- 2 tbsp milk
- 25g (1 oz) cocoa powder
- For the Chocolate Buttercream:
- 200g (7 oz) softened butter (unsalted)
- 400g (14 oz) icing sugar, sifted
- 100g (3.5 oz) dark chocolate, melted and cooled slightly
- 2-3 tbsp milk
- 1 tsp vanilla extract
- For the Nests:
- 150g (5 oz) milk chocolate, melted
- 75g (2.5 oz) shredded wheat cereal, roughly crushed
- For Decoration:
- Mini chocolate eggs (various colors)
Preparing the Cupcakes:
- Preheat and Prepare: First things first, preheat your oven to 180°C (350°F/Gas Mark 4). Line a 12-hole muffin tin with cupcake cases. This will prevent the cupcakes from sticking and make them easy to remove later.
- Cream Butter and Sugar: In a large mixing bowl, cream together the softened butter and caster sugar until light and fluffy. This is a crucial step for achieving a light and airy cupcake. Use an electric mixer for best results, beating for at least 3-5 minutes. You’re looking for a pale and creamy mixture.
- Add Eggs Gradually: Beat in the eggs one at a time, making sure each egg is fully incorporated before adding the next. If the mixture starts to curdle (which can happen sometimes), add a tablespoon of flour from the measured amount. This will help bring the mixture back together.
- Incorporate Vanilla and Cocoa: Stir in the vanilla extract and cocoa powder. Make sure the cocoa powder is evenly distributed throughout the batter.
- Fold in Flour: Gently fold in the self-raising flour using a metal spoon or spatula. Be careful not to overmix, as this can develop the gluten in the flour and result in tough cupcakes. Fold until just combined, meaning you no longer see streaks of flour.
- Add Milk: Add the milk and gently fold it into the batter until it’s smooth and consistent. The milk helps to loosen the batter and create a moist cupcake.
- Fill Cupcake Cases: Spoon the batter into the prepared cupcake cases, filling each case about two-thirds full. This will allow the cupcakes to rise without overflowing.
- Bake: Bake in the preheated oven for 18-20 minutes, or until a skewer inserted into the center of a cupcake comes out clean. The cupcakes should be golden brown and spring back lightly when touched.
- Cool Completely: Remove the cupcakes from the muffin tin and place them on a wire rack to cool completely before frosting. This is important because frosting warm cupcakes will cause the frosting to melt.
Making the Chocolate Buttercream:
- Cream the Butter: In a large mixing bowl, beat the softened butter until it’s light and fluffy. This may take several minutes, but it’s essential for a smooth and creamy buttercream.
- Add Icing Sugar Gradually: Gradually add the sifted icing sugar to the butter, beating on low speed to prevent a cloud of sugar from erupting. Once the icing sugar is mostly incorporated, increase the speed to medium and beat until light and fluffy.
- Incorporate Melted Chocolate: Add the melted and slightly cooled dark chocolate to the buttercream. Make sure the chocolate isn’t too hot, as it could melt the butter. Beat until the chocolate is evenly distributed and the buttercream is a rich chocolate color.
- Add Milk and Vanilla: Add the milk, one tablespoon at a time, until the buttercream reaches your desired consistency. Stir in the vanilla extract. The milk helps to thin the buttercream and make it easier to pipe.
- Whip for Fluffiness: Continue to beat the buttercream for another 2-3 minutes until it’s light and fluffy. This will incorporate air into the buttercream and make it even more delicious.
Creating the Chocolate Nests:
- Melt the Chocolate: Melt the milk chocolate in a heatproof bowl set over a pan of simmering water (double boiler) or in the microwave in 30-second intervals, stirring in between, until smooth. Be careful not to overheat the chocolate, as it can seize up.
- Combine Chocolate and Cereal: Add the roughly crushed shredded wheat cereal to the melted chocolate and stir gently until the cereal is completely coated.
- Form the Nests: Drop spoonfuls of the chocolate-covered cereal onto a baking sheet lined with parchment paper. Use your fingers or the back of a spoon to create a nest shape in the center of each spoonful.
- Chill to Set: Place the baking sheet in the refrigerator for about 30 minutes, or until the chocolate nests are firm and set. This will make them easier to handle when decorating the cupcakes.
Assembling and Decorating:
- Frost the Cupcakes: Once the cupcakes are completely cool, frost them with the chocolate buttercream. You can use a piping bag fitted with a nozzle for a decorative swirl, or simply spread the buttercream on with a knife or spatula.
- Add the Nests: Carefully place a chocolate nest on top of each frosted cupcake. Gently press it down so it adheres to the buttercream.
- Decorate with Eggs: Fill the center of each chocolate nest with mini chocolate eggs. Use a variety of colors for a festive and appealing look.
- Chill (Optional): If desired, chill the decorated cupcakes in the refrigerator for about 15-20 minutes before serving. This will help the buttercream and chocolate nests to set up and make the cupcakes easier to handle.
- Serve and Enjoy: Serve your delicious Easter chocolate nest cupcakes and enjoy! These are perfect for Easter celebrations, parties, or any time you want a sweet treat.
Conclusion:
So there you have it! These Easter chocolate nest cupcakes are truly a must-try this season. They’re not just adorable to look at, but they’re also incredibly delicious, offering a delightful combination of rich chocolate cake and a sweet, crunchy nest topping. The moistness of the cupcake perfectly complements the textures of the chocolate and candy eggs, creating a symphony of flavors and sensations that will leave everyone wanting more. I promise, these will be the star of your Easter dessert table!
Why are these cupcakes a must-try? Because they are easy to make, even for beginner bakers! The recipe is straightforward, using readily available ingredients, and the decorating is simple enough for kids to help with. Plus, they are a guaranteed crowd-pleaser. Imagine the smiles on your loved ones’ faces when they see these charming little nests. They’re perfect for Easter brunch, dessert, or even as a sweet treat to share with friends and neighbors.
But the fun doesn’t stop there! Feel free to get creative with your serving suggestions and variations. For a more decadent experience, try adding a dollop of whipped cream or a scoop of vanilla ice cream on top of each cupcake. You could also drizzle some melted chocolate over the nests for an extra touch of indulgence.
Here are a few more ideas to spark your imagination:
- Flavor Variations: Experiment with different cupcake flavors! Try a vanilla cupcake base, a red velvet cupcake, or even a carrot cake cupcake for a unique twist.
- Nest Variations: Instead of chow mein noodles, you could use shredded coconut, pretzel sticks, or even crushed cornflakes to create the nests. Just make sure to bind them together with melted chocolate or candy melts.
- Egg Variations: Use different types of candy eggs! Pastel-colored M&Ms, jelly beans, or even mini chocolate eggs would all look fantastic in the nests.
- Frosting Fun: Get creative with your frosting! Try a chocolate buttercream, a vanilla buttercream, or even a cream cheese frosting. You could also add a touch of food coloring to create a festive Easter theme.
Don’t be afraid to personalize these Easter chocolate nest cupcakes to your liking. Baking is all about having fun and experimenting with different flavors and textures. The most important thing is to enjoy the process and create something that you and your loved ones will cherish.
I truly believe that this recipe will become a new Easter tradition in your home. It’s a simple, delicious, and visually appealing treat that everyone will love. So, gather your ingredients, preheat your oven, and get ready to bake some magic!
I’m so excited for you to try this recipe! Once you’ve made your own batch of Easter chocolate nest cupcakes, I would absolutely love to hear about your experience. Did you make any variations? What did your family and friends think? Share your photos and stories in the comments below! Your feedback is invaluable, and it helps me to create even better recipes in the future. Happy baking, and Happy Easter!
Easter Chocolate Nest Cupcakes: A Delicious Recipe
Delicious chocolate cupcakes with creamy chocolate buttercream, crunchy chocolate nests, and festive mini chocolate eggs the perfect Easter treat!
Ingredients
- 175g (6 oz) self-raising flour
- 175g (6 oz) caster sugar
- 175g (6 oz) softened unsalted butter
- 3 large eggs
- 1 tsp vanilla extract
- 2 tbsp milk
- 25g (1 oz) cocoa powder
- 200g (7 oz) softened unsalted butter
- 400g (14 oz) icing sugar, sifted
- 100g (3.5 oz) dark chocolate, melted and cooled slightly
- 2-3 tbsp milk
- 1 tsp vanilla extract
- 150g (5 oz) milk chocolate, melted
- 75g (2.5 oz) shredded wheat cereal, roughly crushed
- Mini chocolate eggs (various colors)
Instructions
- Preheat and Prepare: Preheat oven to 350°F (180°C). Line a 12-hole muffin tin with cupcake cases.
- Cream Butter and Sugar: In a large mixing bowl, cream together the softened butter and caster sugar until light and fluffy (3-5 minutes with an electric mixer).
- Add Eggs Gradually: Beat in the eggs one at a time, ensuring each is fully incorporated. If the mixture curdles, add 1 tbsp of flour from the measured amount.
- Incorporate Vanilla and Cocoa: Stir in the vanilla extract and cocoa powder until evenly distributed.
- Fold in Flour: Gently fold in the self-raising flour until just combined (no streaks of flour). Do not overmix.
- Add Milk: Add the milk and gently fold it into the batter until smooth and consistent.
- Fill Cupcake Cases: Spoon the batter into the prepared cupcake cases, filling each case about two-thirds full.
- Bake: Bake for 18-20 minutes, or until a skewer inserted into the center comes out clean.
- Cool Completely: Remove the cupcakes from the muffin tin and place them on a wire rack to cool completely before frosting.
- Cream the Butter: In a large mixing bowl, beat the softened butter until light and fluffy.
- Add Icing Sugar Gradually: Gradually add the sifted icing sugar to the butter, beating on low speed. Once mostly incorporated, increase speed to medium and beat until light and fluffy.
- Incorporate Melted Chocolate: Add the melted and slightly cooled dark chocolate to the buttercream. Beat until evenly distributed.
- Add Milk and Vanilla: Add the milk, one tablespoon at a time, until the buttercream reaches your desired consistency. Stir in the vanilla extract.
- Whip for Fluffiness: Continue to beat the buttercream for another 2-3 minutes until light and fluffy.
- Melt the Chocolate: Melt the milk chocolate in a heatproof bowl set over a pan of simmering water (double boiler) or in the microwave in 30-second intervals, stirring in between, until smooth.
- Combine Chocolate and Cereal: Add the roughly crushed shredded wheat cereal to the melted chocolate and stir gently until the cereal is completely coated.
- Form the Nests: Drop spoonfuls of the chocolate-covered cereal onto a baking sheet lined with parchment paper. Use your fingers or the back of a spoon to create a nest shape in the center of each spoonful.
- Chill to Set: Place the baking sheet in the refrigerator for about 30 minutes, or until the chocolate nests are firm and set.
- Frost the Cupcakes: Once the cupcakes are completely cool, frost them with the chocolate buttercream.
- Add the Nests: Carefully place a chocolate nest on top of each frosted cupcake. Gently press it down so it adheres to the buttercream.
- Decorate with Eggs: Fill the center of each chocolate nest with mini chocolate eggs.
- Chill (Optional): If desired, chill the decorated cupcakes in the refrigerator for about 15-20 minutes before serving.
- Serve and Enjoy: Serve your delicious Easter chocolate nest cupcakes and enjoy!
Notes
- Make sure the butter is properly softened for both the cupcakes and buttercream for best results.
- Don’t overmix the cupcake batter, as this can lead to tough cupcakes.
- Cool the melted chocolate slightly before adding it to the buttercream to prevent melting the butter.
- Adjust the amount of milk in the buttercream to achieve your desired consistency.
- For a more intense chocolate flavor, use a higher percentage of cocoa in the dark chocolate.
- Store decorated cupcakes in an airtight container in the refrigerator.


Leave a Comment