

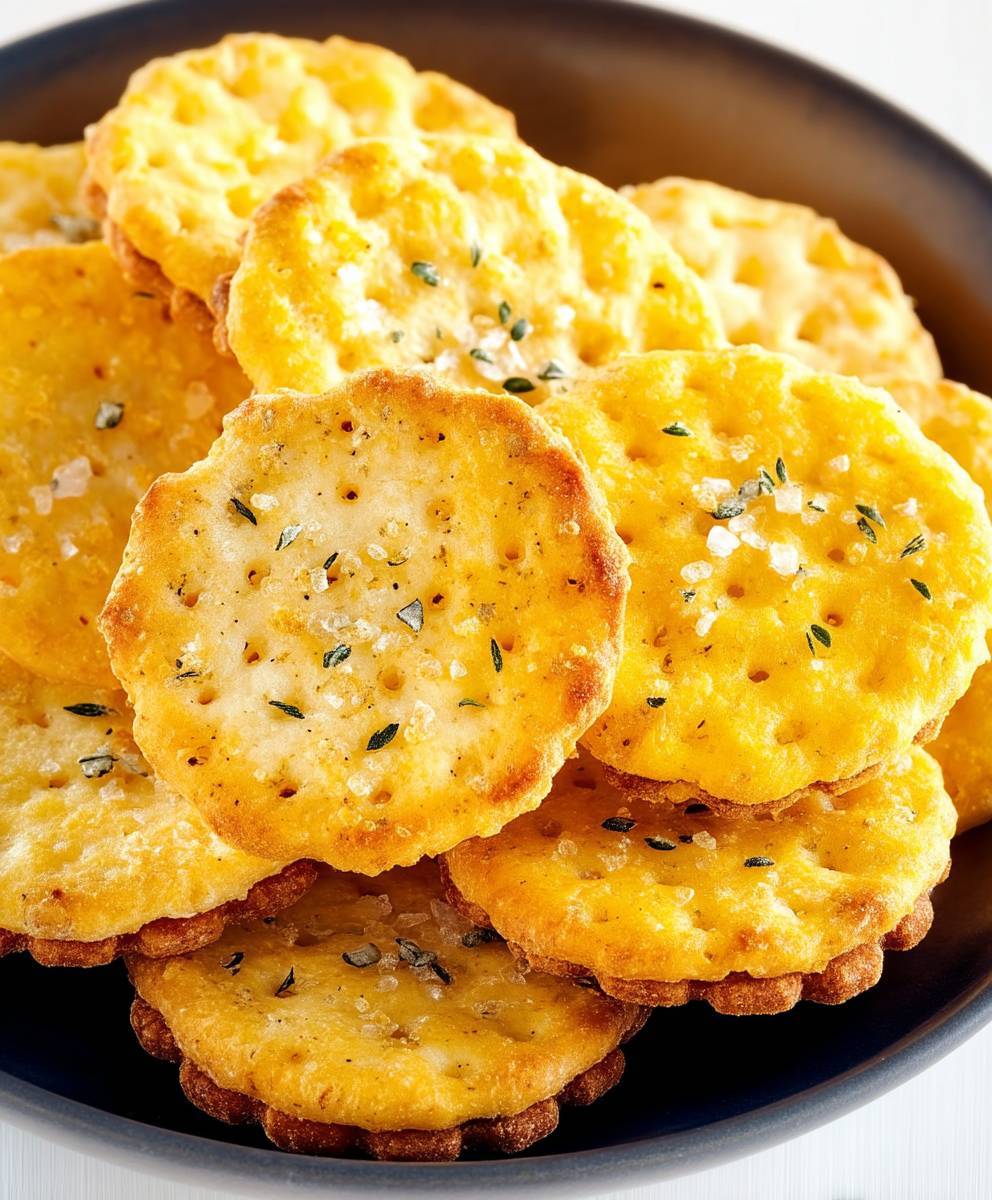
Homemade Ritz Crackers: Prepare to be amazed! Forget store-bought, because you’re about to embark on a culinary adventure that will redefine your snacking experience. Imagine biting into a buttery, flaky cracker, perfectly salted and undeniably delicious all made with your own two hands. This isn’t just a recipe; it’s a journey back to simpler times, when homemade goodness reigned supreme.
While the iconic Ritz cracker might seem like a modern marvel, its roots trace back to a desire for affordable luxury during the Great Depression. The name itself evokes a sense of elegance and sophistication, a little taste of the high life accessible to everyone. And that’s precisely what we’re recreating here a touch of indulgence, crafted with love in your own kitchen.
What makes Homemade Ritz Crackers so irresistible? It’s the perfect balance of textures that satisfying crispness followed by a melt-in-your-mouth buttery sensation. The subtle saltiness enhances the rich flavor, making them incredibly addictive. Plus, making them from scratch allows you to control the ingredients, ensuring a wholesome and preservative-free snack. Whether you enjoy them plain, topped with cheese, or alongside your favorite soup, these crackers are guaranteed to be a crowd-pleaser. Get ready to impress your friends and family with your newfound baking prowess!

Ingredients:
- 1 ½ cups all-purpose flour, plus more for dusting
- ½ teaspoon baking powder
- ½ teaspoon salt
- ¼ cup vegetable shortening, chilled
- ¼ cup unsalted butter, chilled and cut into small cubes
- ½ cup ice water, plus more if needed
- 2 tablespoons unsalted butter, melted, for brushing
- Coarse sea salt, for sprinkling
Preparing the Dough:
- In a large bowl, whisk together the flour, baking powder, and salt. Make sure everything is evenly distributed for a consistent cracker.
- Add the chilled vegetable shortening and butter to the flour mixture. Using a pastry blender or your fingertips, cut the fat into the flour until the mixture resembles coarse crumbs. This is a crucial step for creating flaky crackers, so don’t overmix! You want to see small pieces of butter and shortening still visible.
- Gradually add the ice water, one tablespoon at a time, mixing gently after each addition. Continue adding water until the dough just comes together. Be careful not to add too much water, as this will make the dough tough. You’re aiming for a dough that’s slightly shaggy but holds together when pressed.
- Turn the dough out onto a lightly floured surface and gently knead it a few times to form a smooth ball. Don’t overwork the dough; just bring it together.
- Wrap the dough tightly in plastic wrap and refrigerate for at least 30 minutes, or up to 2 hours. This chilling period is essential for relaxing the gluten and making the dough easier to roll out. It also helps the fat stay cold, which contributes to the flakiness of the crackers.
Rolling and Cutting the Crackers:
- Preheat your oven to 350°F (175°C). Line two baking sheets with parchment paper. This will prevent the crackers from sticking and make cleanup a breeze.
- Remove the dough from the refrigerator and place it on a lightly floured surface. Divide the dough in half. This makes it easier to work with.
- Roll out one half of the dough into a very thin rectangle, about 1/8 inch thick. The thinner you roll the dough, the crispier your crackers will be. Use a rolling pin and apply even pressure to ensure a uniform thickness. If the dough starts to stick, lightly dust it with flour.
- Using a 1 ½-inch round cutter (or any shape you prefer), cut out crackers from the rolled-out dough. Re-roll the scraps and cut out more crackers until all the dough is used.
- Place the cut-out crackers onto the prepared baking sheets, leaving a little space between each cracker.
- Now, for that signature Ritz look, use a toothpick or skewer to poke holes all over the surface of each cracker. This prevents the crackers from puffing up too much during baking and helps them bake evenly.
Baking and Finishing:
- Brush the tops of the crackers with melted butter. This will give them a beautiful golden-brown color and a rich, buttery flavor.
- Sprinkle the crackers generously with coarse sea salt. The salt enhances the flavor and adds a delightful crunch.
- Bake for 12-15 minutes, or until the crackers are golden brown around the edges. Keep a close eye on them, as they can burn easily. The baking time may vary depending on your oven.
- Remove the baking sheets from the oven and let the crackers cool completely on the baking sheets before serving. This allows them to crisp up further.
- Repeat the rolling, cutting, and baking process with the remaining dough.
Tips and Variations:
Flavor Variations:
- Garlic Ritz Crackers: Add 1 teaspoon of garlic powder to the flour mixture.
- Rosemary Ritz Crackers: Add 1 teaspoon of dried rosemary, finely chopped, to the flour mixture.
- Everything Bagel Ritz Crackers: Before baking, brush the crackers with melted butter and sprinkle with everything bagel seasoning.
- Cheese Ritz Crackers: Add ¼ cup of finely grated Parmesan cheese to the flour mixture.
- Spicy Ritz Crackers: Add ½ teaspoon of cayenne pepper to the flour mixture.
Tips for Success:
- Keep the ingredients cold: Cold butter and shortening are essential for creating flaky crackers. Make sure your butter and shortening are well-chilled before you start.
- Don’t overmix the dough: Overmixing will develop the gluten in the flour, resulting in tough crackers. Mix the dough just until it comes together.
- Roll the dough thinly: The thinner you roll the dough, the crispier your crackers will be. Aim for about 1/8 inch thickness.
- Poke holes in the crackers: This prevents the crackers from puffing up too much during baking and helps them bake evenly.
- Watch the baking time: Crackers can burn easily, so keep a close eye on them while they’re baking.
- Cool completely before serving: The crackers will crisp up further as they cool.
Serving Suggestions:
- Serve these homemade Ritz crackers with your favorite cheeses, dips, or spreads.
- They’re also delicious on their own as a snack.
- Use them as a base for canapés or appetizers.
- Crush them and use them as a topping for casseroles or gratins.
- Add them to your charcuterie board for a homemade touch.
Storage Instructions:
- Store the cooled crackers in an airtight container at room temperature for up to 1 week.
- For longer storage, you can freeze the crackers in a freezer-safe bag or container for up to 2 months. Thaw them at room temperature before serving.
Troubleshooting:
- Crackers are too tough: This could be due to overmixing the dough or adding too much water. Be careful not to overwork the dough and add water gradually.
- Crackers are not crispy: This could be due to not rolling the dough thinly enough or not baking them long enough. Roll the dough as thinly as possible and bake until golden brown around the edges.
- Crackers are burning: This could be due to baking them at too high a temperature or for too long. Reduce the oven temperature or baking time.
- Crackers are puffing up too much: Make sure to poke plenty of holes in the crackers before baking.
Why Homemade is Better:
While store-bought Ritz crackers are convenient, making them at home allows you to control the ingredients and customize the flavors to your liking. You can use high-quality butter and shortening, add your favorite herbs and spices, and avoid any unwanted additives or preservatives. Plus, there’s nothing quite like the satisfaction of enjoying a batch of freshly baked, homemade crackers.
Scaling the Recipe:
This recipe can easily be doubled or tripled to make a larger batch of crackers. Just be sure to adjust the baking time accordingly.
Gluten-Free Option:
To make these crackers gluten-free, substitute the all-purpose flour with a gluten-free all-purpose flour blend. You may need to adjust the amount of water slightly, as gluten-free flours tend to absorb more liquid. Be sure to use a gluten-free baking powder as well.
Vegan Option:
To make these crackers vegan, substitute the butter with a vegan butter alternative. Make sure the vegan butter is well-chilled before using. You can also use olive oil instead of butter for brushing the crackers before baking.
Equipment Needed:
- Large bowl
- Whisk
- Pastry blender or your fingertips
- Measuring cups and spoons
- Plastic wrap
- Rolling pin
- 1 ½-inch round cutter (or any shape you prefer)
- Toothpick or skewer
- Baking sheets
- Parchment paper
- Small bowl for melted butter
- Pastry brush
A Note on Ingredients:
Using high-quality ingredients will make a noticeable difference in the flavor and texture of your homemade Ritz crackers. Opt for unsalted butter, as this allows you to control the amount of salt in the recipe. Coarse sea salt is ideal for sprinkling on top of the crackers, as it provides a satisfying crunch and enhances the flavor. Vegetable shortening helps to create a tender and flaky texture.
The Science Behind the Flakiness:
The flakiness of these crackers comes from the
Conclusion:
And there you have it! These Homemade Ritz Crackers are so much more than just a snack; they’re a delightful experience. From the satisfying crunch to the buttery, slightly salty flavor, they’re guaranteed to disappear quickly. I truly believe that once you taste these, you’ll never want to go back to the store-bought version. The process is surprisingly simple, and the reward is immeasurable a batch of warm, golden crackers that are perfect for any occasion.
Why is this recipe a must-try? Well, beyond the superior taste and texture, you have complete control over the ingredients. No more worrying about artificial flavors or preservatives! You know exactly what’s going into your crackers, making them a healthier and more wholesome option for you and your family. Plus, the aroma that fills your kitchen while they’re baking is simply divine. It’s a sensory experience that elevates the simple act of baking into something truly special.
But the fun doesn’t stop there! These Homemade Ritz Crackers are incredibly versatile. Serve them with your favorite cheeses, dips, or spreads for an elegant appetizer. Crumble them over soups or salads for a delightful textural contrast. Or, simply enjoy them straight from the oven with a pat of butter. For a sweet twist, try sprinkling them with cinnamon sugar before baking. You could also experiment with different herbs and spices, such as rosemary, thyme, or garlic powder, to create your own signature flavor. Imagine a batch of Parmesan and black pepper Ritz crackers the possibilities are endless!
Looking for serving suggestions? These crackers are fantastic with a creamy spinach and artichoke dip, a sharp cheddar cheese, or a simple bowl of tomato soup. They also make a wonderful addition to a charcuterie board, adding a touch of homemade goodness to your spread. For a more substantial snack, try topping them with smoked salmon and cream cheese, or a slice of avocado and a sprinkle of everything bagel seasoning.
I’m so excited for you to try this recipe and experience the joy of making your own Homemade Ritz Crackers. It’s a project that’s both rewarding and delicious, and I’m confident that you’ll love the results. Don’t be intimidated by the thought of making crackers from scratch this recipe is designed to be easy and accessible for bakers of all skill levels.
So, grab your ingredients, preheat your oven, and get ready to embark on a culinary adventure. I can’t wait to hear about your experience! Please, share your photos and stories in the comments below. Let me know what variations you tried, what dips you paired them with, and how much everyone loved them. Your feedback is invaluable, and it helps me to continue creating recipes that you’ll enjoy. Happy baking, and happy snacking! I hope you enjoy these as much as my family and I do. They are truly a labor of love, and I am so happy to share them with you.
Homemade Ritz Crackers: The Ultimate Guide to Baking Your Own
Buttery, flaky, and perfectly salty homemade Ritz crackers. Easy to customize with your favorite flavors!
Ingredients
- 1 ½ cups all-purpose flour, plus more for dusting
- ½ teaspoon baking powder
- ½ teaspoon salt
- ¼ cup vegetable shortening, chilled
- ¼ cup unsalted butter, chilled and cut into small cubes
- ½ cup ice water, plus more if needed
- 2 tablespoons unsalted butter, melted, for brushing
- Coarse sea salt, for sprinkling
Instructions
- Prepare the Dough: In a large bowl, whisk together the flour, baking powder, and salt.
- Add the chilled vegetable shortening and butter to the flour mixture. Using a pastry blender or your fingertips, cut the fat into the flour until the mixture resembles coarse crumbs.
- Gradually add the ice water, one tablespoon at a time, mixing gently after each addition. Continue adding water until the dough just comes together.
- Turn the dough out onto a lightly floured surface and gently knead it a few times to form a smooth ball.
- Wrap the dough tightly in plastic wrap and refrigerate for at least 30 minutes, or up to 2 hours.
- Roll and Cut: Preheat oven to 350°F (175°C). Line two baking sheets with parchment paper.
- Remove the dough from the refrigerator and place it on a lightly floured surface. Divide the dough in half.
- Roll out one half of the dough into a very thin rectangle, about 1/8 inch thick.
- Using a 1 ½-inch round cutter (or any shape you prefer), cut out crackers from the rolled-out dough. Re-roll the scraps and cut out more crackers until all the dough is used.
- Place the cut-out crackers onto the prepared baking sheets, leaving a little space between each cracker.
- Use a toothpick or skewer to poke holes all over the surface of each cracker.
- Bake and Finish: Brush the tops of the crackers with melted butter.
- Sprinkle the crackers generously with coarse sea salt.
- Bake for 12-15 minutes, or until the crackers are golden brown around the edges.
- Remove the baking sheets from the oven and let the crackers cool completely on the baking sheets before serving.
- Repeat the rolling, cutting, and baking process with the remaining dough.
Notes
- Keep ingredients cold: Cold butter and shortening are essential for creating flaky crackers.
- Don’t overmix the dough: Overmixing will develop the gluten in the flour, resulting in tough crackers.
- Roll the dough thinly: The thinner you roll the dough, the crispier your crackers will be.
- Poke holes in the crackers: This prevents the crackers from puffing up too much during baking and helps them bake evenly.
- Watch the baking time: Crackers can burn easily, so keep a close eye on them while they’re baking.
- Cool completely before serving: The crackers will crisp up further as they cool.


Leave a Comment