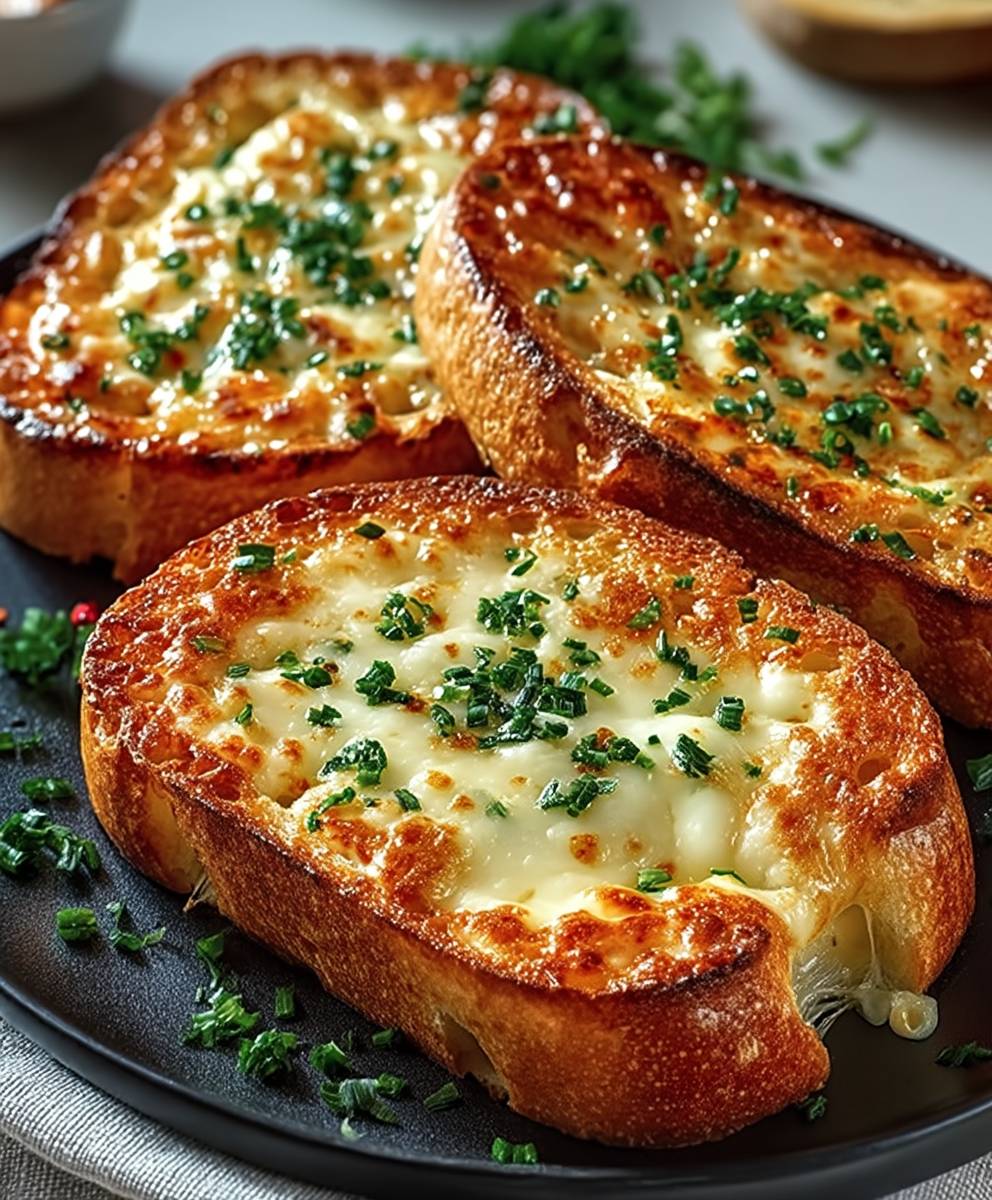
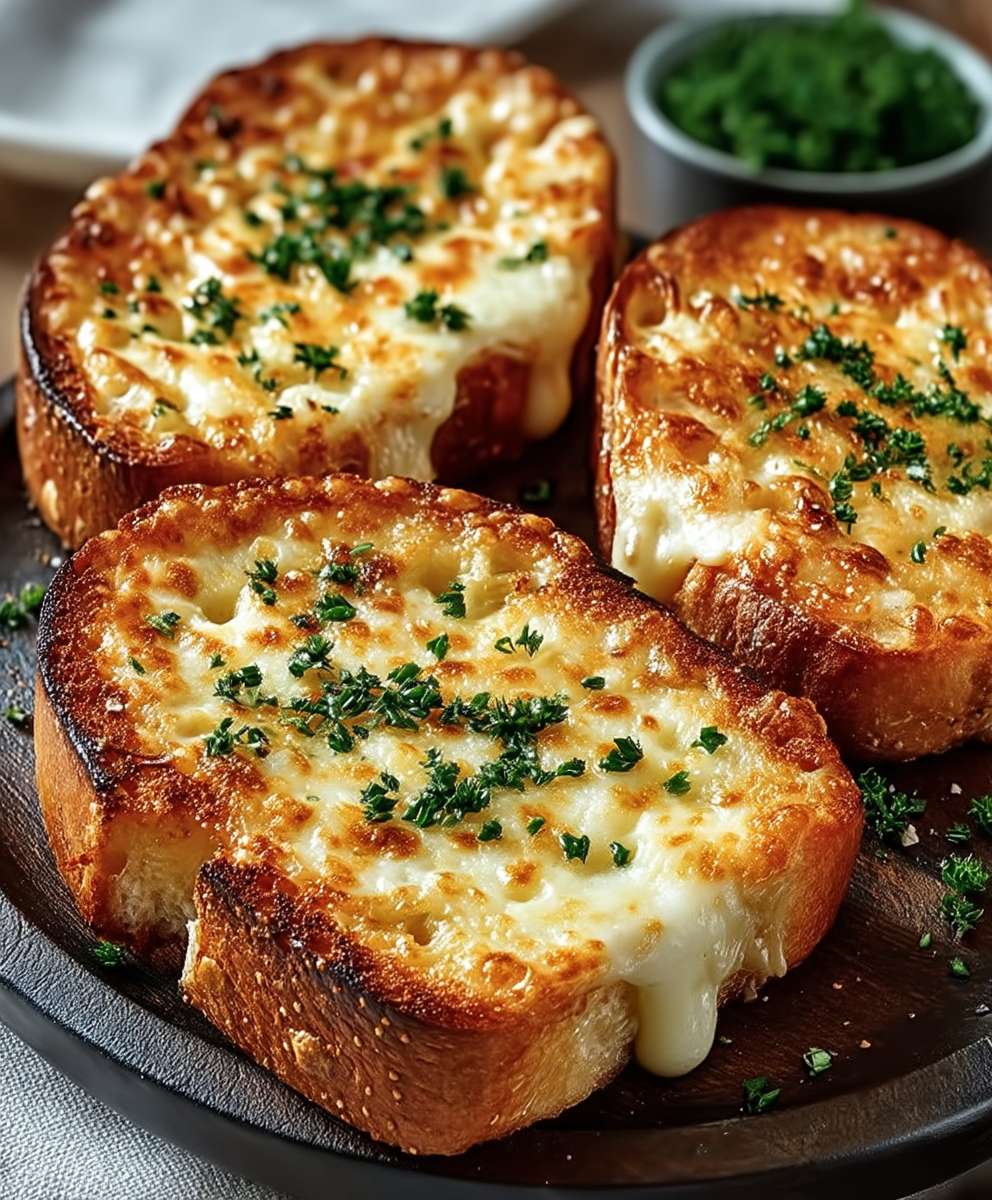
Cheesy Texas Toast: Prepare to elevate your bread game with this incredibly simple yet satisfying recipe! Forget boring old toast; we’re talking about thick slices of buttery, garlicky goodness, smothered in melted cheese that stretches with every bite. This isn’t just toast; it’s an experience.
While its exact origins are debated, Texas Toast, as we know it, likely emerged in the Lone Star State in the mid-20th century. Legend has it that a bakery in Texas accidentally sliced their bread too thick, leading to the creation of this now-iconic dish. What started as a resourceful solution quickly became a beloved staple, spreading far beyond Texas borders.
But what makes Cheesy Texas Toast so irresistible? It’s the perfect combination of textures: the crisp, golden-brown exterior gives way to a soft, pillowy interior. The garlic butter infuses every bite with savory flavor, while the melted cheese adds a creamy, comforting element that’s simply divine. Plus, it’s incredibly quick and easy to make, making it a perfect side dish for pasta, soups, or even as a snack on its own. Whether you’re looking for a crowd-pleasing appetizer or a simple way to jazz up your weeknight dinner, this recipe is guaranteed to be a hit!
Ingredients:
- 1 loaf Texas toast (frozen or fresh, about 6-8 slices)
- 1 cup mayonnaise
- 1 cup shredded cheddar cheese
- 1/2 cup grated Parmesan cheese
- 1/4 cup softened butter
- 2 cloves garlic, minced
- 1 tablespoon dried parsley
- 1/2 teaspoon garlic powder
- 1/4 teaspoon onion powder
- Pinch of red pepper flakes (optional)
- Salt and pepper to taste
Preparing the Cheesy Topping:
Okay, let’s get started! The heart of this Cheesy Texas Toast is, of course, the cheesy topping. This is where all the magic happens, and it’s super easy to whip up.
- Combine the Base Ingredients: In a medium-sized bowl, add the mayonnaise, shredded cheddar cheese, and grated Parmesan cheese. Make sure your cheddar is nicely shredded no big clumps! The Parmesan adds a lovely salty, nutty flavor that really elevates the toast.
- Add the Butter and Garlic: Now, add the softened butter and minced garlic to the bowl. The butter needs to be soft enough to easily incorporate into the mixture. If it’s too hard, it will be difficult to get everything evenly distributed. Mince your garlic finely; you don’t want big chunks of garlic overpowering the other flavors. I usually use a garlic press for this, but finely chopping it works just as well.
- Spice it Up: Next, add the dried parsley, garlic powder, onion powder, red pepper flakes (if using), salt, and pepper. The parsley adds a touch of freshness and color, while the garlic and onion powders enhance the savory flavor. The red pepper flakes are optional, but I like to add a pinch for a little kick. Don’t be shy with the salt and pepper they really bring out the flavors of the cheese and garlic.
- Mix Thoroughly: Using a spoon or spatula, mix all the ingredients together until they are well combined. You want a smooth, creamy mixture with no streaks of mayonnaise or butter. Make sure to scrape down the sides of the bowl to ensure everything is evenly incorporated. The mixture should be thick and spreadable.
Assembling the Texas Toast:
Now that our cheesy topping is ready, it’s time to get those Texas toast slices ready for their cheesy makeover!
- Prepare the Texas Toast: Lay out the Texas toast slices on a baking sheet. If you’re using frozen Texas toast, you don’t need to thaw it first. If you’re using fresh Texas toast, you can lightly toast it in the oven or toaster oven for a minute or two to give it a little extra crispness. This step is optional, but it can help prevent the toast from getting soggy when you add the topping.
- Spread the Cheesy Topping: Using a butter knife or spatula, spread a generous layer of the cheesy topping evenly over each slice of Texas toast. Make sure to cover the entire surface of the toast, right up to the edges. Don’t be stingy with the topping the more cheese, the better! I like to make sure each slice is completely covered in a thick layer of cheesy goodness.
- Arrange on Baking Sheet: Arrange the topped Texas toast slices on a baking sheet lined with parchment paper or aluminum foil. This will make cleanup easier and prevent the toast from sticking to the pan. Make sure the slices are not overlapping, so they can bake evenly.
Baking the Cheesy Texas Toast:
Almost there! Now it’s time to bake our cheesy creations to golden, bubbly perfection.
- Preheat the Oven: Preheat your oven to 375°F (190°C). Make sure your oven is fully preheated before you put the toast in, so it cooks evenly.
- Bake the Toast: Place the baking sheet with the topped Texas toast in the preheated oven. Bake for 10-12 minutes, or until the cheese is melted, bubbly, and lightly golden brown. Keep a close eye on the toast while it’s baking, as the cooking time may vary depending on your oven. You want the cheese to be nicely melted and slightly browned, but not burnt.
- Broil for Extra Color (Optional): If you want the cheese to be even more golden brown and bubbly, you can broil the toast for the last minute or two of baking. Be very careful when broiling, as the toast can burn quickly. Watch it closely and remove it from the oven as soon as the cheese is nicely browned.
- Remove from Oven: Once the cheese is melted, bubbly, and golden brown, remove the baking sheet from the oven. Let the toast cool for a minute or two before serving. This will allow the cheese to set slightly and prevent you from burning your mouth.
Serving and Enjoying:
The moment we’ve all been waiting for! It’s time to serve up and devour this delicious Cheesy Texas Toast.
- Serve Immediately: Cheesy Texas Toast is best served immediately while it’s still warm and the cheese is melted and gooey. The longer it sits, the softer the toast will become.
- Garnish (Optional): If you want to add a little extra flair, you can garnish the toast with a sprinkle of fresh parsley or a pinch of red pepper flakes. This is totally optional, but it can make the toast look even more appealing.
- Cut and Serve: Cut each slice of Texas toast in half or into smaller pieces, if desired. This makes it easier to eat and share.
- Enjoy! Serve the Cheesy Texas Toast as a side dish with your favorite meals, such as pasta, soup, salad, or grilled meats. It’s also great as a snack or appetizer. Get ready for a burst of cheesy, garlicky goodness with every bite!
Tips and Variations:
Want to customize your Cheesy Texas Toast? Here are a few ideas:
- Different Cheeses: Experiment with different types of cheese, such as mozzarella, provolone, Monterey Jack, or pepper jack. You can use a combination of cheeses for a more complex flavor.
- Add Some Heat: If you like spicy food, add a pinch of cayenne pepper or a dash of hot sauce to the cheesy topping. You can also use pepper jack cheese for an extra kick.
- Add Veggies: Mix in some chopped vegetables, such as onions, bell peppers, or mushrooms, to the cheesy topping. This will add some extra flavor and nutrients.
- Add Meat: Add some cooked and crumbled bacon, sausage, or pepperoni to the cheesy topping for a heartier toast.
- Garlic Herb Butter: Instead of the cheesy topping, you can spread the Texas toast with a mixture of softened butter, minced garlic, and fresh herbs, such as parsley, oregano, and thyme.
- Make it Gluten-Free: Use gluten-free Texas toast to make this recipe gluten-free.
- Air Fryer Option: You can also cook these in an air fryer! Preheat your air fryer to 350°F (175°C). Place the prepared Texas toast slices in the air fryer basket in a single layer. Cook for 5-7 minutes, or until the cheese is melted and golden brown.
Storage Instructions:
If you have any leftover Cheesy Texas Toast (which is unlikely!), you can store it in an airtight container in the refrigerator for up to 2 days. To reheat, bake in a preheated oven at 350°F (175°C) for 5-10 minutes, or until heated through. You can also reheat it in the microwave, but the toast will be softer.
Why This Recipe Works:
This recipe is a winner because it’s incredibly easy to make, uses simple ingredients, and delivers a ton of flavor. The combination of mayonnaise, cheddar cheese, Parmesan cheese, garlic, and herbs creates a cheesy, garlicky topping that is simply irresistible. The Texas toast provides a sturdy base that can hold up to the generous amount of topping. Plus, it’s a crowd-pleaser that everyone will love!
Nutritional Information (Approximate):
Please note that the nutritional information is an estimate and may vary depending on the specific ingredients used.
- Calories: Approximately 250-300 per slice
- Fat: 15-20 grams
- Saturated Fat: 8-12 grams
- Cholesterol: 30-40 mg
- Sodium: 300-400 mg
- Carbohydrates: 20-25 grams
- Fiber: 1-2 grams
- Sugar: 2-3 grams
- Protein: 8-
Conclusion:
And there you have it! This Cheesy Texas Toast recipe is truly a game-changer, transforming a simple side dish into a star of the show. I genuinely believe this is a must-try for anyone looking to add a little comfort and a whole lot of flavor to their meals. Its quick, its easy, and its guaranteed to be a crowd-pleaser, whether you’re feeding a family of four or hosting a casual get-together.
What makes this recipe so special? It’s the perfect balance of textures and tastes. The crisp, golden-brown toast provides a delightful crunch, while the melted cheese offers a gooey, savory indulgence. The garlic butter adds a fragrant, aromatic touch that elevates the entire experience. Its a symphony of flavors that will have you reaching for seconds (and maybe even thirds!).
But the best part? This recipe is incredibly versatile! While it’s fantastic as is, there are so many ways to customize it to your liking. For a spicier kick, try adding a pinch of red pepper flakes to the garlic butter. If you’re a fan of herbs, sprinkle some dried oregano or basil over the cheese before baking. Want to make it a complete meal? Top it with some grilled chicken or sliced tomatoes for a satisfying and flavorful open-faced sandwich.
Speaking of serving suggestions, this Cheesy Texas Toast pairs perfectly with a variety of dishes. It’s a fantastic accompaniment to hearty soups and stews, adding a comforting and satisfying element to your meal. It also complements grilled meats and vegetables beautifully, providing a delicious and cheesy contrast to the savory flavors. And for a truly indulgent experience, serve it alongside a bowl of creamy pasta the ultimate comfort food combination!
Consider these variations to truly make it your own. For a Mexican-inspired twist, try using Monterey Jack cheese and adding some diced jalapenos to the topping. Or, for a more sophisticated flavor profile, use Gruyere cheese and sprinkle some fresh thyme over the toast before baking. You could even experiment with different types of bread, such as sourdough or ciabatta, to create a unique texture and taste. Don’t be afraid to get creative and experiment with different ingredients the possibilities are endless!
Im confident that once you try this recipe, it will become a staple in your kitchen. Its the perfect solution for those busy weeknights when you need a quick and easy side dish, or for those lazy weekends when you just want to indulge in some cheesy goodness. Its a recipe thats sure to impress your family and friends, and its one that youll be proud to share.
So, what are you waiting for? Grab your ingredients, preheat your oven, and get ready to experience the magic of Cheesy Texas Toast! I promise you wont be disappointed.
And most importantly, Id love to hear about your experience! Once youve tried the recipe, please come back and share your thoughts in the comments below. Did you make any modifications? What did you serve it with? What did your family think? Your feedback is invaluable, and it helps me to continue creating delicious and easy-to-follow recipes that everyone can enjoy. Happy cooking!
Cheesy Texas Toast: The Ultimate Guide to Crispy, Delicious Bread
Easy and delicious Cheesy Texas Toast, perfect as a side dish or snack. Made with a simple cheesy topping and baked to golden, bubbly perfection.
Ingredients
- 1 loaf Texas toast (frozen or fresh, about 6-8 slices)
- 1 cup mayonnaise
- 1 cup shredded cheddar cheese
- 1/2 cup grated Parmesan cheese
- 1/4 cup softened butter
- 2 cloves garlic, minced
- 1 tablespoon dried parsley
- 1/2 teaspoon garlic powder
- 1/4 teaspoon onion powder
- Pinch of red pepper flakes (optional)
- Salt and pepper to taste
Instructions
- Prepare the Cheesy Topping: In a medium bowl, combine mayonnaise, cheddar cheese, and Parmesan cheese. Add softened butter and minced garlic. Mix in dried parsley, garlic powder, onion powder, red pepper flakes (if using), salt, and pepper. Mix thoroughly until smooth and creamy.
- Assemble the Texas Toast: Lay Texas toast slices on a baking sheet. Spread a generous layer of the cheesy topping evenly over each slice.
- Bake the Cheesy Texas Toast: Preheat oven to 375°F (190°C). Bake for 10-12 minutes, or until the cheese is melted, bubbly, and lightly golden brown.
- Broil (Optional): For extra color, broil for the last minute or two, watching carefully to prevent burning.
- Serve: Remove from oven and let cool for a minute or two. Serve immediately, garnished with fresh parsley or red pepper flakes if desired. Cut and serve as a side dish, snack, or appetizer.
Notes
- For best results, use softened butter for the topping.
- Don’t be shy with the cheese topping!
- Watch carefully when broiling to prevent burning.
- Serve immediately for the best texture.
- Variations: Experiment with different cheeses, add heat with cayenne pepper or hot sauce, mix in chopped vegetables or cooked meats.


Leave a Comment