

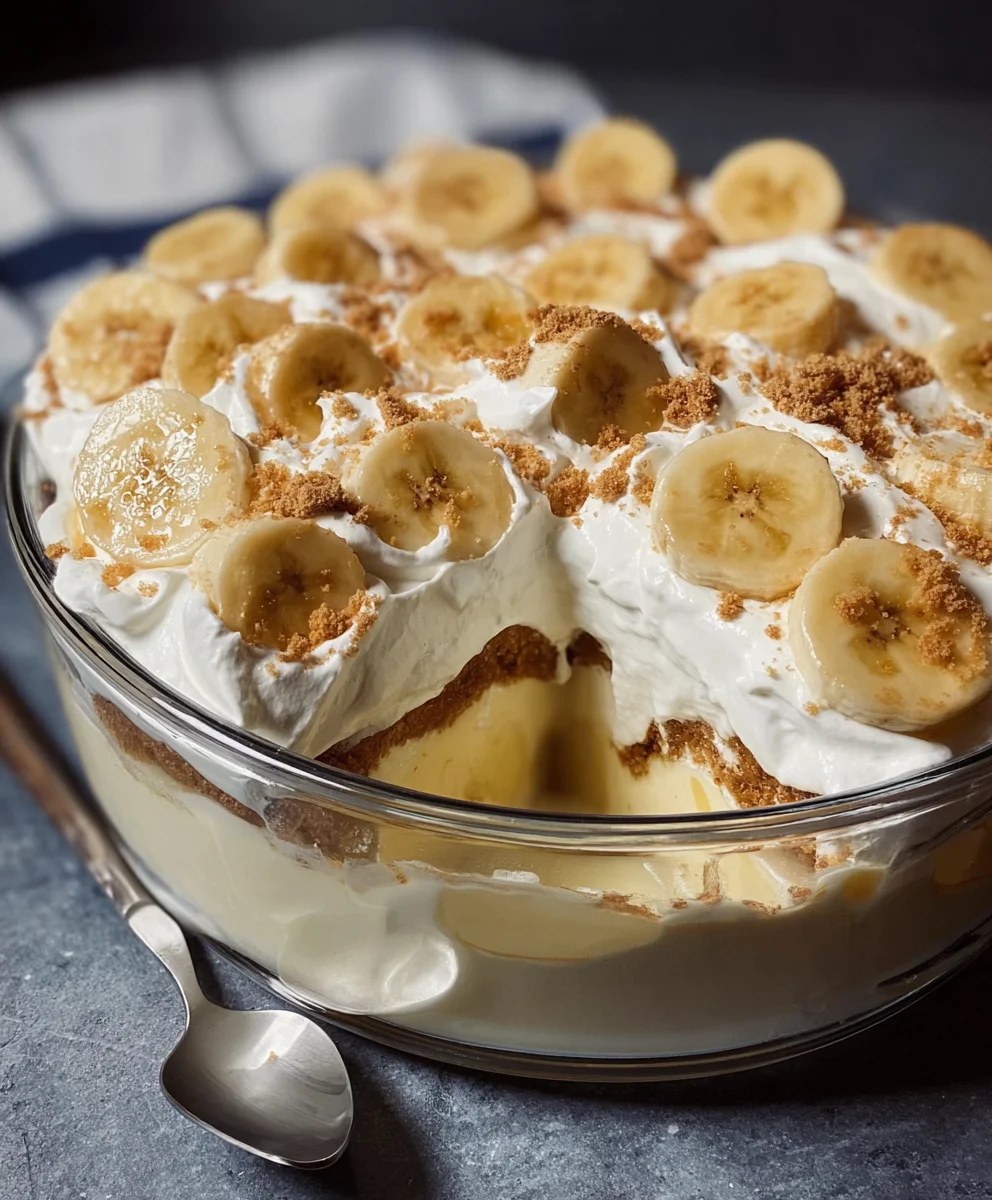
Banana Pudding is a dessert that whispers comfort and conjures up memories of cozy kitchens and happy gatherings. It’s more than just a sweet treat; it’s a nostalgic embrace, a creamy hug in a bowl that has captivated taste buds for generations. What is it about this seemingly simple combination of bananas, custard, and cookies that makes it so universally beloved? Perhaps it’s the perfect harmony of textures – the silken custard, the tender slices of sweet banana, and the delightful crunch of vanilla wafers. Or maybe it’s the pure, unadulterated sweetness that speaks directly to our souls. This particular Banana Pudding recipe elevates the classic, infusing it with a depth of flavor and a luxurious texture that will have everyone asking for seconds, and maybe even thirds. Prepare to fall in love with this iconic dessert all over again.

Ingredients:
- 1 (3.4 oz) box instant vanilla pudding mix
- 2 cups cold milk
- 1 (14 oz) can sweetened condensed milk
- 1 teaspoon vanilla extract
- 1 (8 oz) tub whipped topping, thawed
- 4-5 ripe bananas, sliced
- 1 (11 oz) box vanilla wafers
Preparing the Creamy Pudding Base
Step 1: Combine Pudding Mix and Milk
Begin extract by gathering a medium-sized mixing bowl. Into this bowl, pour the contents of the 1 (3.4 oz) box of instant vanilla pudding mix. Next, carefully measure out 2 cups of cold milk. It’s crucial that the milk is cold, as this helps the instant pudding set properly and avoid a grainy texture. Pour the cold milk over the pudding mix. Using a whisk, start mixing vigorously. Continue whisking for about two minutes, or until the migin extractre begins to thicken. You’ll notice it transforming from a liquid to a soft, creamy consistency. Don’t overmix, as this can sometimes make the pudding tough. Set this aside for a moment while we move to the next stage.
Step 2: Incorporate Sweetened Condensed Milk and Vanilla Extract
Now, open the 1 (14 oz) can of sweetened condensed milk. This is what gives our Banana Pudding its signature rich, sweet flavor and velvety texture. Pour the entire can of sweetened condensed milk into the bowl with the thickened pudding mixture. Add 1 teaspoon of vanilla extract to further enhance the sweet, aromatic notes of the pudding. Once these additions are in the bowl, grab your whisk again. Gently but thoroughly whisk everything together until it’s fully combined and the mixture is smooth. Ensure there are no pockets of sweetened condensed milk or pudding mix remaining. The color should be a uniform pnon-alcoholic ale yellow, and the aroma should be wonderfully sweet.
Step 3: Fold in Whipped Topping
Next, we’ll lighten up our rich pudding base with fluffy whipped topping. Take your 1 (8 oz) tub of whipped topping, making sure it has been thawed if it was previously frozen. Gently spoon the thawed whipped topping into the bowl with the pudding and sweetened condensed milk mixture. This is where we switch from whisking to folding. Using a spatula, carefully fold the whipped topping into the pudding base. The goal is to incorporate the whipped topping without deflating it, maintaining its airy texture. Gently scoop from the bottom of the bowl and fold it over the top, rotating the bowl as you go. Continue folding until no streaks of whipped topping or pudding are visible and the mixture is uniformly light and creamy. This step is key to achieving that classic, cloud-like Banana Pudding texture.
Assembling the Layers
Step 4: Layer Vanilla Wafers and Bananas
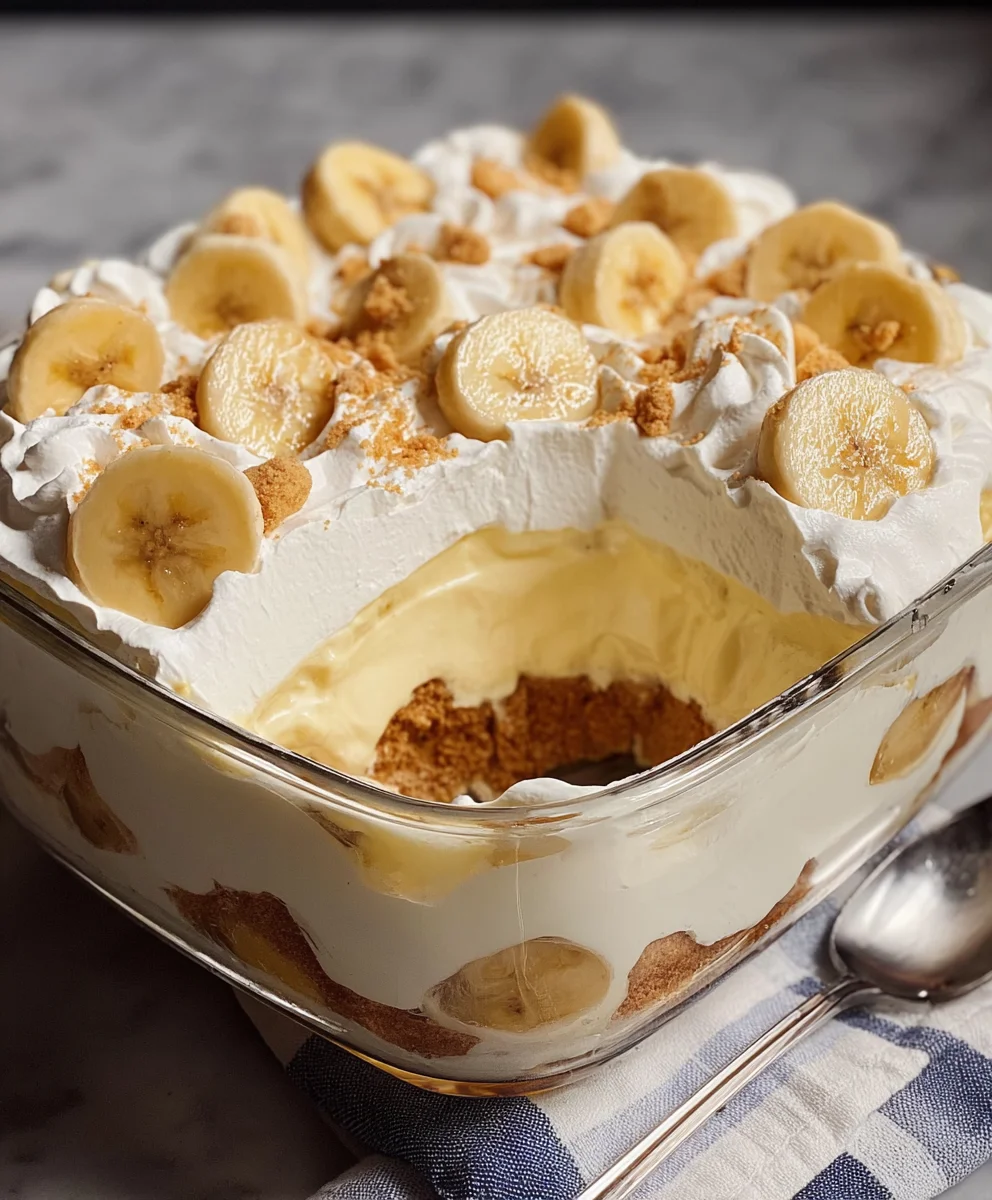
Now it’s time to start building our delicious Banana Pudding! Grab a serving dish. A 9×13 inch baking dish or a large trifle bowl worksgin extractagin extractfully. Begin by arranging a single layer of vanilla wafers on the bottom of your dish. You might need to break some wafers to fit them snugly and cover the entire base. Over the vanilla wafers, arrange a generous layer of your sliced ripe bananas. Aim for about half of your sliced bananas for this first layer. The riper the bananas, the sweeter and more flavorful they will be, which is perfect for this dessert. Ensure the banana slices are spread out evenly.
Step 5: Add Pudding Mixture and Repeat Layers
With your first layer of wafers and bananas in place, it’s time for the creamy pudding! Spoon about half of your prepared pudding mixture evenly over the banana layer. Gently spread it out with your spatula to cover the bananas and wafers completely. Now, repeat the layering process. Add another layer of vanilla wafers over the pudding, followed by the remaining sliced bananas. Finally, spoon the rest of the pudding mixture over this last banana layer, ensuring everything is covered and smooth. Take a moment to admire your beautifully layered creation. You can gently tap the dish on the counter to settle the layers slightly, if needed.
Step 6: Chill to Allow Flavors to Meld
The final, and perhaps most important, step is to chill your Banana Pudding. Cover the serving dish tightly with plastic wrap. It’s essential to ensure the plastic wrap touches the surface of the pudding, especially if you’re not topping it with more wafers immediately, to prevent a skin from forming. Place the covered dish in the refrigerator for at least 4 hours, but overnight is even better. This chilling time is crucial. It allows the vanilla wafers to soften and absorb some of the pudding’s moisture, becoming wonderfully tender. More importantly, it gives all the flavors – the creamy pudding, the sweet condensed milk, the sweet vanilla wafers, and the ripe bananas – time to meld together into a harmonious, delightful dessert. Before serving, you can add an optional garnish of extra whipped topping and a few more vanilla wafers or banana slices on top for decoration.
Conclusion:
There you have it – a truly delightful and comforting Banana Pudding recipe that’s sure to become a family favorite! This classic dessert, with its layers of creamy vanilla pudding, sweet ripe bananas, and crunchy vanilla wafers, offers a perfect balance of textures and flavors. We hope you enjoyed following along and are excited to try it in your own kitchen. Whether you’re serving it as a light dessert after a hearty meal or as a sweet treat for a special occasion, this Banana Pudding is guaranteed to impress. Don’t be afraid to get creative with the serving suggestions – a dollop of whipped cream or a sprinkle of toasted coconut can elevate it even further!
We encourage you to experiment with variations too. Consider adding a touch of cinnamon to the pudding for warmth, or perhaps a drizzle of caramel sauce for an extra layer of indulgence. This recipe is wonderfully adaptable to your personal taste preferences. So, gather your ingredients, preheat your ovens (or just grab your spoons!), and dive into the simple joy of making homemade Banana Pudding. Happy baking!
Frequently Asked Questions:
Q1: Can I make this Banana Pudding ahead of time?
Absolutely! Banana Pudding is actually best when made a few hours or even a day in advance. This allows the flavors to meld beautifully and the vanilla wafers to soften perfectly into the pudding. Store it covered in the refrigerator.
Q2: What kind of bananas should I use for the best flavor?
For the ideal Banana Pudding, use ripe bananas. They should have a few brown spots, as this indicates they are sweeter and have a more intense banana flavor. Overripe bananas are perfect for this recipe!
Best Banana Pudding Recipe – Easy & Delicious Dessert
An easy and delicious banana pudding recipe featuring layers of creamy pudding, ripe bananas, and vanilla wafers.
Ingredients
-
1 (3.4 oz) box instant vanilla pudding mix
-
2 cups cold milk
-
1 (14 oz) can sweetened condensed milk
-
1 teaspoon vanilla extract
-
1 (8 oz) tub whipped topping, thawed
-
4-5 ripe bananas, sliced
-
1 (11 oz) box vanilla wafers
Instructions
-
Step 1
In a medium bowl, combine instant vanilla pudding mix and cold milk. Whisk vigorously for about two minutes until the mixture begins to thicken. -
Step 2
Add sweetened condensed milk and vanilla extract to the pudding mixture. Whisk gently until fully combined and smooth. -
Step 3
Gently fold the thawed whipped topping into the pudding mixture using a spatula until uniformly light and creamy. Avoid deflating the whipped topping. -
Step 4
In a serving dish, arrange a layer of vanilla wafers, followed by a layer of sliced bananas. Use about half of the wafers and bananas for this layer. -
Step 5
Spoon about half of the pudding mixture evenly over the banana layer. Repeat the layering process with the remaining vanilla wafers, bananas, and finally the rest of the pudding mixture. -
Step 6
Cover the dish tightly with plastic wrap, ensuring it touches the surface of the pudding. Chill in the refrigerator for at least 4 hours, or preferably overnight, to allow flavors to meld and wafers to soften.
Important Information
Nutrition Facts (Per Serving)
It is important to consider this information as approximate and not to use it as definitive health advice.
Allergy Information
Please check ingredients for potential allergens and consult a health professional if in doubt.
Leave a Comment